¶ BTCPay: Bitcoin Store, Payment Server, Wallet Manager.
BTCPay is an open-source Bitcoin payment gateway. We use the BTCPay server to manage multiple payment gateways on our websites allowing users to checkout with Bitcoin. You can also store your BTC on the BTCPay server. Although, it is not advised to store any crypto on a hot wallet. BTCPay also allows multiple organizations all within one application. You can learn more about BTCPay from the links below:
¶ Introduction
We are going to be covering a basic install of the BTCPay server. Full disclosure, we did not come up with most of the information in this docker-compose and have merely modified it. We will be covering how to run the BTCPay server using Docker, Docker-compose, Portainer, and Nginx Proxy Manager. If you follow our code exactly things should run properly.
We have an advanced course on how to do this at TrueFreedomTech.com covering multiple configurations and separating data from compute, deploying with git, and more.
¶ Overview
Assuming you already have a working server with Docker, Portainer, and Nginx Proxy Manager running we can get started with the docker-compose. We are not using our own docker images for this so there is no need to cover that. If you are interested in building your own images for BTCPay you can find the source code here.
¶ Docker-Compose
We will be deploying the BTCPay server using docker-compose in portainer.
If you are not familiar with Portainer or Docker-Compose here are the official docs:
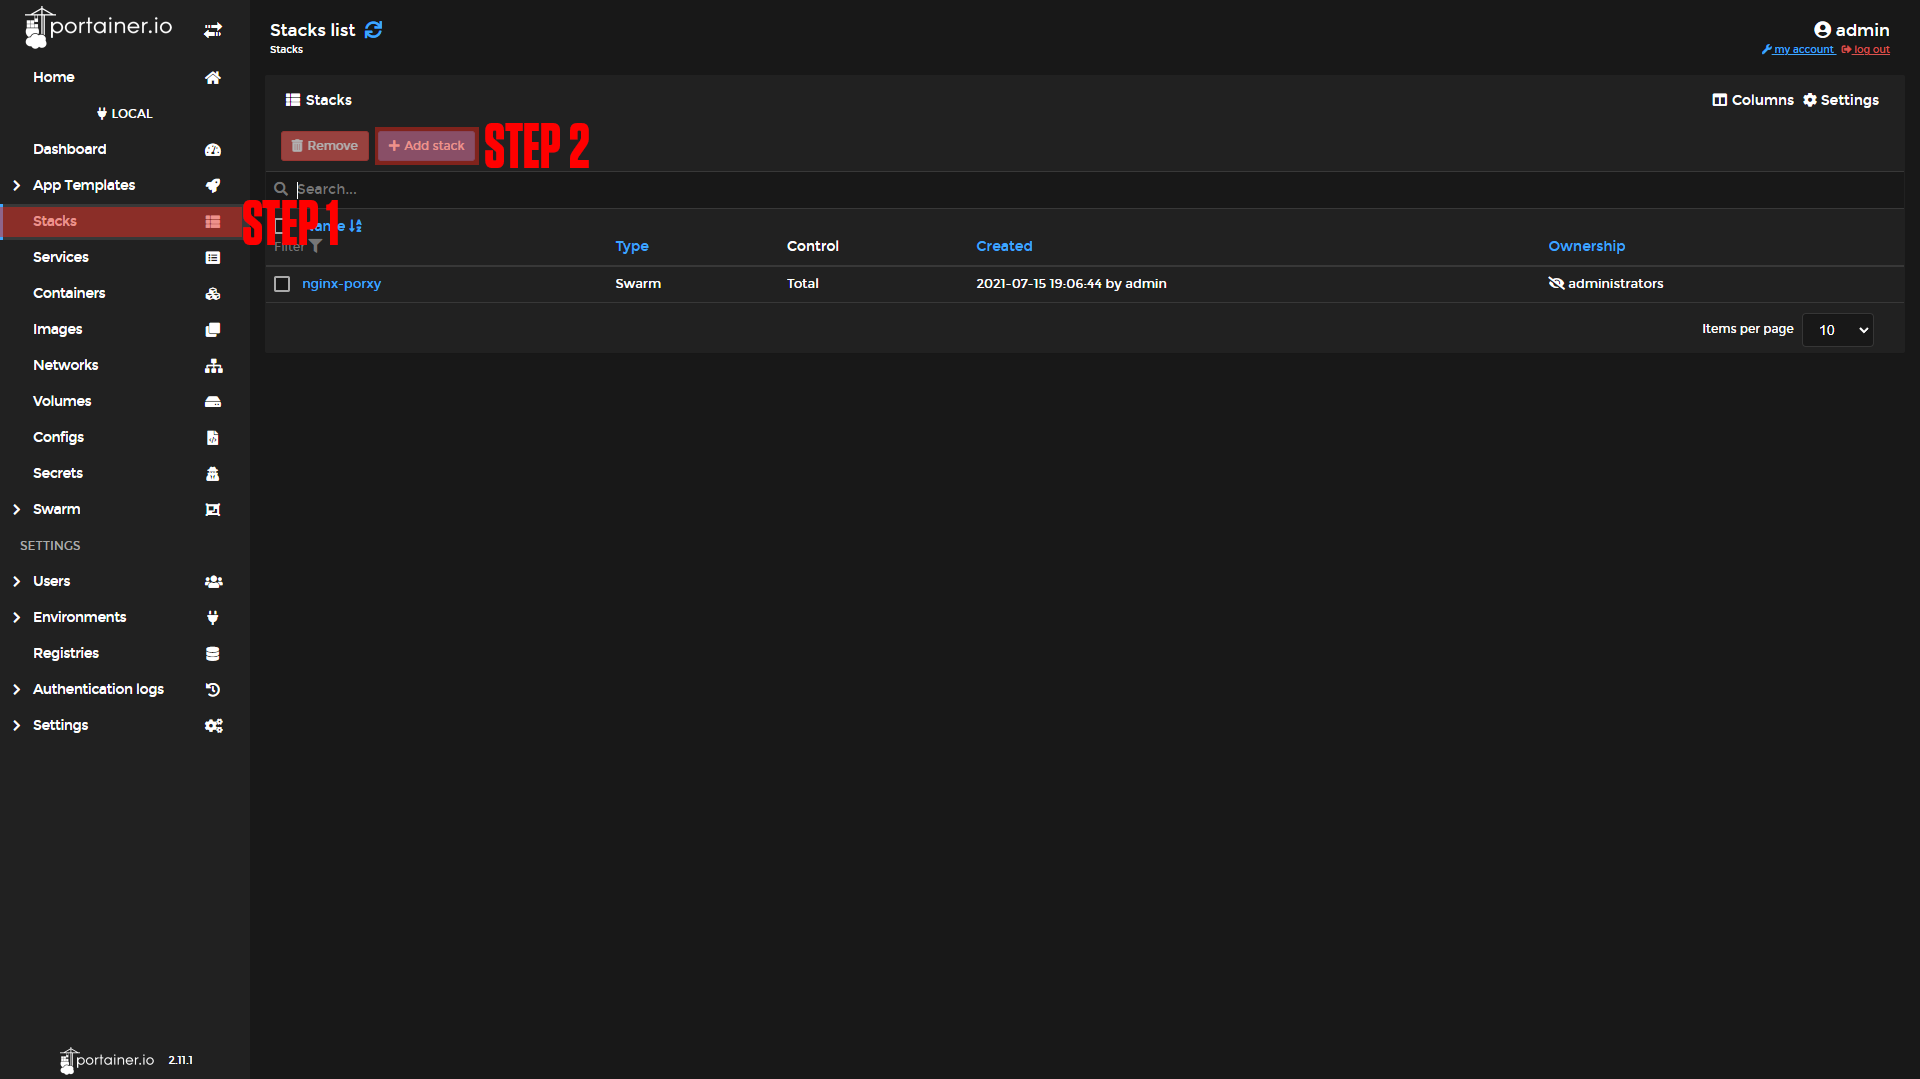
Start by opening Portainer and logging in.
Step 1: Go to Stacks.
Step 2: Click Add Stack.
Step 3: Name Your Stack (Ex. btcpay).
Step 4: Paste in the Contents Below:
Step 5: Press Deploy the Stack.
 |
 |
 |
version: '3.8'
services:
  btcpayserver:
    restart: unless-stopped
    image: btcpayserver/btcpayserver:1.3.7
    #Ports:
    #	- 84:80 #to test on localhost Remove "#" from ports & this line && add "#" to expose & - "80"
    expose:
    - "80"
    environment:
      BTCPAY_POSTGRES: User ID=postgres;Host=postgres;Port=5432;Database=btcpayservermainnet
      BTCPAY_NETWORK: mainnet
      BTCPAY_BIND: 0.0.0.0:80
      BTCPAY_ROOTPATH: /
      BTCPAY_SSHCONNECTION: "root@host.docker.internal"
      BTCPAY_DEBUGLOG: btcpay.log
      BTCPAY_UPDATEURL: https://api.github.com/repos/btcpayserver/btcpayserver/releases/latest
      BTCPAY_DOCKERDEPLOYMENT: "true"
      BTCPAY_CHAINS: "btc"
      BTCPAY_BTCEXPLORERURL: http://nbxplorer:32838/
      HIDDENSERVICE_NAME: BTCPayServer
      HIDDENSERVICE_REVERSEPROXY: nginx
      BTCPAY_TORRCFILE: /usr/local/etc/tor/torrc-2
      BTCPAY_SOCKSENDPOINT: tor:9050
    links:
    - postgres
    volumes:
    - btcpay-datadir:/datadir
    - btcpay-nbxplorer-datadir:/root/.nbxplorer
    - btcpay-xmr-wallet:/root/xmr_wallet
    - btcpay-tor-servicesdir:/var/lib/tor/hidden_services
    - btcpay-tor-torrcdir:/usr/local/etc/tor/
    networks:
     - nginx-public
     - internal
  bitcoind:
    restart: unless-stopped
    container_name: btcpayserver_bitcoind
    image: btcpayserver/bitcoin:22.0-1
    environment:
      BITCOIN_NETWORK: mainnet
      BITCOIN_WALLETDIR: "/walletdata"
      BITCOIN_EXTRA_ARGS: |
        rpcport=43782
        rpcbind=0.0.0.0:43782
        rpcallowip=0.0.0.0/0
        port=39388
        whitelist=0.0.0.0/0
        maxmempool=500
        prune=50000
        onion=tor:9050
        # rpcuser=btcrpc
        # rpcpassword=btcpayserver
        # We need to use rpcauth because we also need cookieauth. rpcpassword disabled cookie file auth.
        # Be careful if you copy the line below from the docker-compose.yml! A dollar sign is escaped.
        rpcauth=btcrpc:a6a5d29a3f44f02e4cd8cabb5b10a234$$ab6152915515f6a9cca806d2ab5f0e2794c346ba74f812c61e48241d523778b8
      HIDDENSERVICE_NAME: BTC-P2P,BTC-RPC
      BTC-P2P_HIDDENSERVICE_VIRTUAL_PORT: 8333
      BTC-P2P_HIDDENSERVICE_PORT: 39388
      BTC-RPC_HIDDENSERVICE_VIRTUAL_PORT: 8332
      BTC-RPC_HIDDENSERVICE_PORT: 43782
    expose:
    - "43782"
    - "39388"
    volumes:
    - btcpay-bitcoin-datadir:/data
    - btcpay-bitcoin-wallet-datadir:/wallet
    - btcpay-tor-datadir:/home/tor/.tor
    links:
    - tor
    networks:
     - internal
  nbxplorer:
    restart: unless-stopped
    image: nicolasdorier/nbxplorer:2.1.49
    expose:
    - "32838"
    environment:
      NBXPLORER_NETWORK: mainnet
      NBXPLORER_BIND: 0.0.0.0:32838
      NBXPLORER_TRIMEVENTS: 10000
      NBXPLORER_SIGNALFILESDIR: /datadir
      NBXPLORER_CHAINS: "btc"
      NBXPLORER_BTCRPCURL: http://bitcoind:43782/
      NBXPLORER_BTCNODEENDPOINT: bitcoind:39388
    volumes:
    - btcpay-nbxplorer-datadir:/datadir
    - btcpay-bitcoin-datadir:/root/.bitcoin
    networks:
     - internal
  postgres:
    restart: unless-stopped
    image: postgres:9.6.20
    environment:
      POSTGRES_HOST_AUTH_METHOD: trust
    volumes:
    - btcpay-postgres-datadir:/var/lib/postgresql/data
    networks:
     - internal
  tor:
    restart: unless-stopped
    image: btcpayserver/tor:0.4.4.7
    container_name: tor
    environment:
      TOR_PASSWORD: btcpayserver
      TOR_ADDITIONAL_CONFIG: /usr/local/etc/tor/torrc-2
      TOR_EXTRA_ARGS: |
        CookieAuthentication 1
    expose:
    - "9050"
    - "9051"
    volumes:
    - btcpay-tor-datadir:/home/tor/.tor
    - btcpay-tor-torrcdir:/usr/local/etc/tor
    - btcpay-tor-servicesdir:/var/lib/tor/hidden_services
    networks:
     - internal

networks:
  nginx-public:
    external: true
  internal:
    external: false
volumes:
  btcpay-datadir:
  btcpay-bitcoin-datadir:
  btcpay-bitcoin-wallet-datadir:
  btcpay-xmr-wallet:
  btcpay-xmr-data:
  btcpay-postgres-datadir:
  btcpay-nbxplorer-datadir:
  btcpay-tor-datadir:
  btcpay-tor-torrcdir:
btcpay-tor-servicesdir: ¶ Nginx-Proxy-Manager
Before we configure the BTCPay server, we will set up our domains using Nginx-Proxy-Manager. If you followed our Nginx-Proxy-Manager stack setup you should be able to copy everything we do step by step.
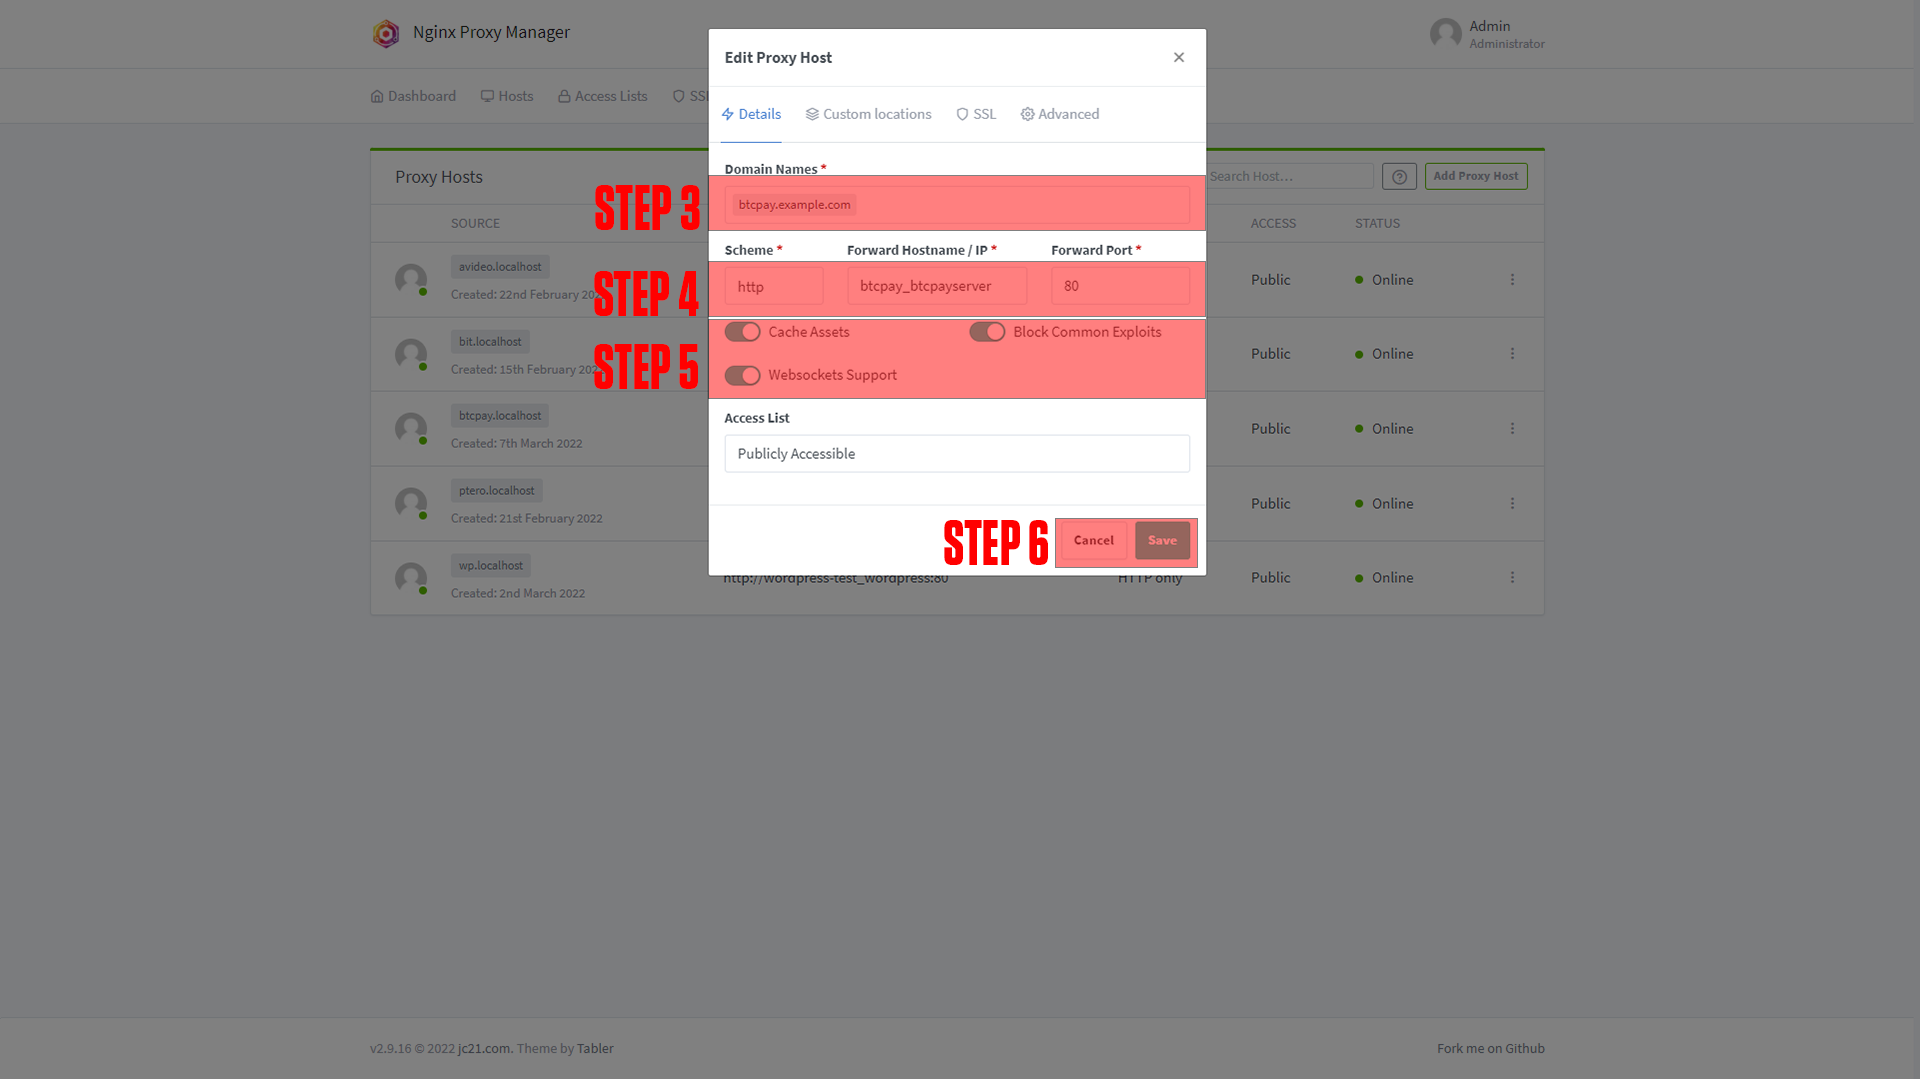
¶ BTCPay Domain Setup
Step 1: Copy the BTCPay server service name.
This should be btcpay_btcpayserver if you did not change the names of apps.
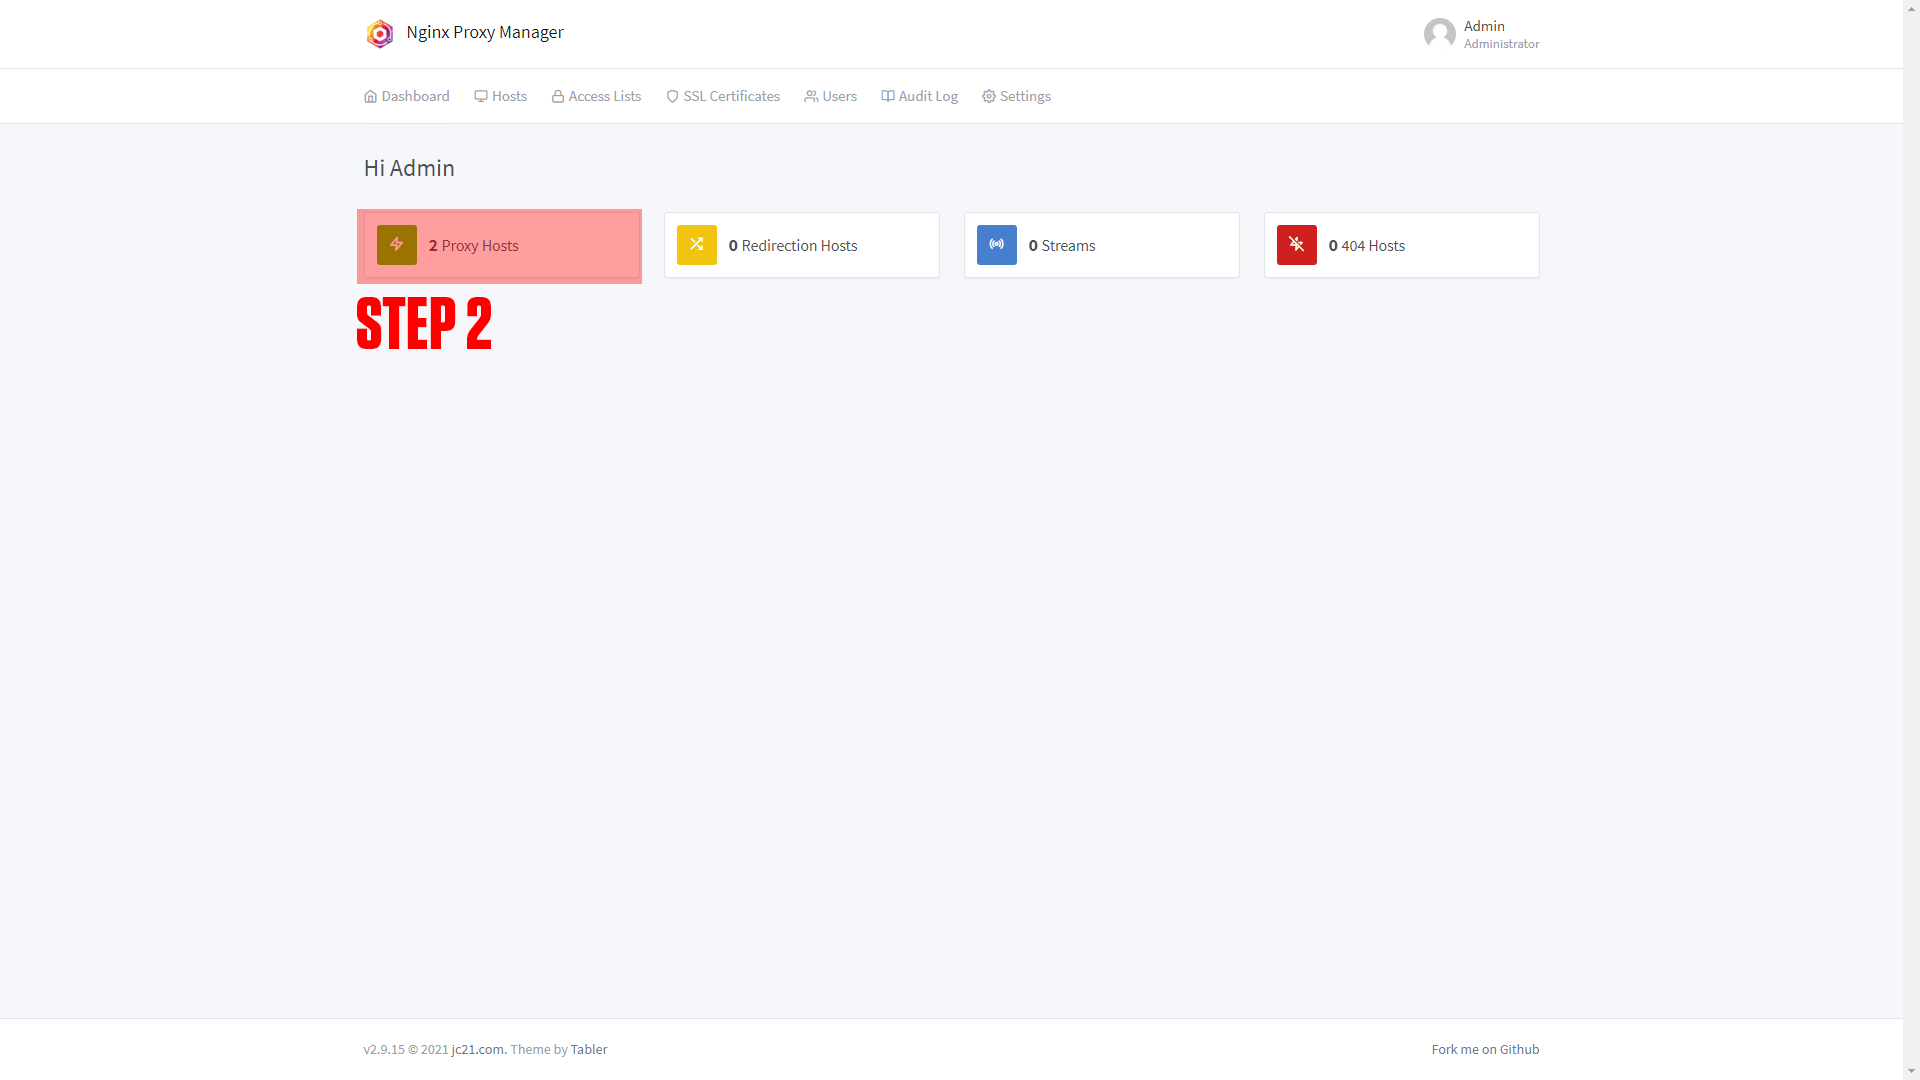
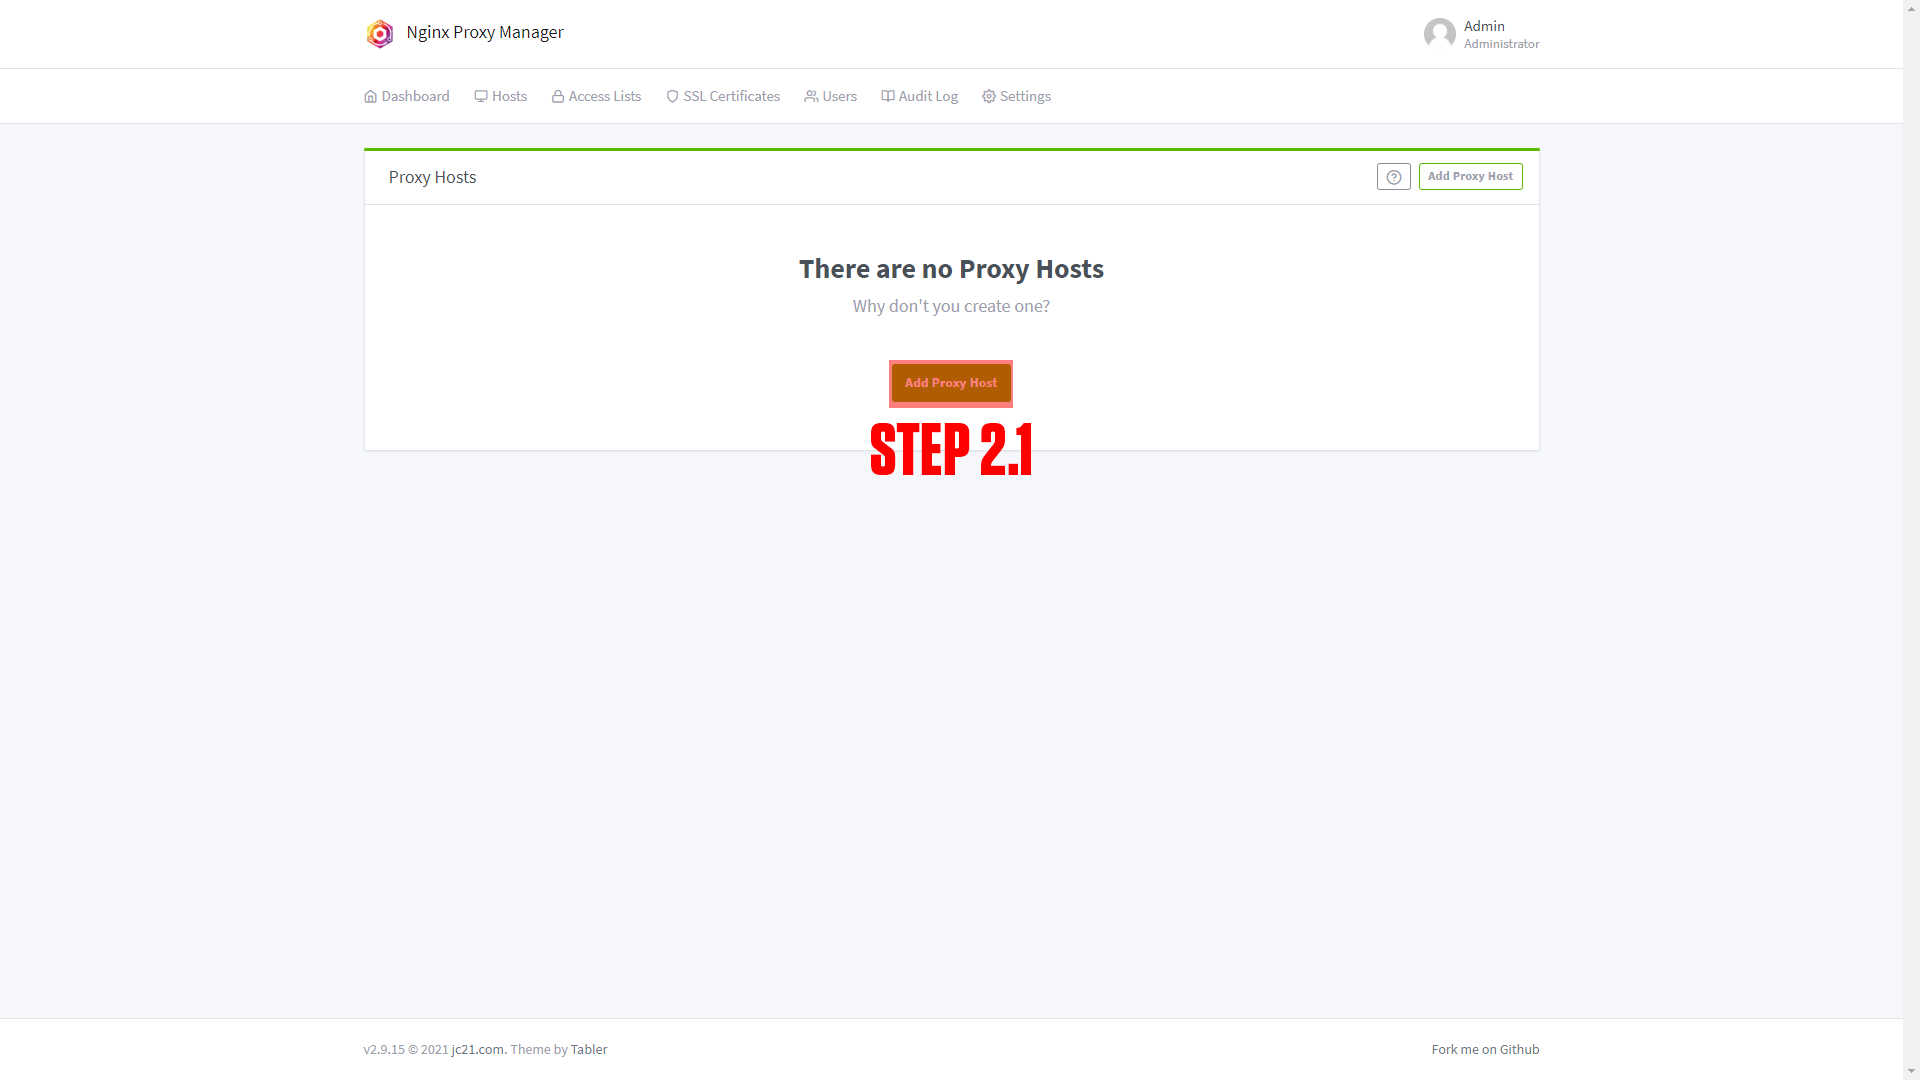
Step 2: Log in to Nginx-Proxy-Manager and create a new proxy host.
Step 3: Enter your Domain name (Ex. btcpay.example.com)
Step 4: Add the service name to the Forward Hostname / IP at port 80.
Step 5: Enable Cache Assets, Block Common Exploits, and Websockets Support.
Step 6: Click Save.
Step 7: Enable SSL (Required for BTCPay).
 |
 |
 |
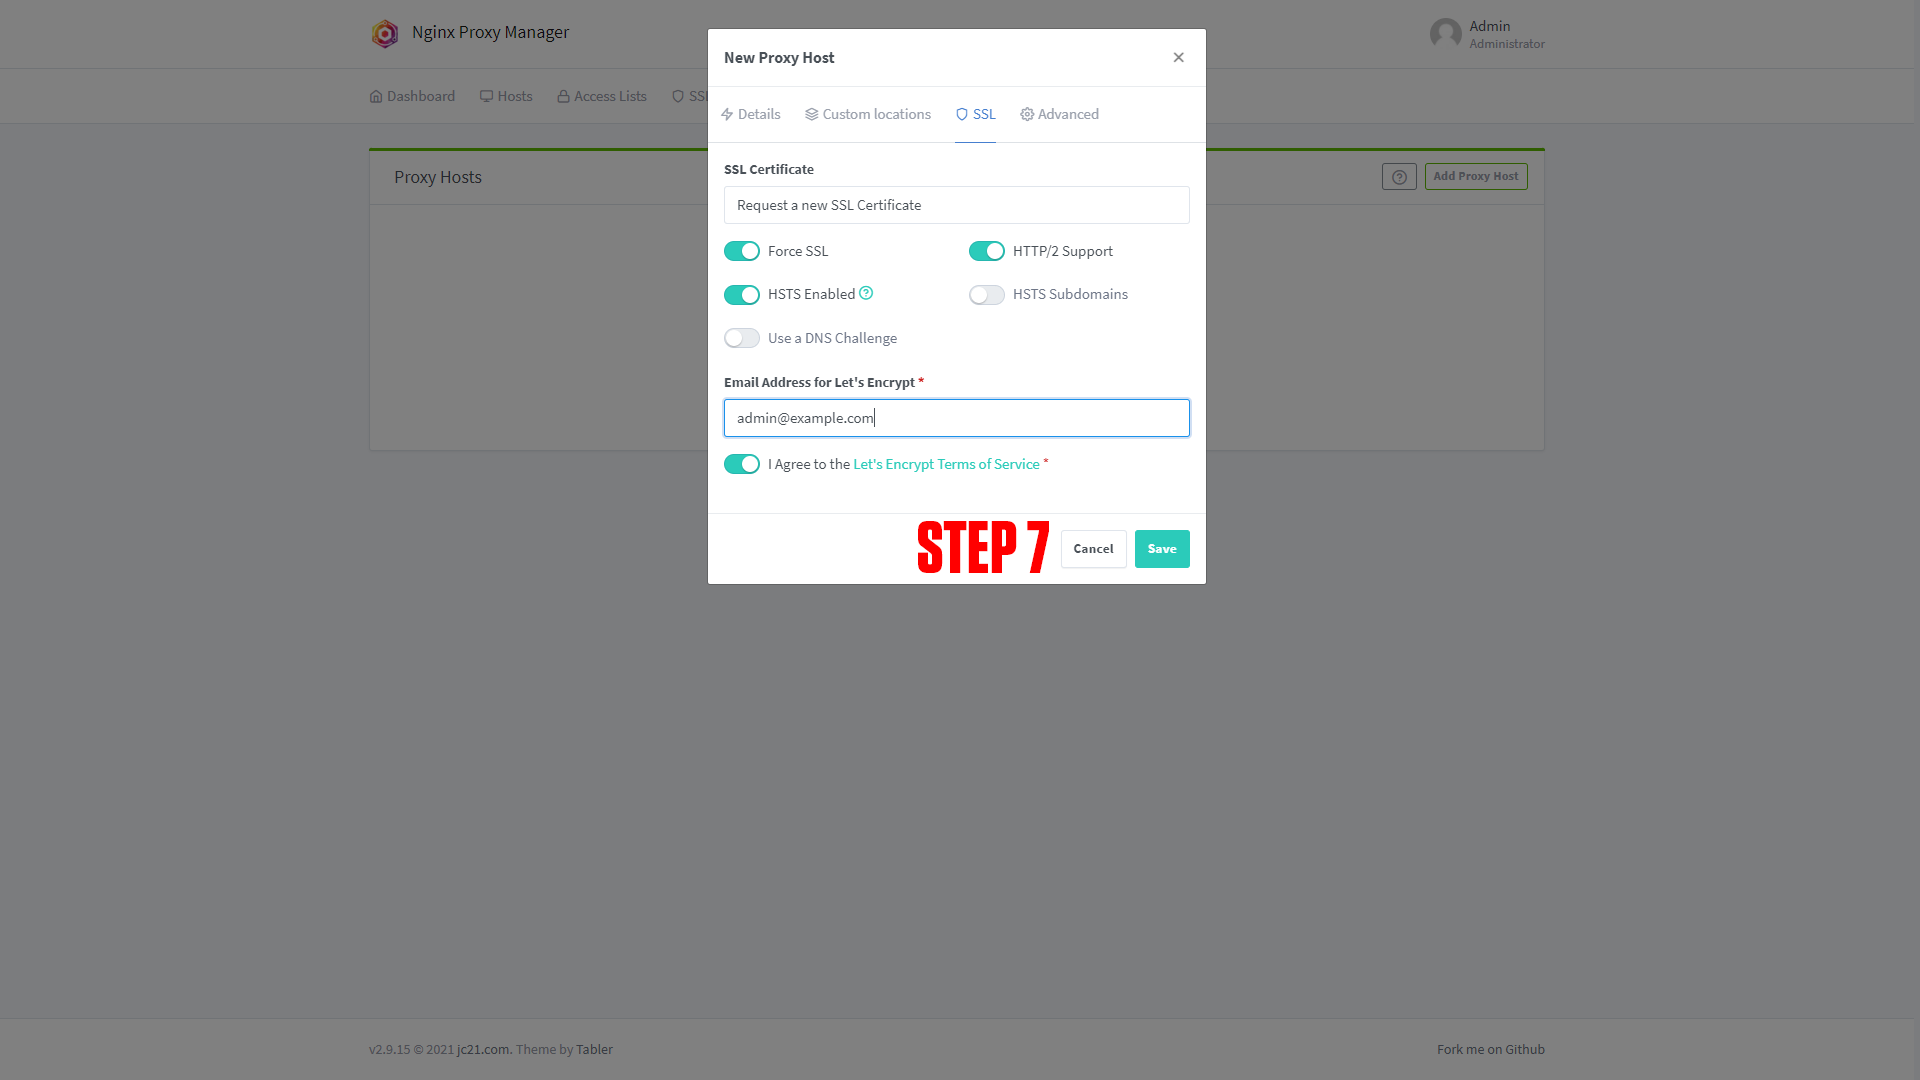 |
¶ Configuring BTCPay
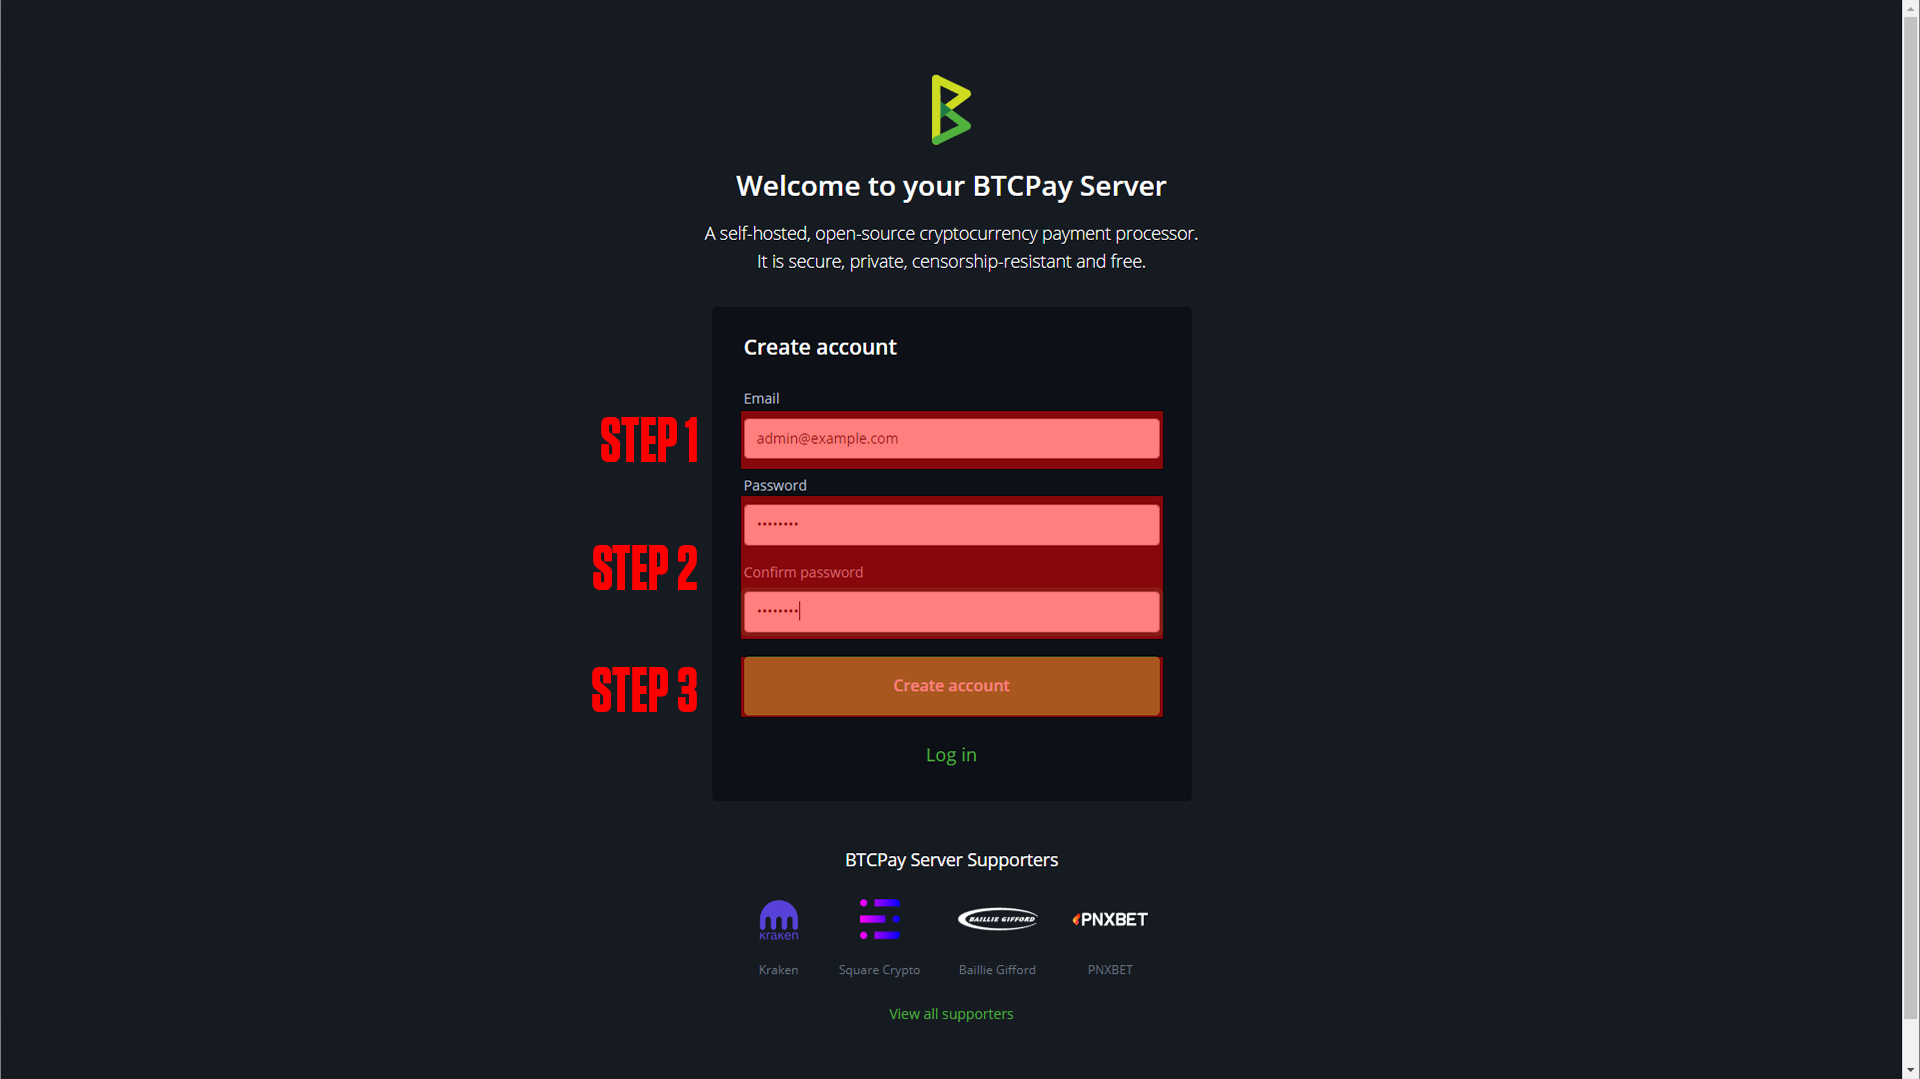
After setting up your domain name it's time to finish configuring the app. Go to the URL you chose for your application. You should arrive at a screen like this!
 |
 |
(If you do not arrive at a screen like this then something is wrong! Our premium members can open a support ticket Here!)
Step 1: Enter your email
Step 2: Enter your password
Step 3: Create your account
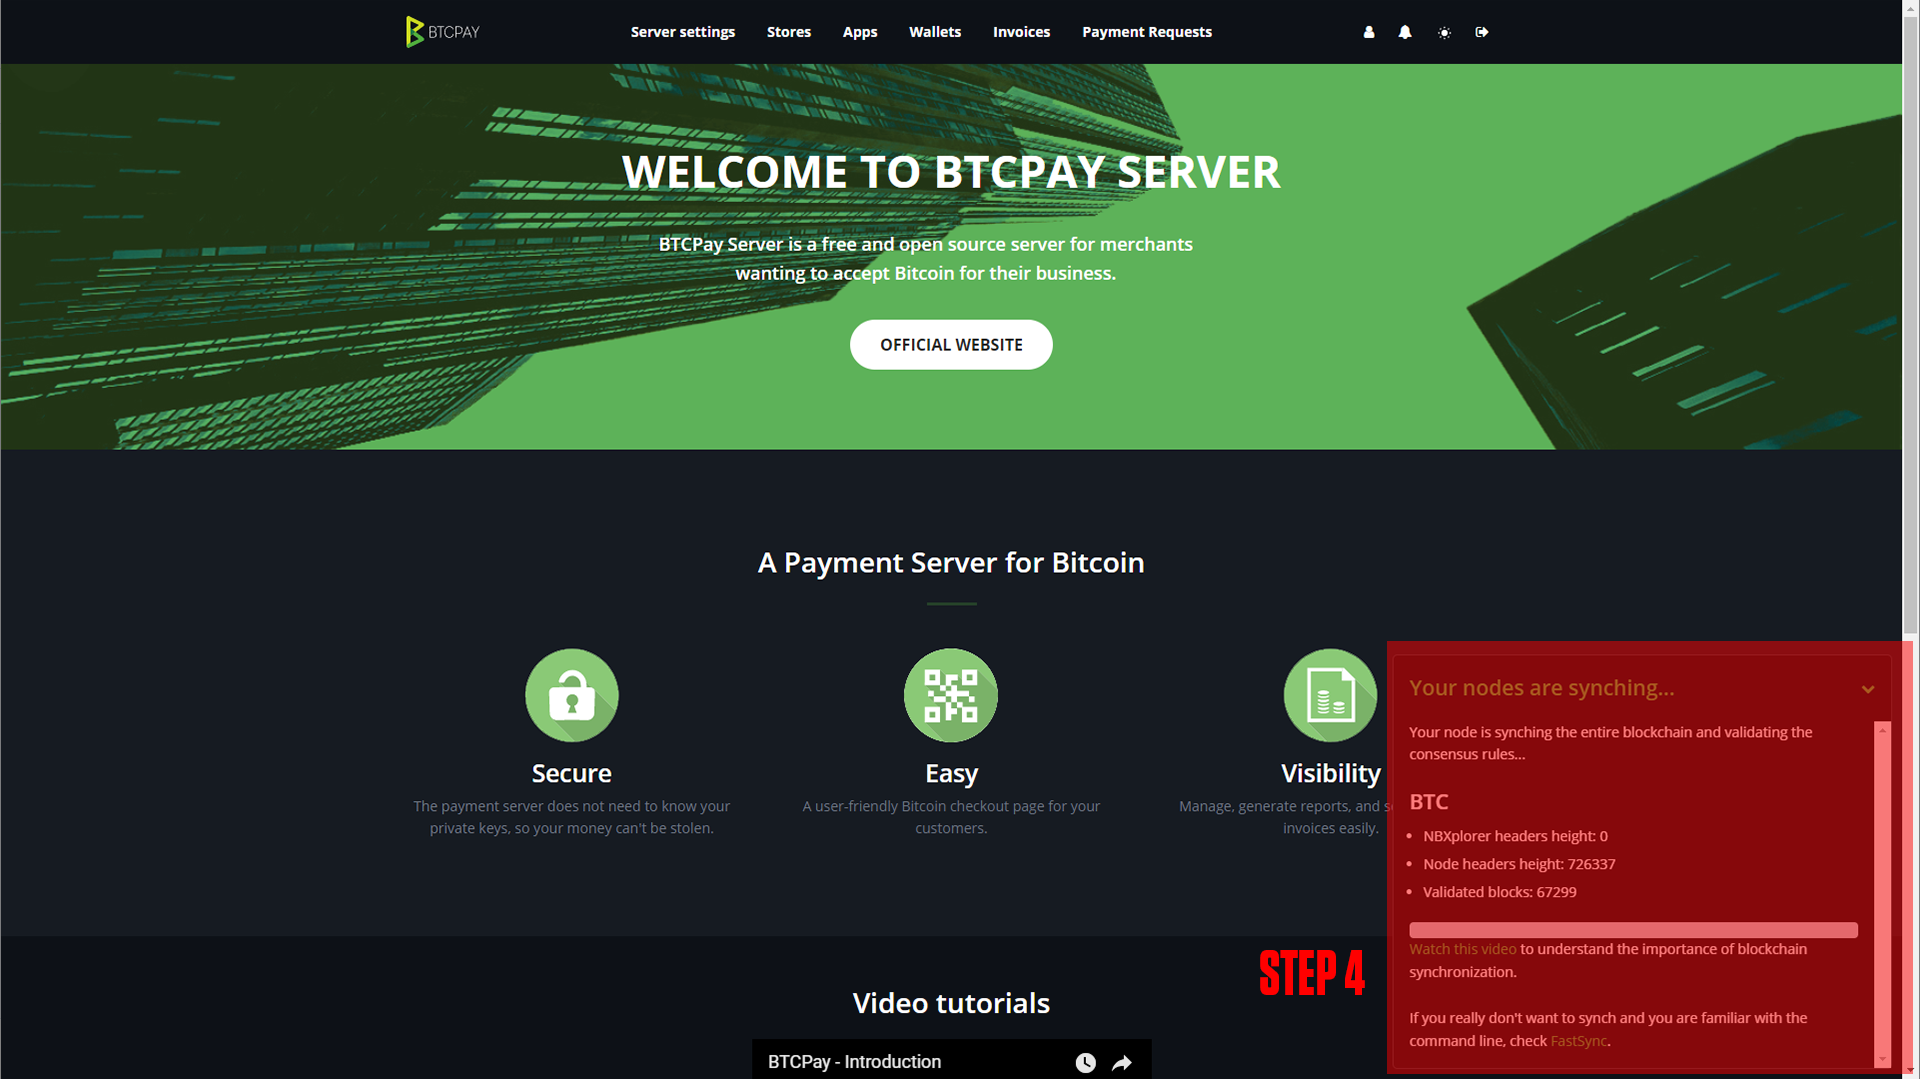
Step 4: Once your nodes are finished syncing (Downloading the blockchain) you will be able to accept crypto!
¶ Conclusion
Congrats! This is the basic setup for the BTCPay server, as mentioned at the beginning we have a more in-depth course available at TrueFreedomTech.com. To learn how to use the BTCPay server go Here!