¶ Vaultwarden: Password Manager, 2fa Authenticator, Secure Note Safe.
Vaultwarden is a powerful platform for managing passwords, sharing passwords with authenticated users in organizations, and two-factor authentication. You can learn more about Vaultwarden from the links below:
*Note: Vaultwarden & Bitwarden are two different things (Kind of). Vaultwarden is a much smaller application than Bitwarden. For the record, Bitwarden is the official version. This is an important distinction and can cause confusion, Vaultwarden in Docker hub used to be called Bitwardenrs.
**Note: Anytime we mention Bitwarden instead of Vaultwarden we are still talking about Vaultwarden… Not confusing at all. We have tried to catch all instances (except for the compose) but we have been running this app for quite a while and may have missed some.
¶ Introduction
Vaultwarden is an excellent open-source password manager. Your Vaultwarden server can be used as your primary password manager on your phone, web browser, and desktop. For privacy-focused tech-savvy individuals, it would only make sense to add it to your stack. Hackers aren't likely to target people who don't seem worth the effort, and if everyone had their own self-hosted password manager it would be even more of a headache to hack anything at all! This is unrealistic of course, but hosting your own Vaultwarden and getting off of big providers is a good way to go to keep your passwords safe.
We will be running Vaultwarden using Docker, Docker-Compose, Portainer, and Nginx Proxy Manager. We have an advanced course on how to do this at TrueFreedomTech.com covering multiple configurations and separating data from compute, deploying with git, and more.
¶ Overview
We are going to assume you already have a working server with Docker, Portainer, and Nginx Proxy Manager running. We will go over the compose for the stack and configuring Nginx-Proxy-Manager. We are not using our own images for this stack so please consult the Docker hub and GitHub links for more information regarding the Docker image and source code.
This is strictly how to get the app running. Once again, we cover how to do this at TrueFreedomTech.com in much more detail! This should be good enough to get beginners running, and experts should be able to adapt this to their own configuration with relative ease.
Now let's begin!
¶ Docker-Compose
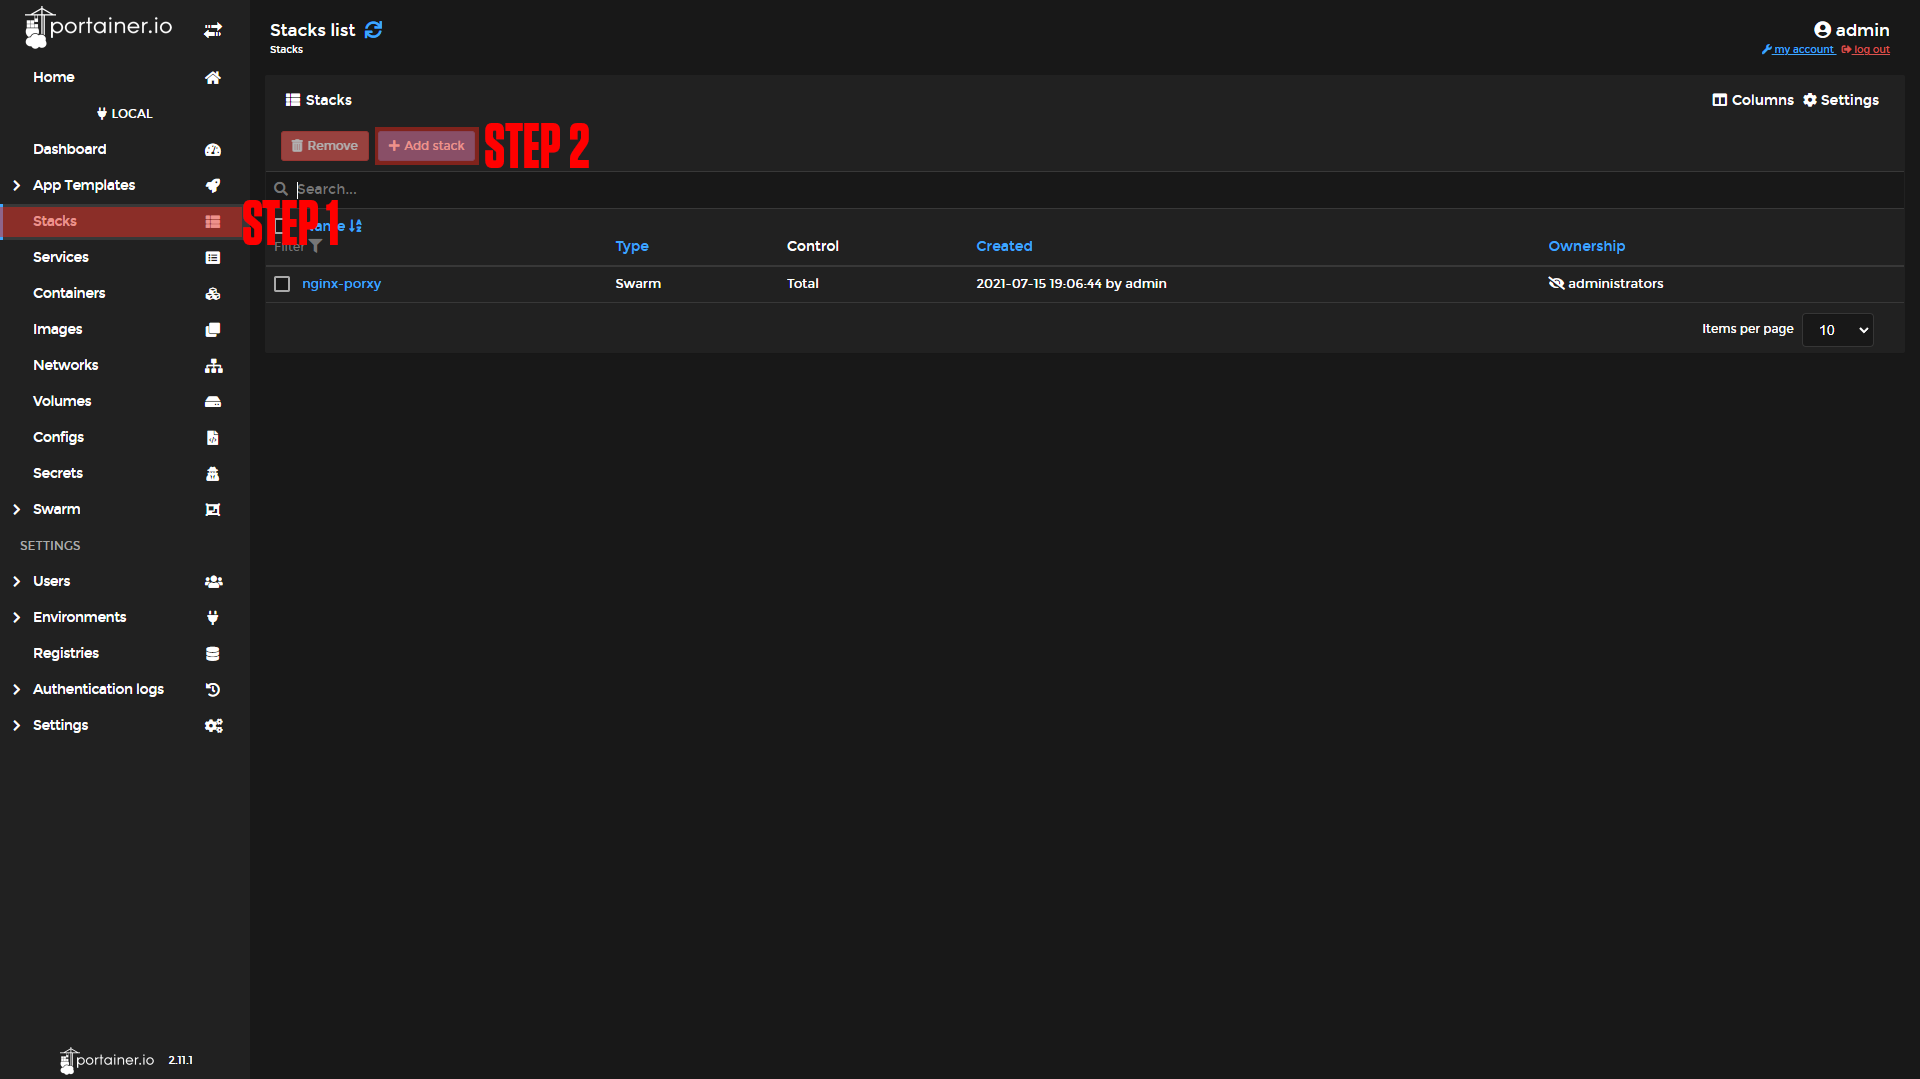
Step 1: Go to Stacks.
Step 2: Click Add Stack.
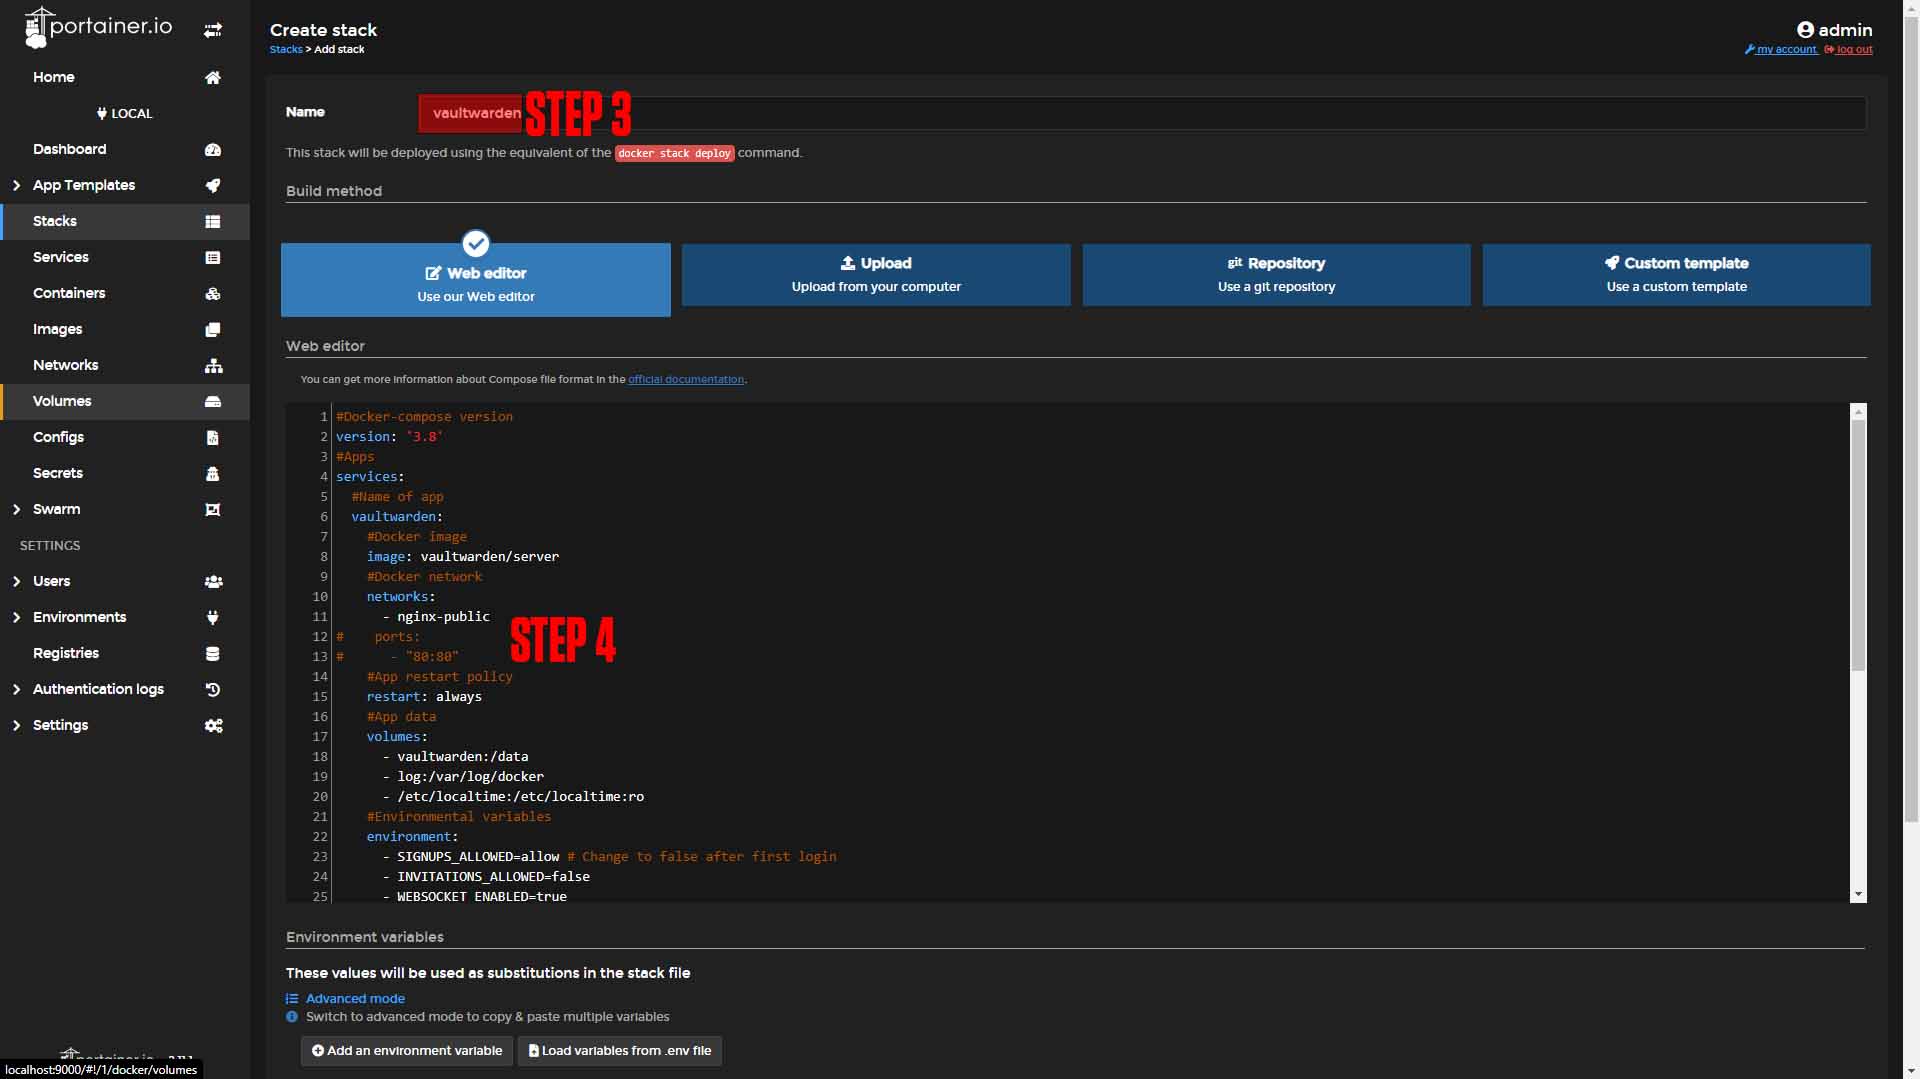
Step 3: Name your stack (Ex. Vaultwarden).
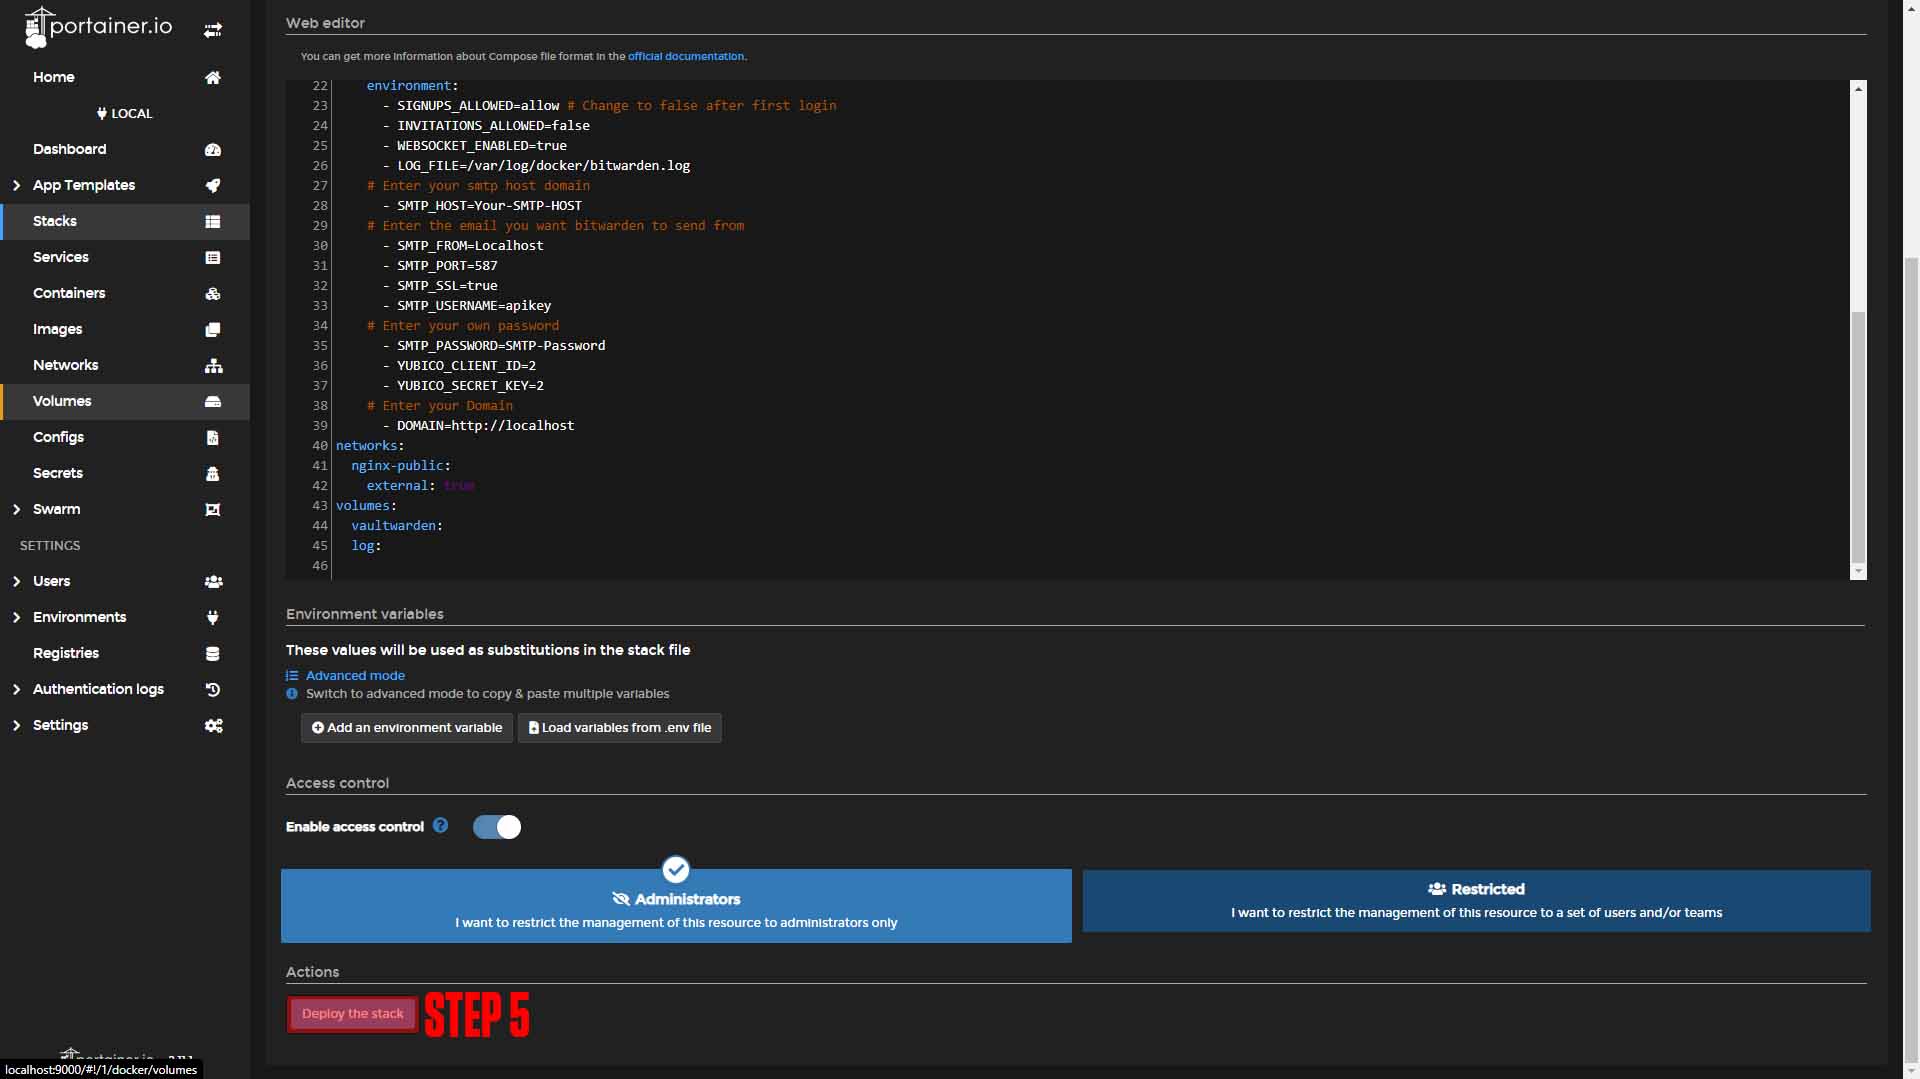
Step 4: Paste in the contents below (Make sure you look over the compose and change anything with the #CHANGEME comment):
Step 5: Press Deploy the Stack.
 |
|
#Docker-compose version
version: '3.8'
#Apps
services:
  #Name of app
  vaultwarden:
    #Docker image
    image: vaultwarden/server
    #Docker network
    networks:
      - nginx-public
#    ports:
#      - "80:80"
    #App restart policy
    restart: always
    #App data
    volumes:
      - vaultwarden:/data
      - log:/var/log/docker
      - /etc/localtime:/etc/localtime:ro
    #Environmental variables
    environment:
      - SIGNUPS_ALLOWED=allow # Change to false after first login
      - INVITATIONS_ALLOWED=false
      - WEBSOCKET_ENABLED=true
      - LOG_FILE=/var/log/docker/bitwarden.log
    # Enter your smtp host domain
      - SMTP_HOST=Your-SMTP-HOST #CHANGEME
    # Enter the email you want bitwarden to send from
      - SMTP_FROM=Your-Email@YourDomain.com #CHANGEME
      - SMTP_PORT=587
      - SMTP_SSL=true
      - SMTP_USERNAME=apikey
    # Enter your own password
      - SMTP_PASSWORD=SMTP-Password
      - YUBICO_CLIENT_ID=2
      - YUBICO_SECRET_KEY=2
    # Enter your Domain
      - DOMAIN=https://your_domain.com #CHANGEME
networks:
  nginx-public:
    external: true
volumes:
  vaultwarden:
  log:
¶ Nginx-Proxy-Manager
Before we configure our apps, we will set up our domains using Nginx-Proxy-Manager. If you followed our Nginx-Proxy-Manager stack setup you should be able to copy everything we do step by step.
¶ Vaultwarden Domain Setup
Step 1: Copy the vaultwarden service name.
This should be vaultwarden_vaultwarden if you did not change the names of apps.
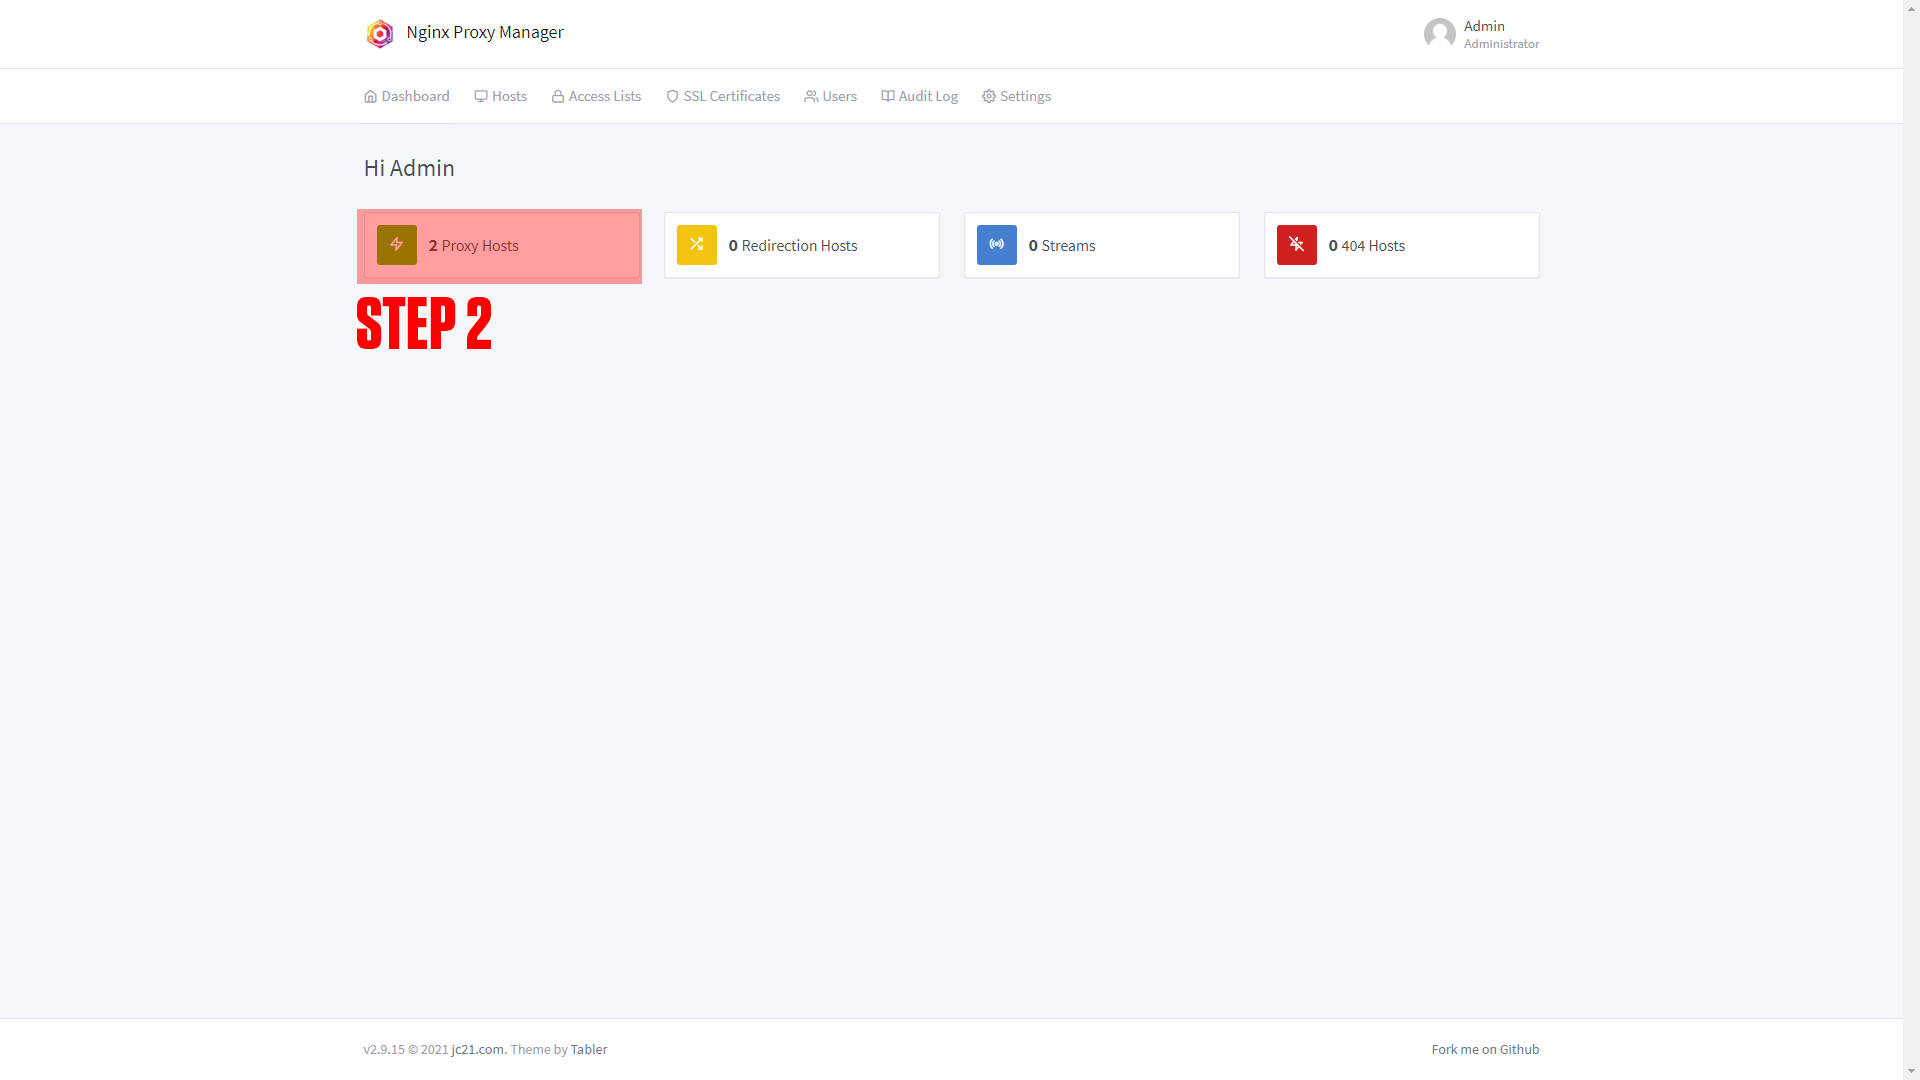
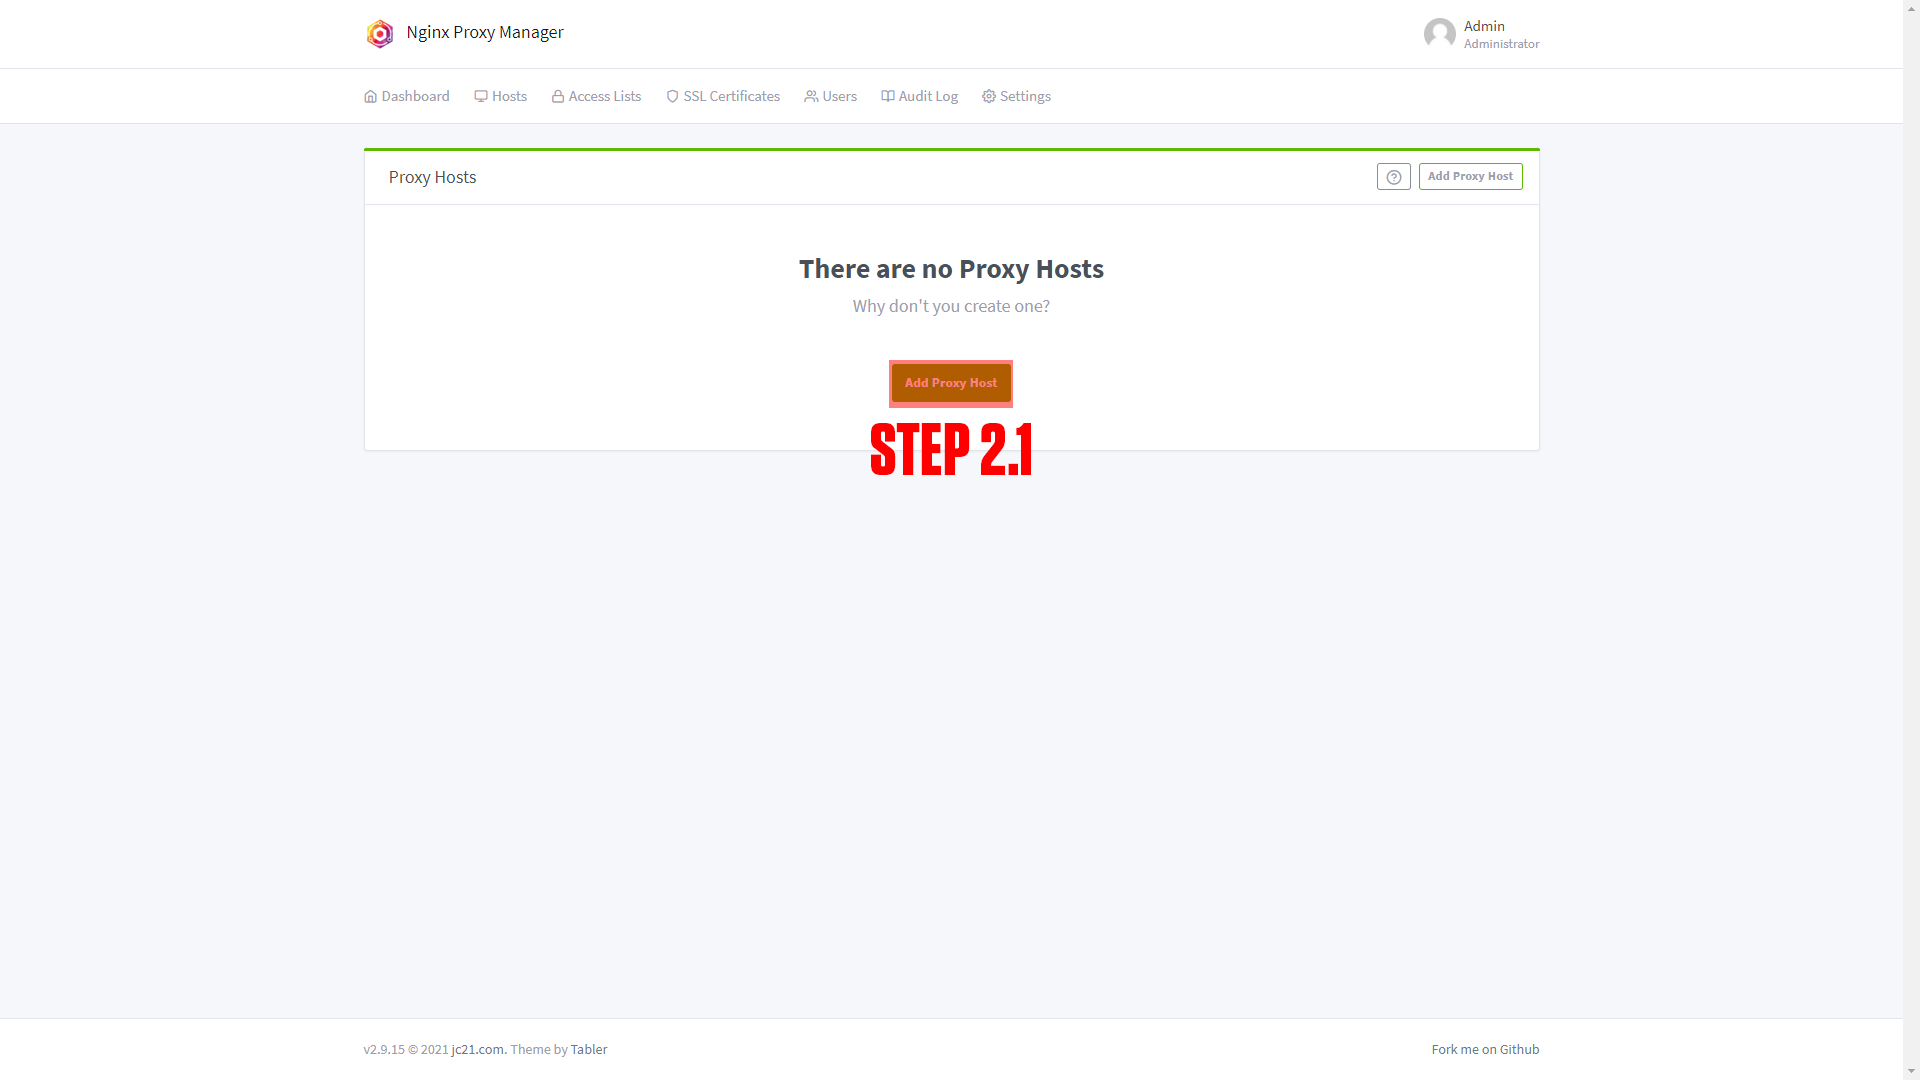
Step 2: Log in to Nginx-Proxy-Manager and create a new proxy host.
Step 3: Enter your Domain name (Ex. vault.TrueFreedomTech.com)
Step 4: Add the service name to the Forward Hostname / IP at port 80.
Step 5: Enable Cache Assets, Block Common Exploits, and Websockets Support.
Step 6: Click Save.
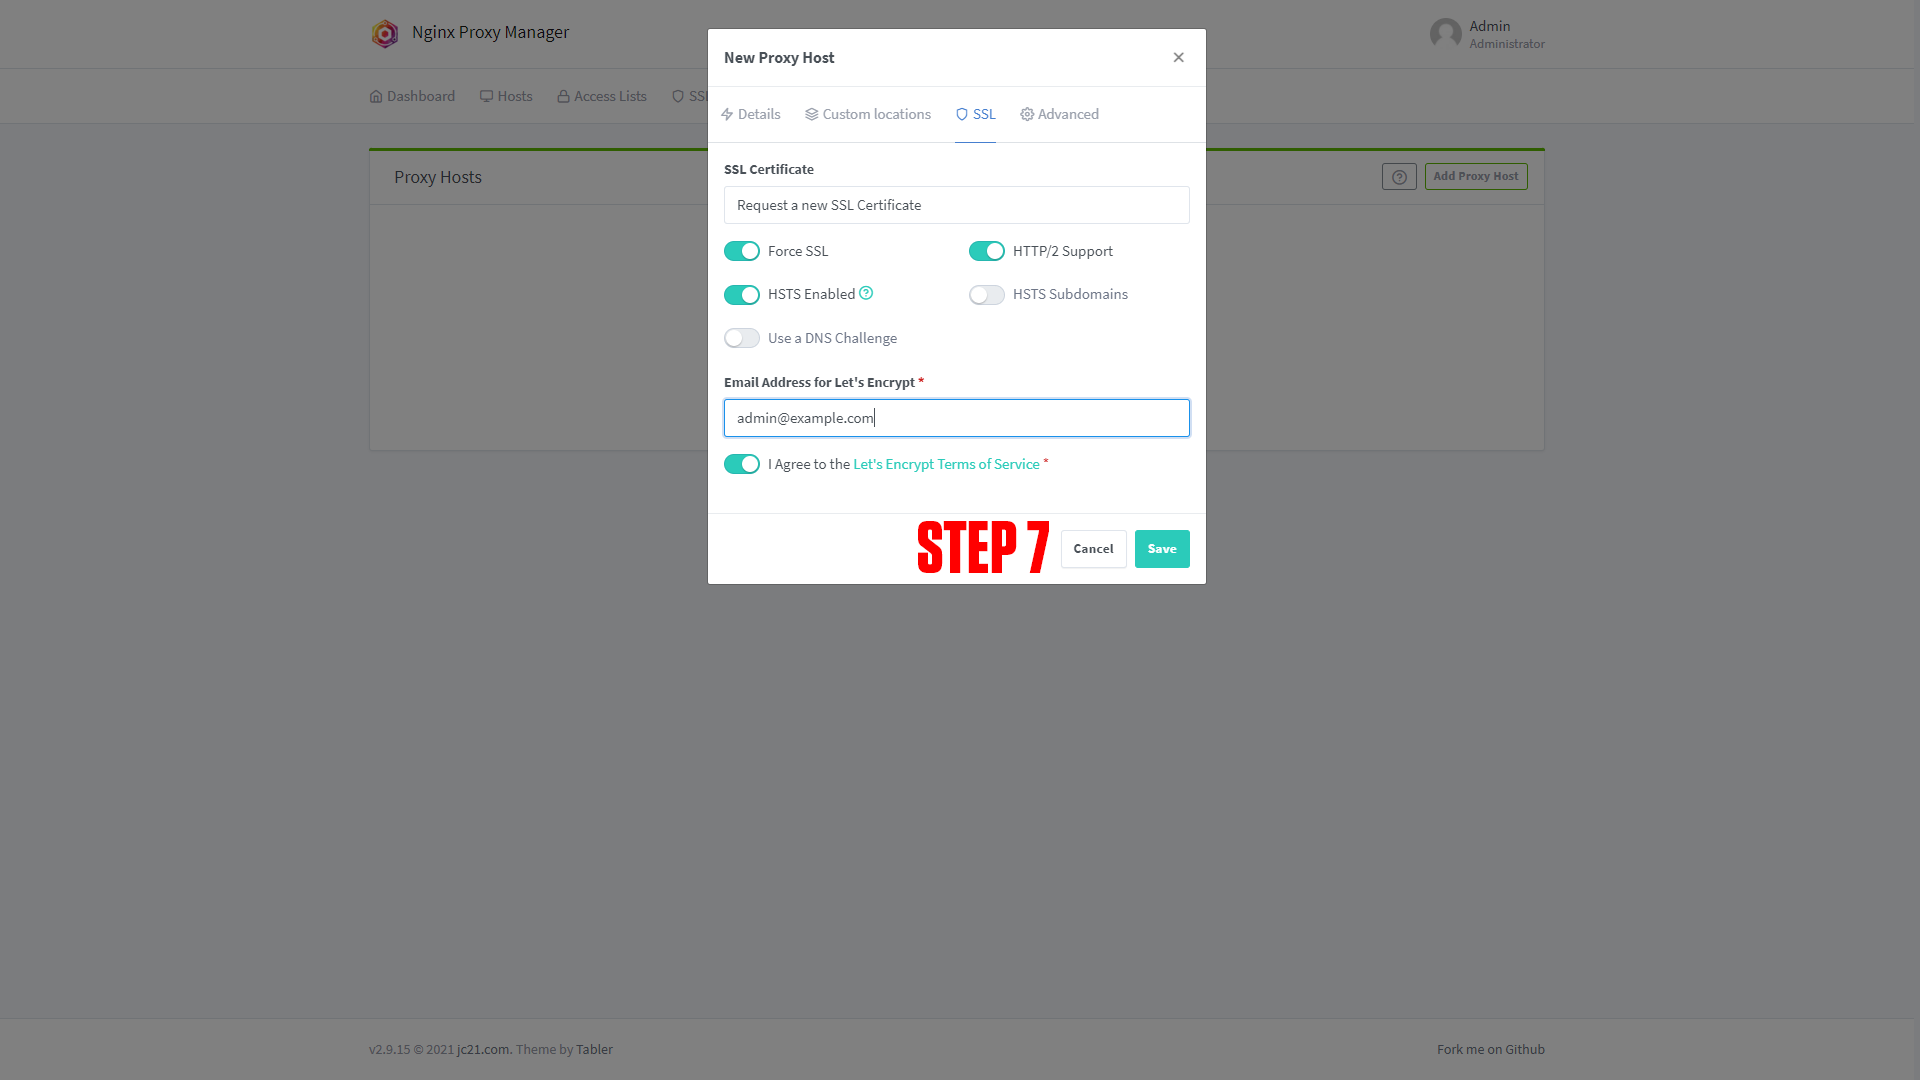
Step 7 (Optional): Enable SSL (we say this is optional, but you should always have an SSL cert if possible).
¶ Screenshots:
 |
 |
 |
 |
¶ Configuring Vaultwarden
After setting up your domain name it's time to finish configuring the app. Go to the URL you chose for your application. You should arrive at a screen like this!
 |
 |
(If you do not arrive at a screen like this then something is wrong! Our premium members can open a support ticket Here!)
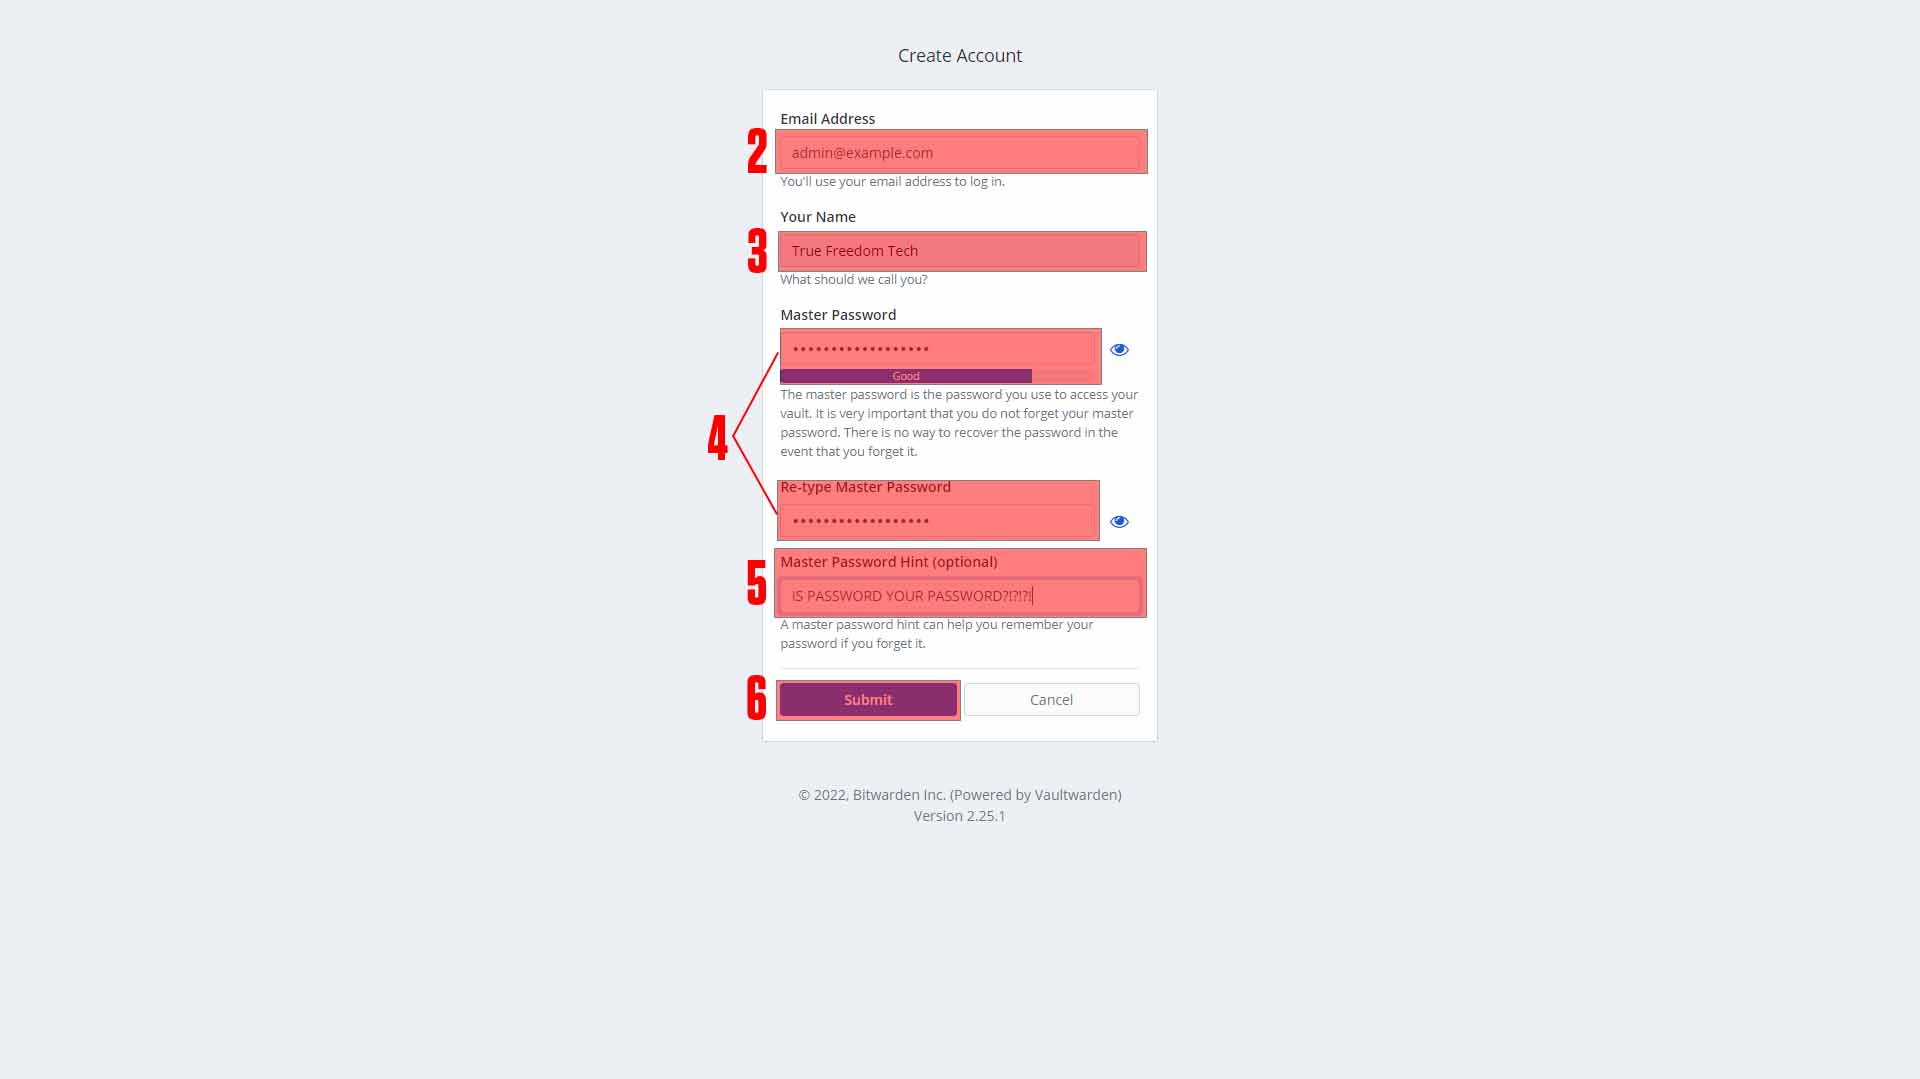
Step 1: Press Create Account. (There is an option in the compose to disable this option. If you do not want users to be able to register then after creating your account change this option to false.
Step 2: Enter your email.
Step 3: Enter your account name.
Step 4: Enter and re-enter your password
Step 5: Enter your master pass hint.
Step 6: Click Submit.
¶ Conclusion
Congrats! This is the basic setup for Vaultwarden, as mentioned at the beginning we have a more in-depth course available at TrueFreedomTech.com.