¶ Heimdall: Directory, Dashboard, Sitemap
Heimdall is a god in Norse mytholo- kidding! Heimdall is an open-source dashboard used to keep track of all your web applications. You can learn more about Heimdall from the links below:
¶ Introduction
Heimdall links any web service you want as a bookmark essentially. So why do this instead of just using your browser's bookmarks? For an individual not hosting services for others, it probably doesn't make sense. For a team hosting services, it makes plenty of sense. Everyone can have a user account, add what they want, and have it immediately accessible to others. at True Freedom Tech, we provide a Heimdall dashboard for every client for current and future services, passwords, internal resources, and more. It takes literally 2 minutes to get a Heimdall container running, and we are going to show you how!
We will be running Heimdall using Docker, Docker-Compose, Portainer, and Nginx Proxy Manager. We have an advanced course on how to do this at TrueFreedomTech.com covering multiple configurations and separating data from compute, deploying with git, and more.
¶ Overview
We are going to assume you already have a working server with Docker, Portainer, and Nginx Proxy Manager running. We will go over the compose for the stack and configuring Nginx-Proxy-Manager. We are not using our own images for this stack so please consult the Docker hub and GitHub links for more information regarding the Docker image and source code.
This is strictly how to get the app running. Once again, we cover how to do this at TrueFreedomTech.com in much more detail! This should be good enough to get beginners running, and experts should be able to adapt this to their own configuration with relative ease.
¶ Docker-Compose
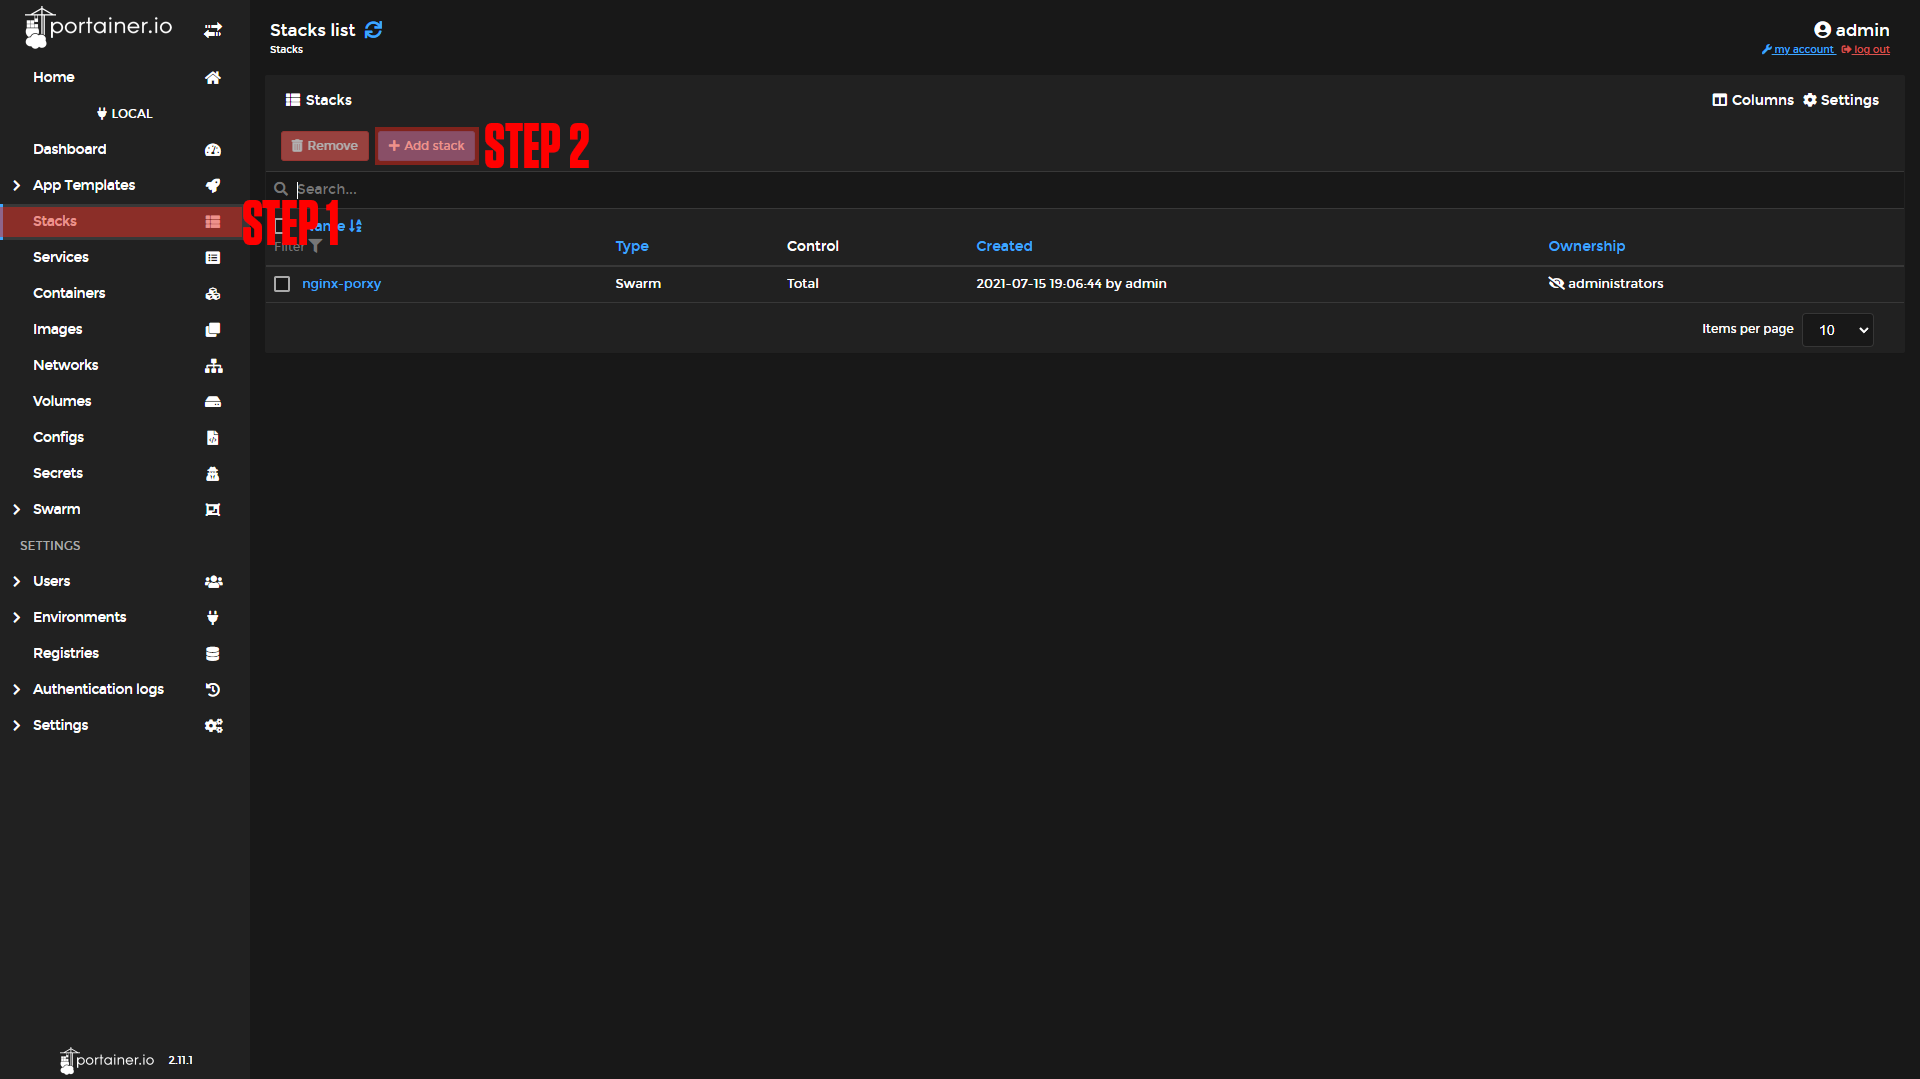
Step 1: Go to Stacks.
Step 2: Click Add Stack.
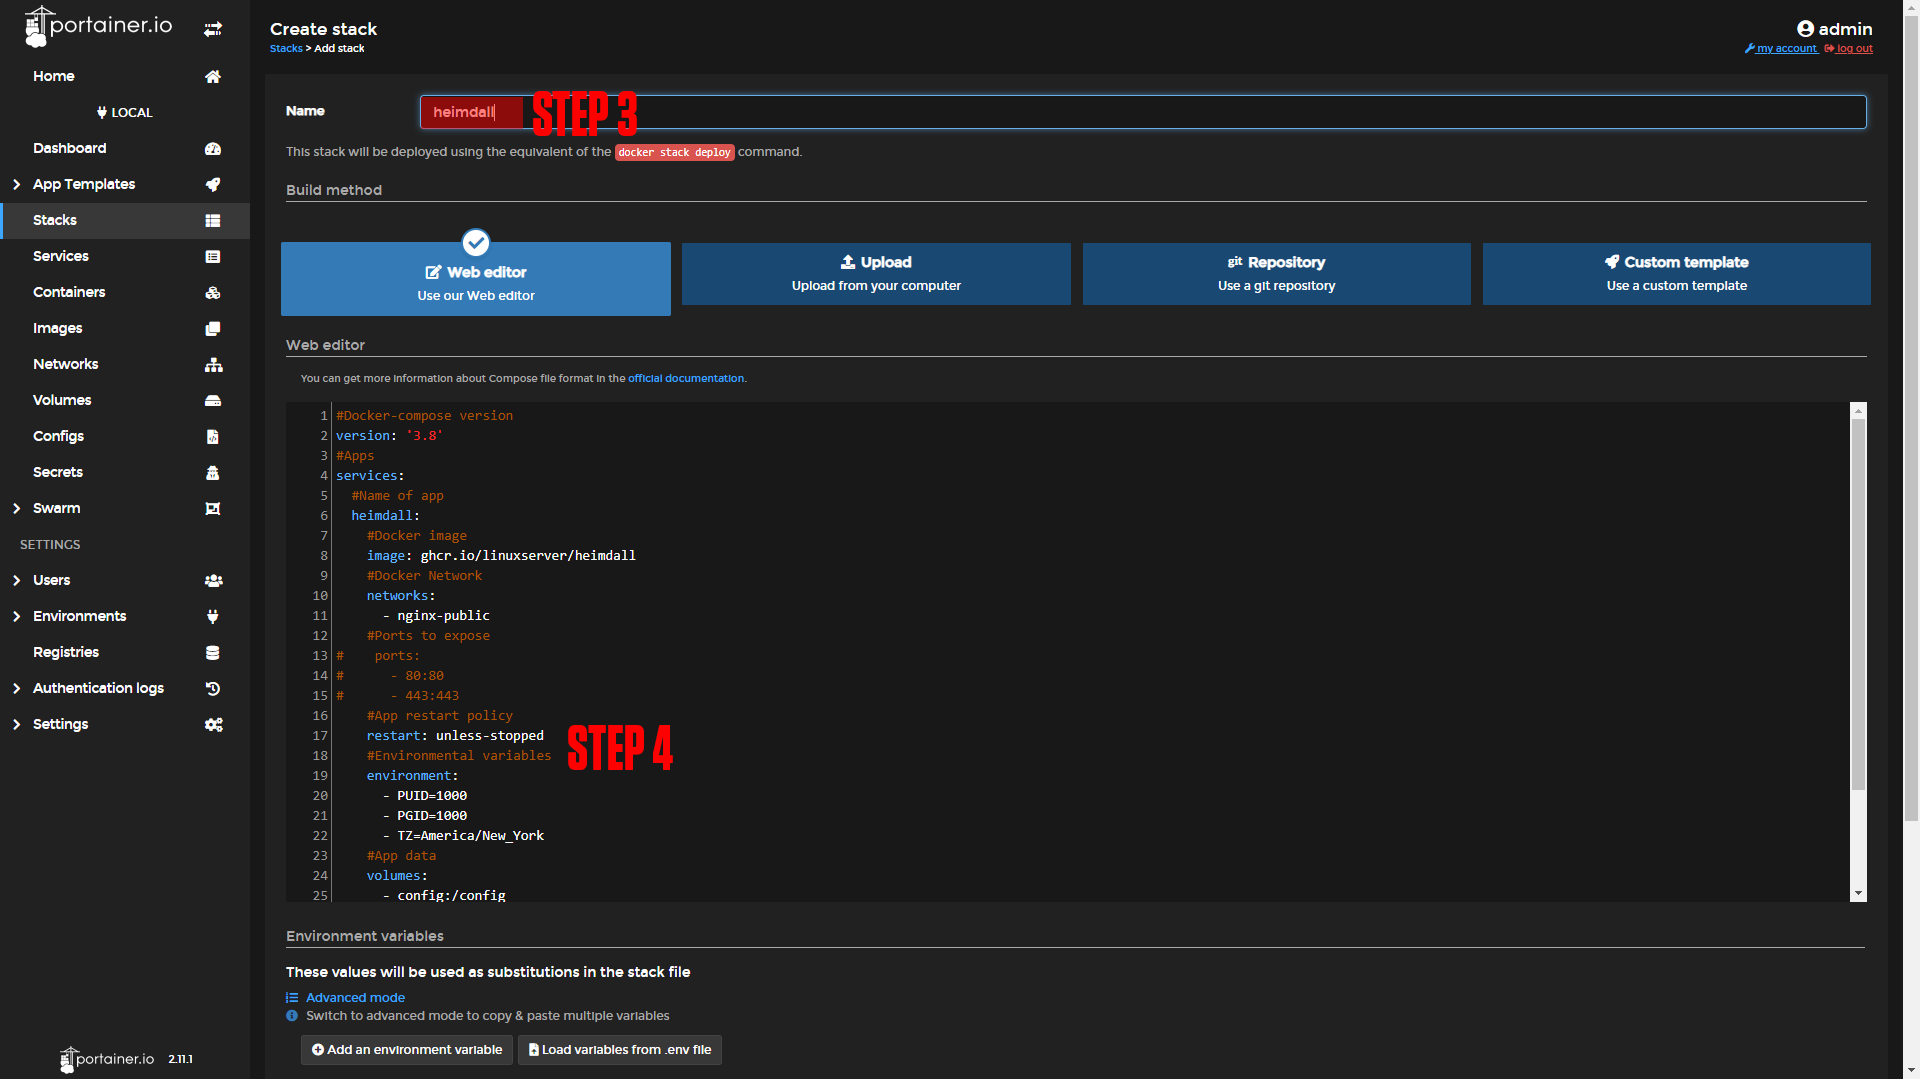
Step 3: Name your stack (Ex. Heimdall).
Step 4: Paste in the contents below:
Step 5: Press Deploy the Stack.
|
|

|
#Docker-compose version
version: '3.8'
#Apps
services:
  #Name of app
  heimdall:
    #Docker image
    image: ghcr.io/linuxserver/heimdall
    #Docker Network
    networks:
      - nginx-public
    #Ports to expose
#    ports:
#      - 80:80
#      - 443:443
    #App restart policy
    restart: unless-stopped
    #Environmental variables
    environment:
      - PUID=1000
      - PGID=1000
      - TZ=America/New_York
    #App data
    volumes:
      - config:/config

networks:
  nginx-public:
    external: true
volumes:
config:¶ Nginx-Proxy-Manager
Before we configure our apps, we will set up our domains using Nginx-Proxy-Manager. If you followed our Nginx-Proxy-Manager stack setup you should be able to copy everything we do step by step.
¶ Heimdall Domain Setup
Step 1: Copy the Heimdall service name.
This should be heimdall_heimdall if you did not change the names of apps.
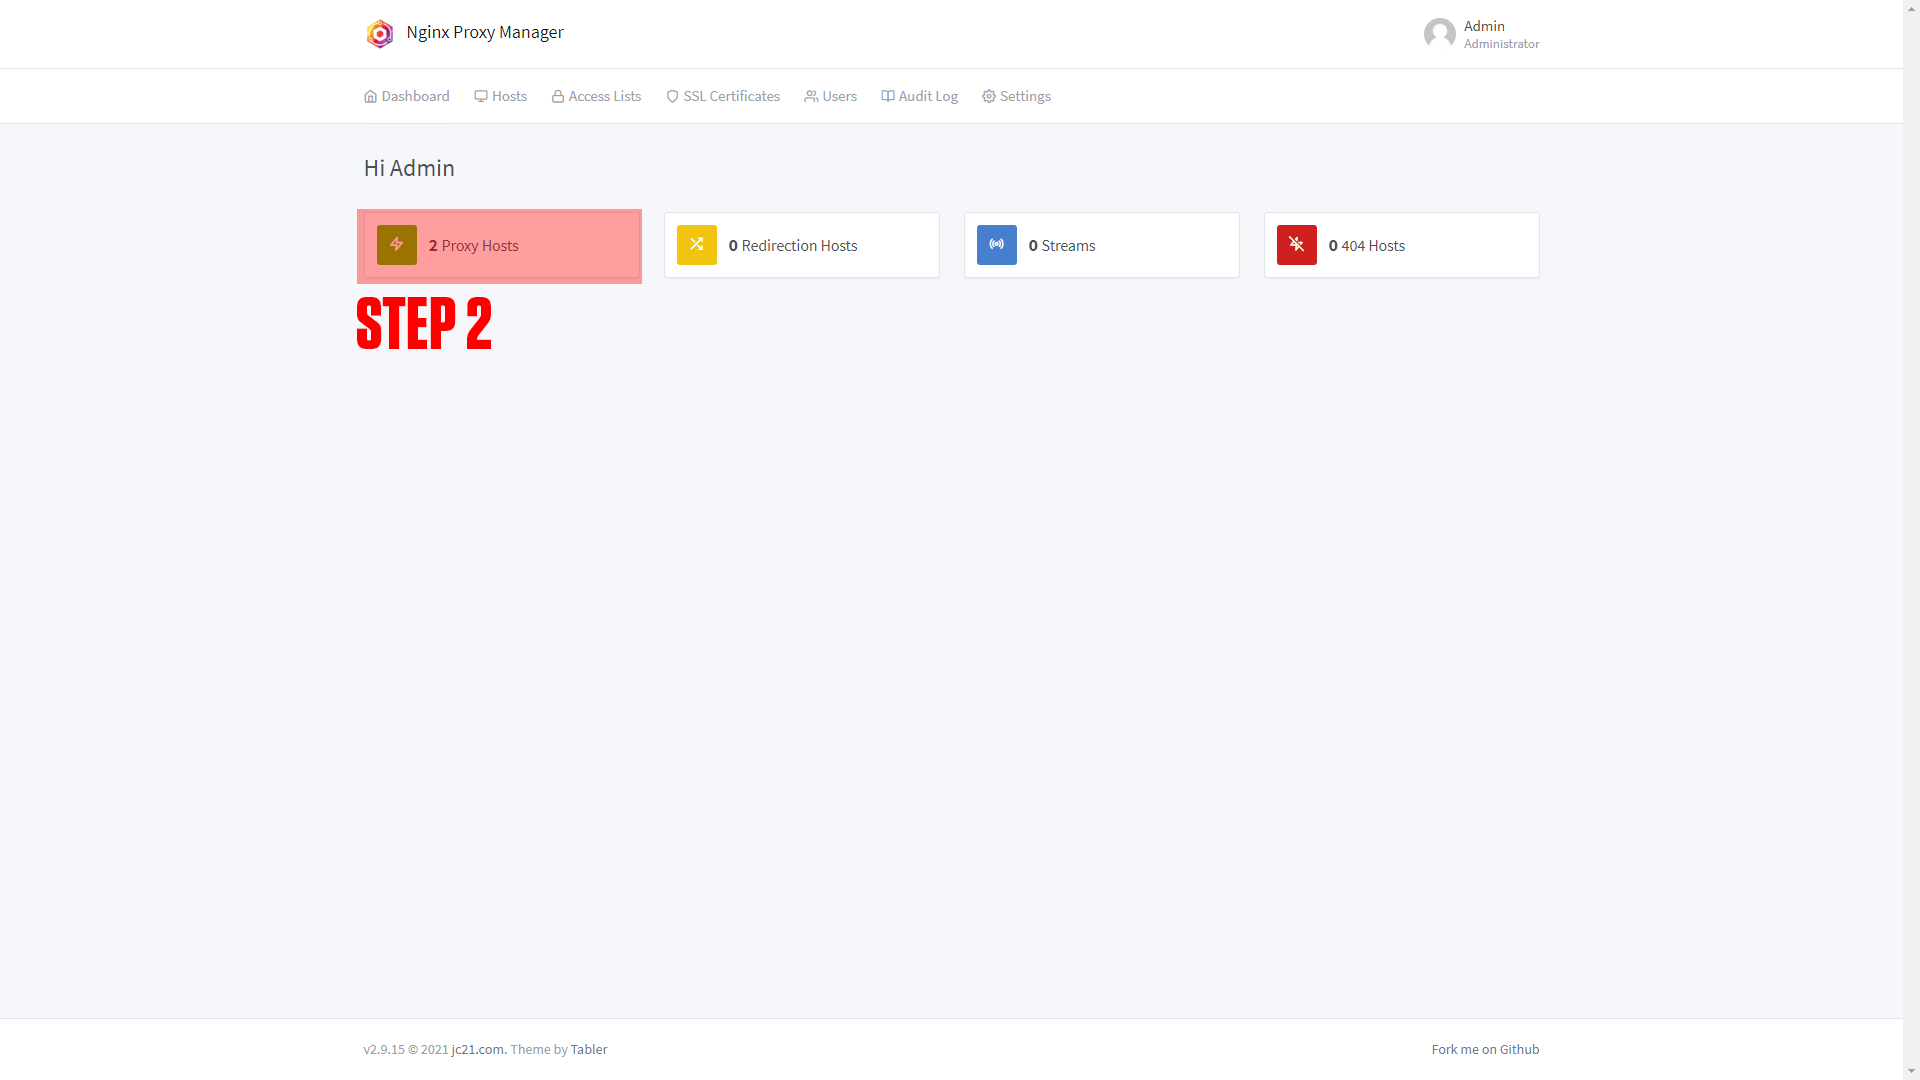
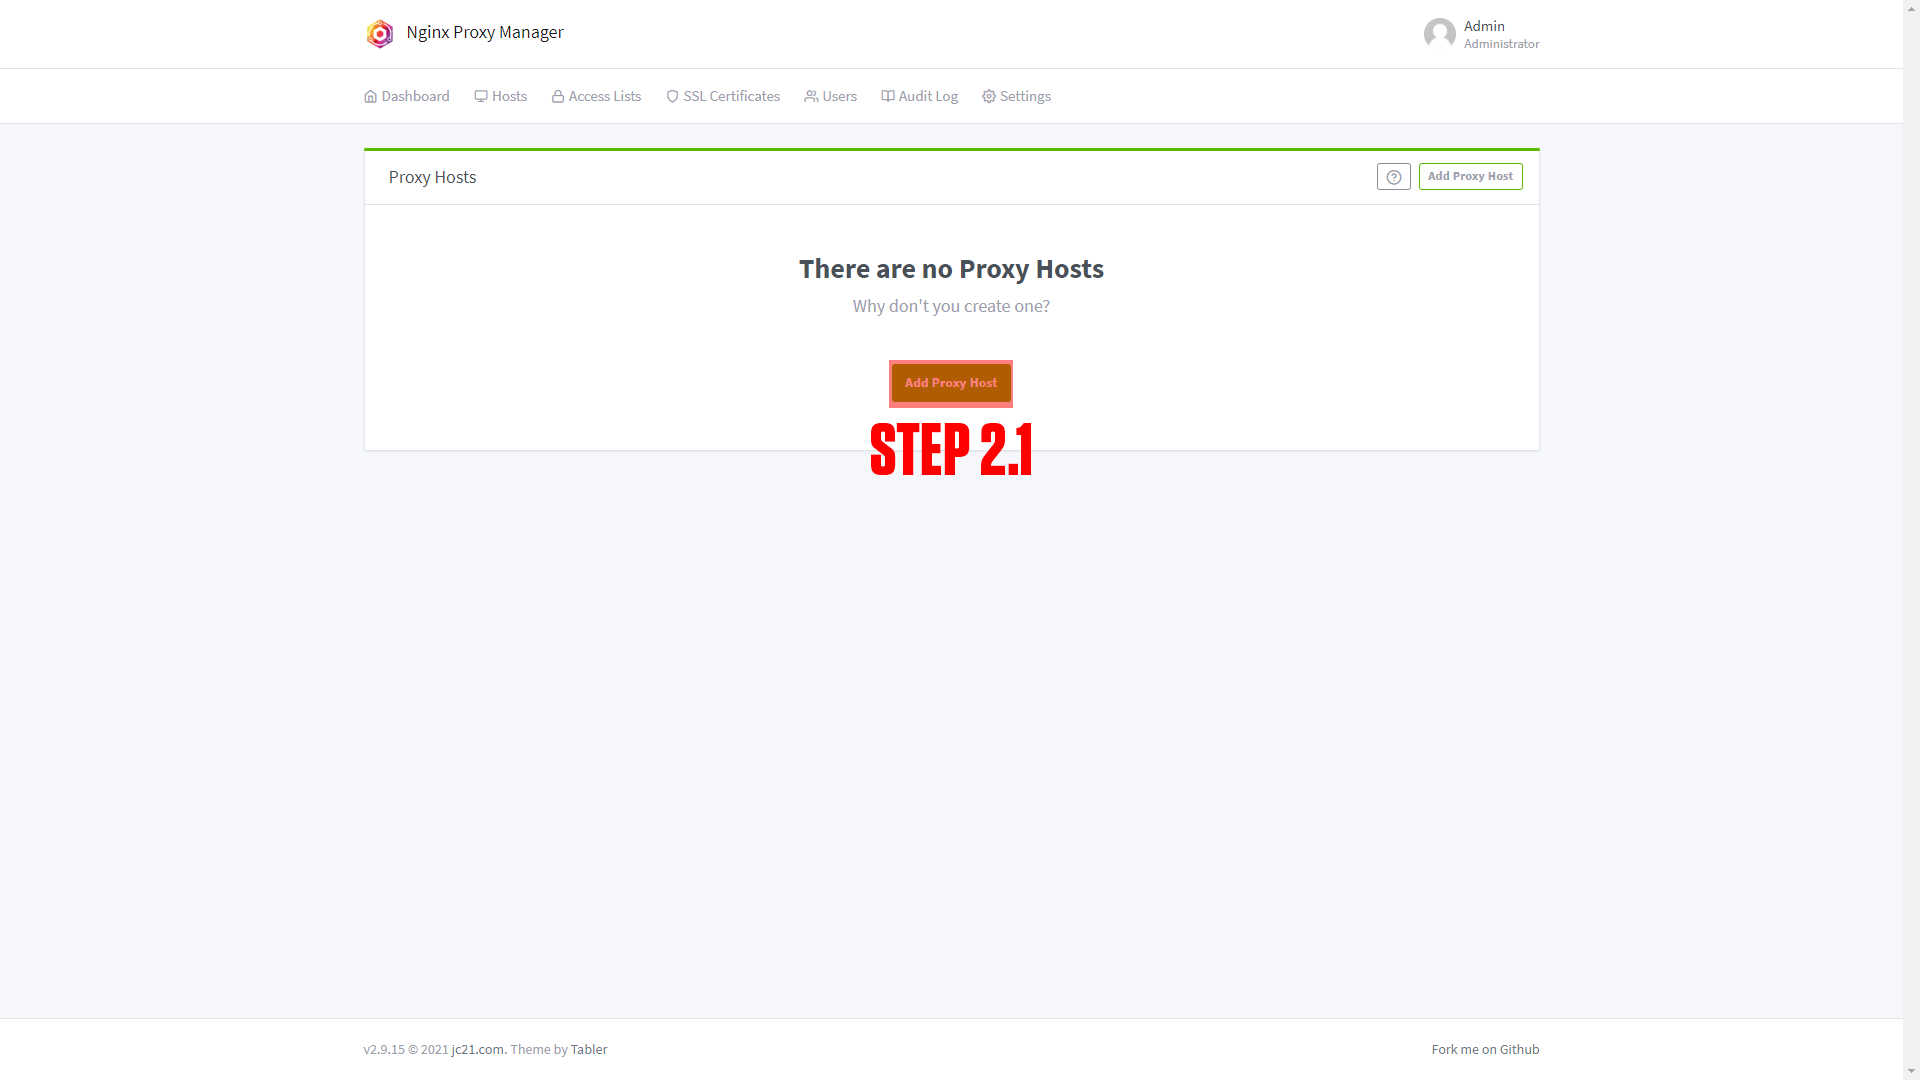
Step 2: Log in to Nginx-Proxy-Manager and create a new proxy host.
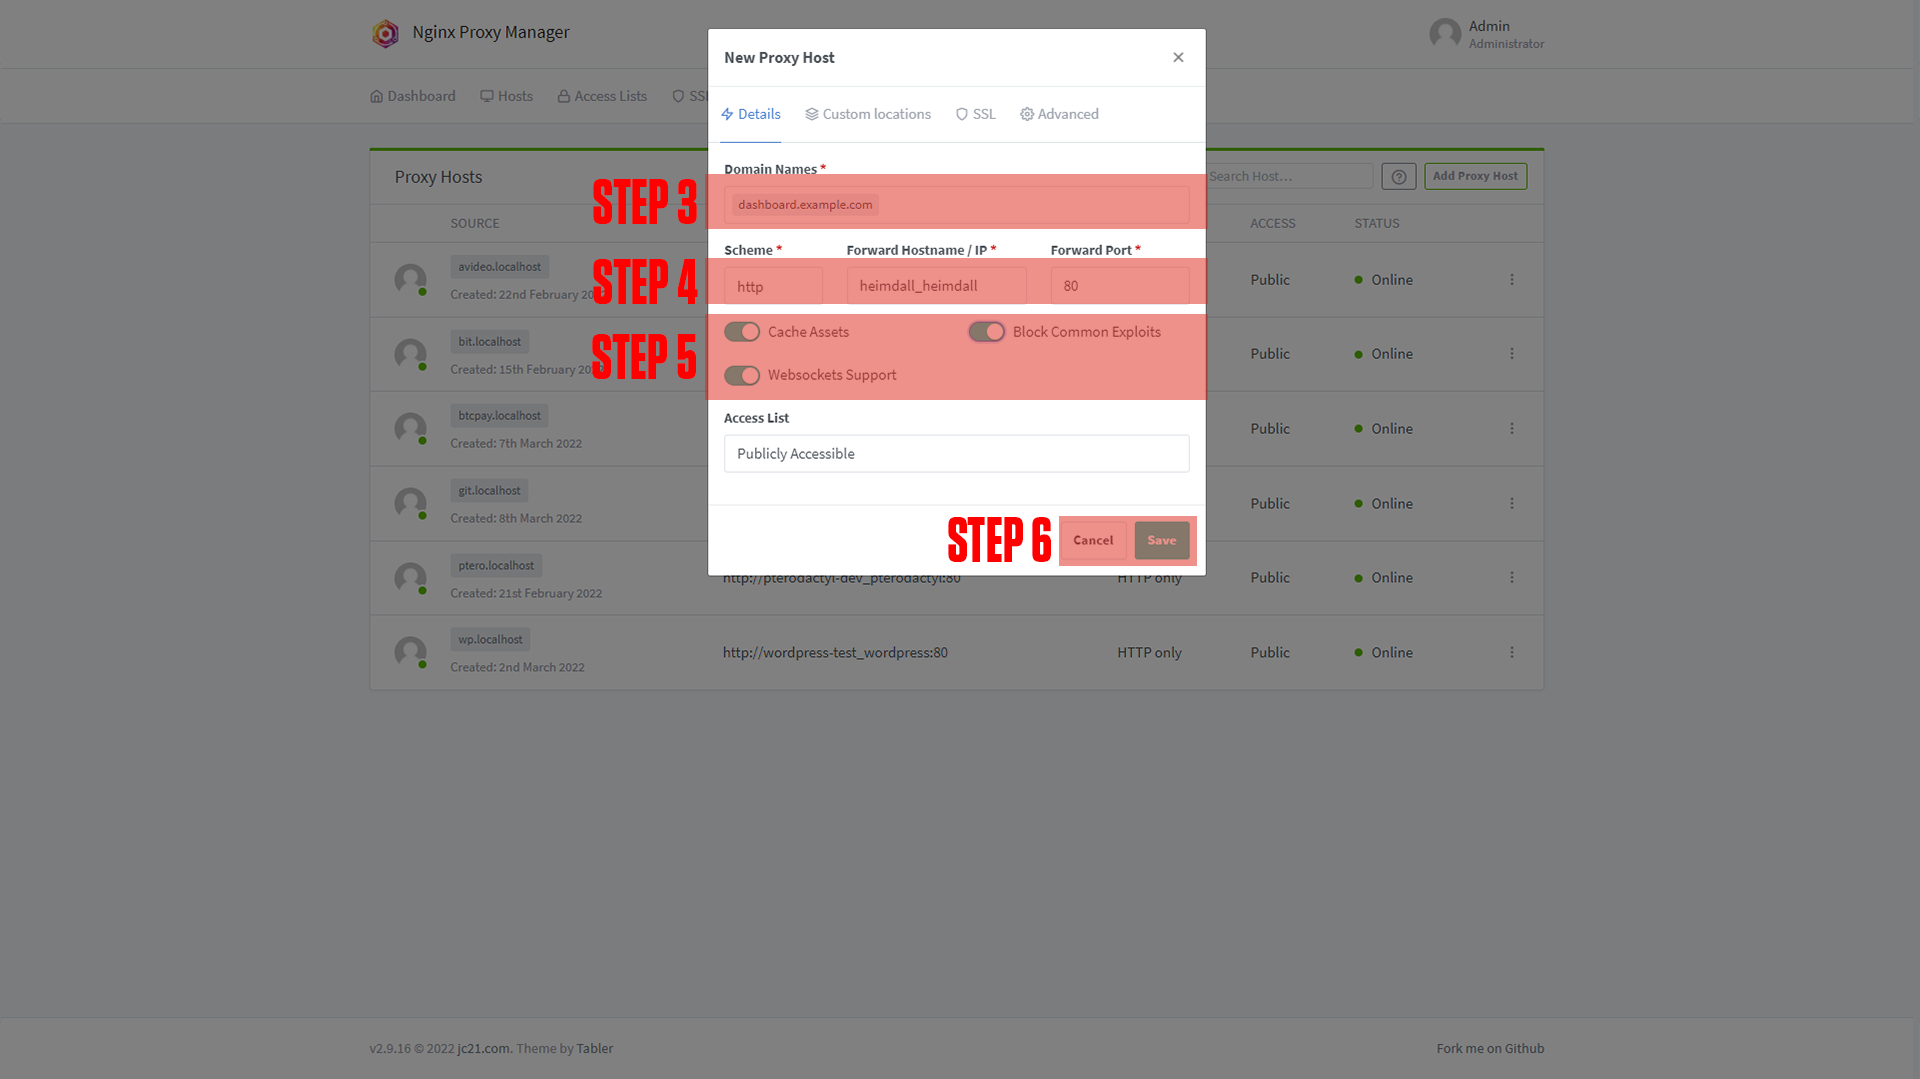
Step 3: Enter your Domain name (Ex. dashboard.example.com)
Step 4: Add the service name to the Forward Hostname / IP at port 80.
Step 5: Enable Cache Assets, Block Common Exploits, and Websockets Support.
Step 6: Click Save.
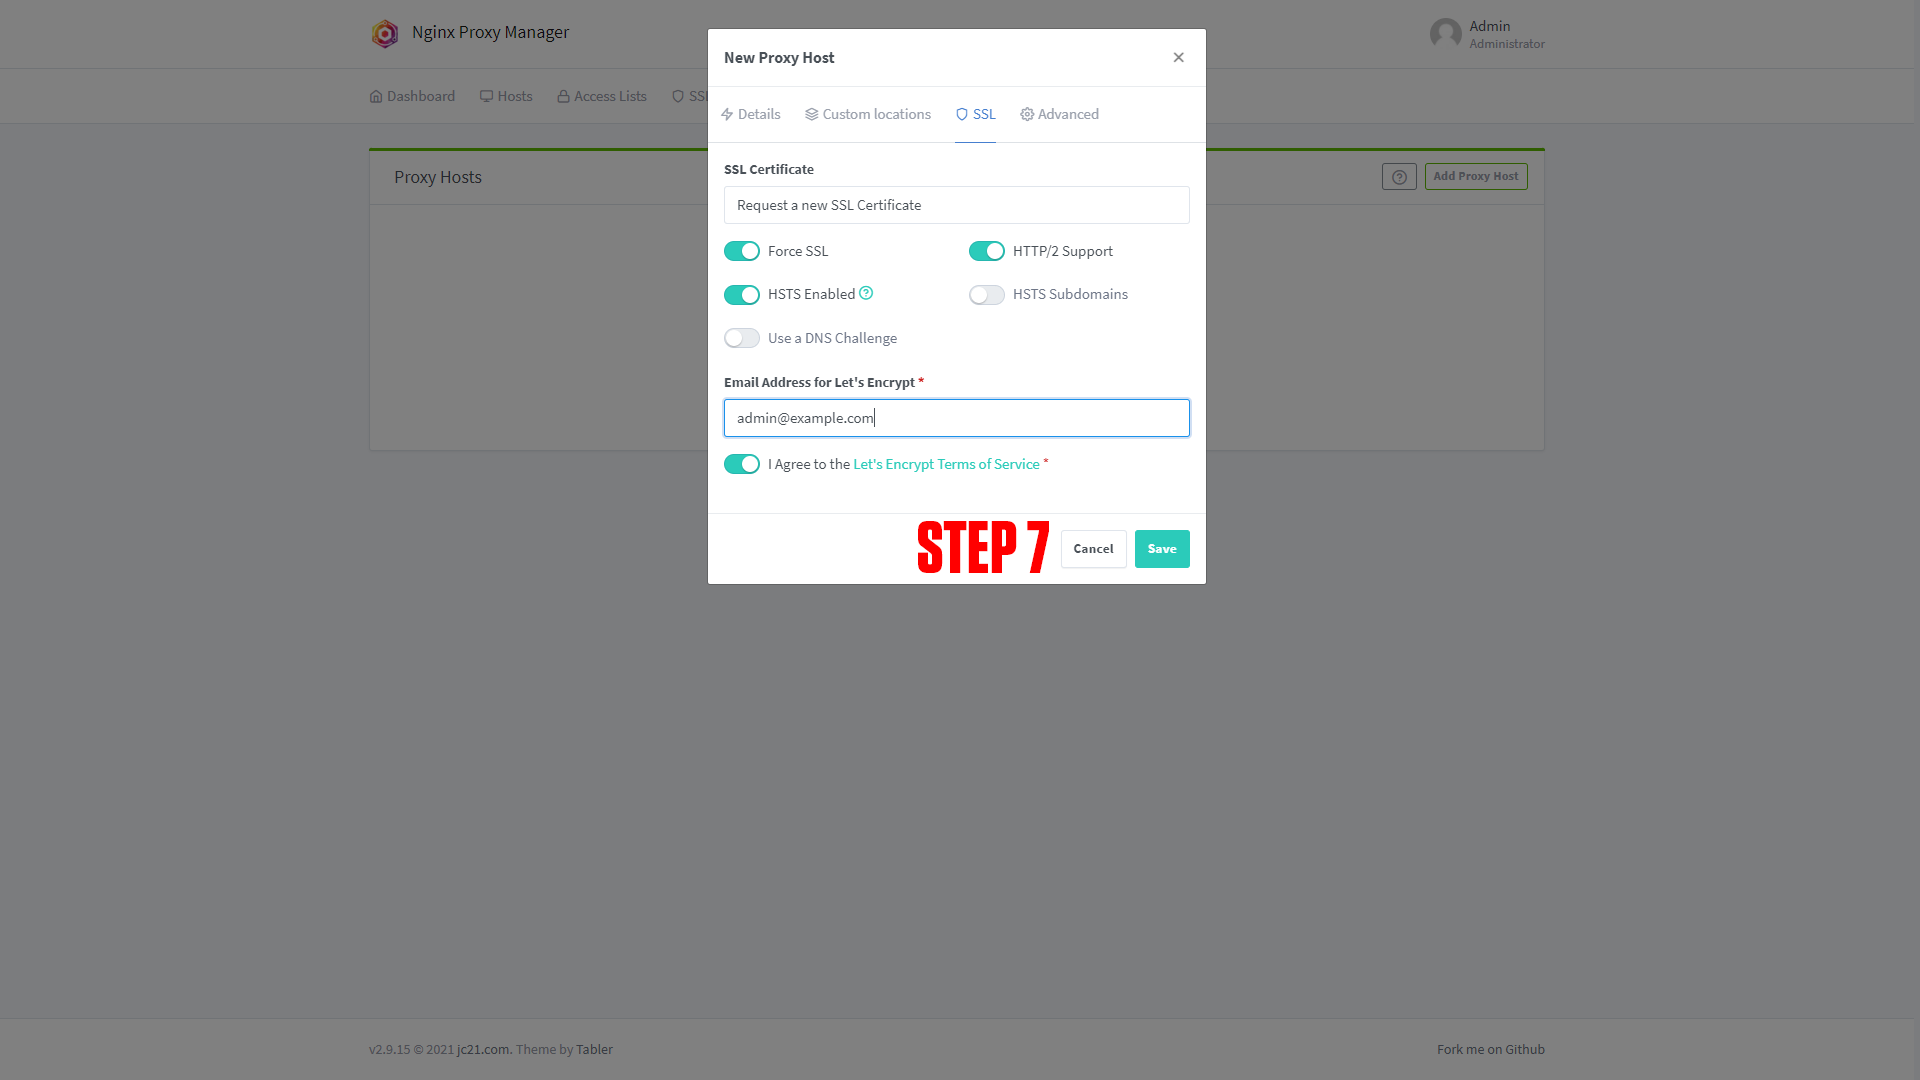
Step 7 (Optional): Enable SSL (we say this is optional, but you should always have an SSL cert if possible).
|
|
|
|
¶ Configuring Heimdall
After setting up your domain name it's time to finish configuring the app. Go to the URL you chose for your application. You should arrive at a screen like this!
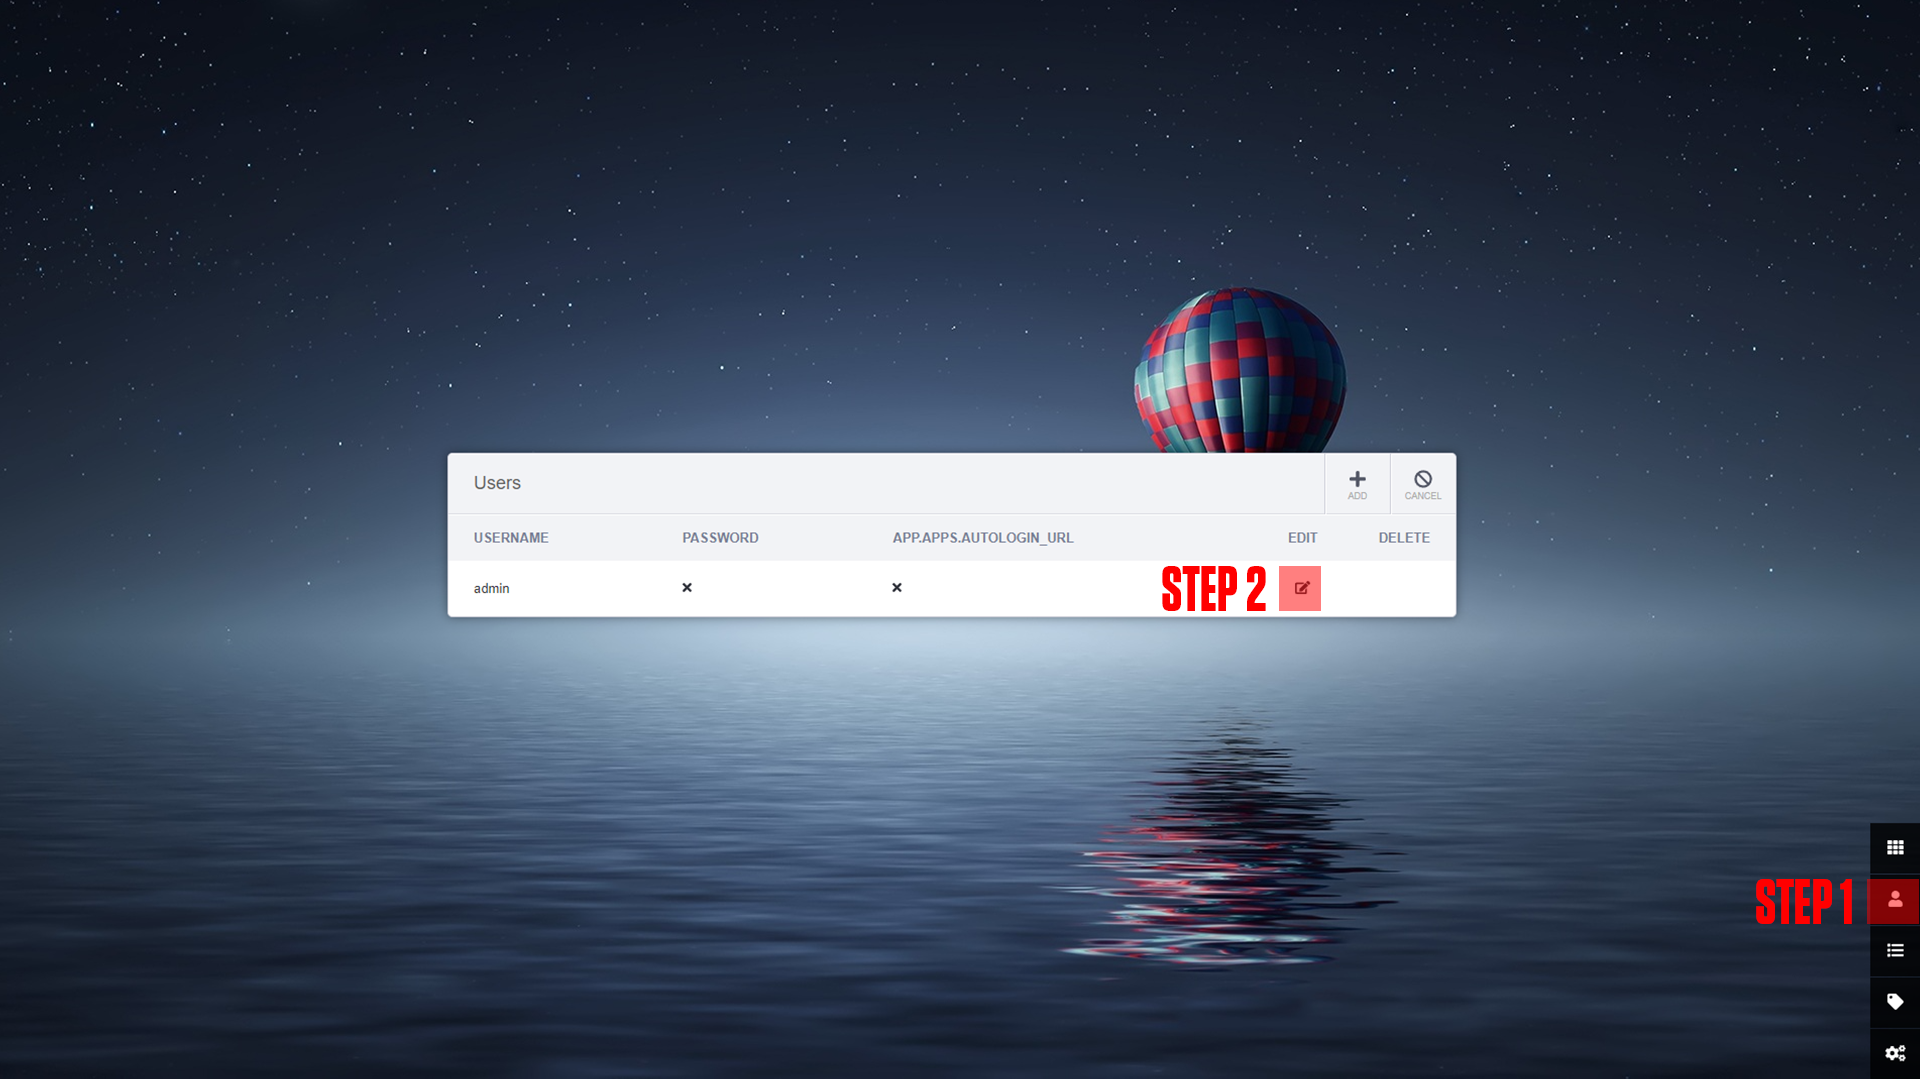
|
|
(If you do not arrive at a screen like this then something is wrong! Our premium members can open a support ticket Here!)
Step 1: Click the user icon.
Step 2: Edit your user.
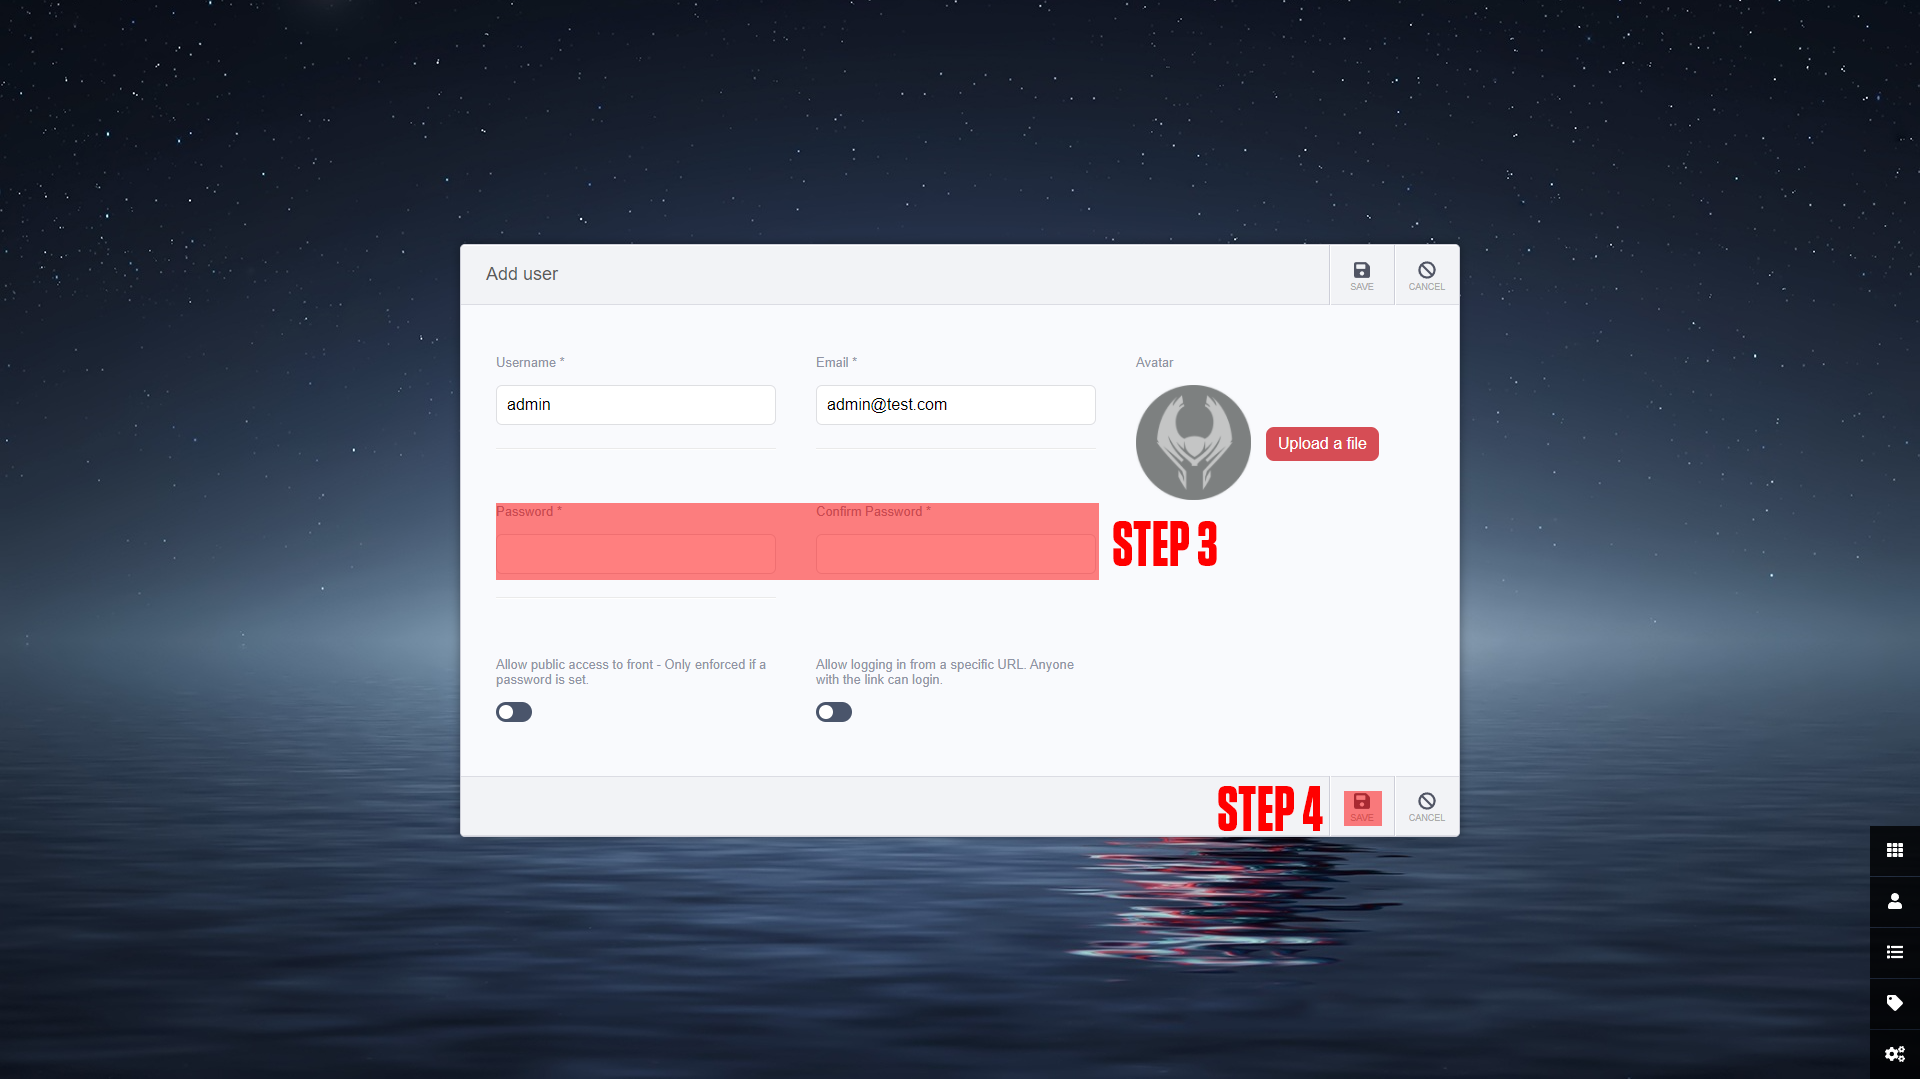
Step 3: Enter your user password.
Step 4: Save your user changes.
¶ Conclusion
Congrats! This is the basic setup for Heimdall, as mentioned at the beginning we have a more in-depth course available at TrueFreedomTech.com.