Listmonk is an open-source mailing list manager. It allows you to create opt-in forms and send email campaigns along with more features such as analytics tracking, email templating, multiple subscriber lists, and campaign scheduling. You can learn more about Listmonk from the links below:
¶ Introduction
Listmonk is exactly what we were looking for to manage our newsletters and company updates! A modern UI with embeddable opt-ins, analytics, and multiple subscriber lists. There are other options for newsletter management that may have a more robust feature set but Listmonk satisfies our needs and focuses on the main task at hand which is sending emails to your subscribers. Also, we are a huge fan of sleek modern design and don't want to look at old outdated UI's as much as possible! Listmonk is built using Nodejs, Go (programming language), Vue (javascript framework), Buefy (UI components for Vue), and connects to a Postgres database.
Listmonk is built on Go (golang), and Nodejs, which are two things we already know and use! Docker is written in Go, and since our migration from WordPress we have been using Nodejs to build our custom websites! If you can, you should use open-source applications made from things you care to learn about, or already know. It's worth mentioning that at the time of writing Go, and Nodejs (javascript) are among the most popular programming languages.
We will be running Listmonk using Docker, Docker-compose, Portainer, and Nginx-Proxy-Manager. We have an advanced course on how to do this at TrueFreedomTech.com covering multiple configurations, separating data from compute, deploying with git, and more.
¶ Overview
We are going to assume you already have a working server with Docker, Portainer, and Nginx Proxy Manager running. We will go over the custom configuration file, the docker-compose for the stack, and configuring Nginx-Proxy-Manager.
¶ Docker-Config
Open up Portainer and log in. If you are not familiar with Portainer here are the official docs:
We will be adding 1 custom configuration to our stack. The source code is linked below and can be found below the steps.
Add this file in Portainer:
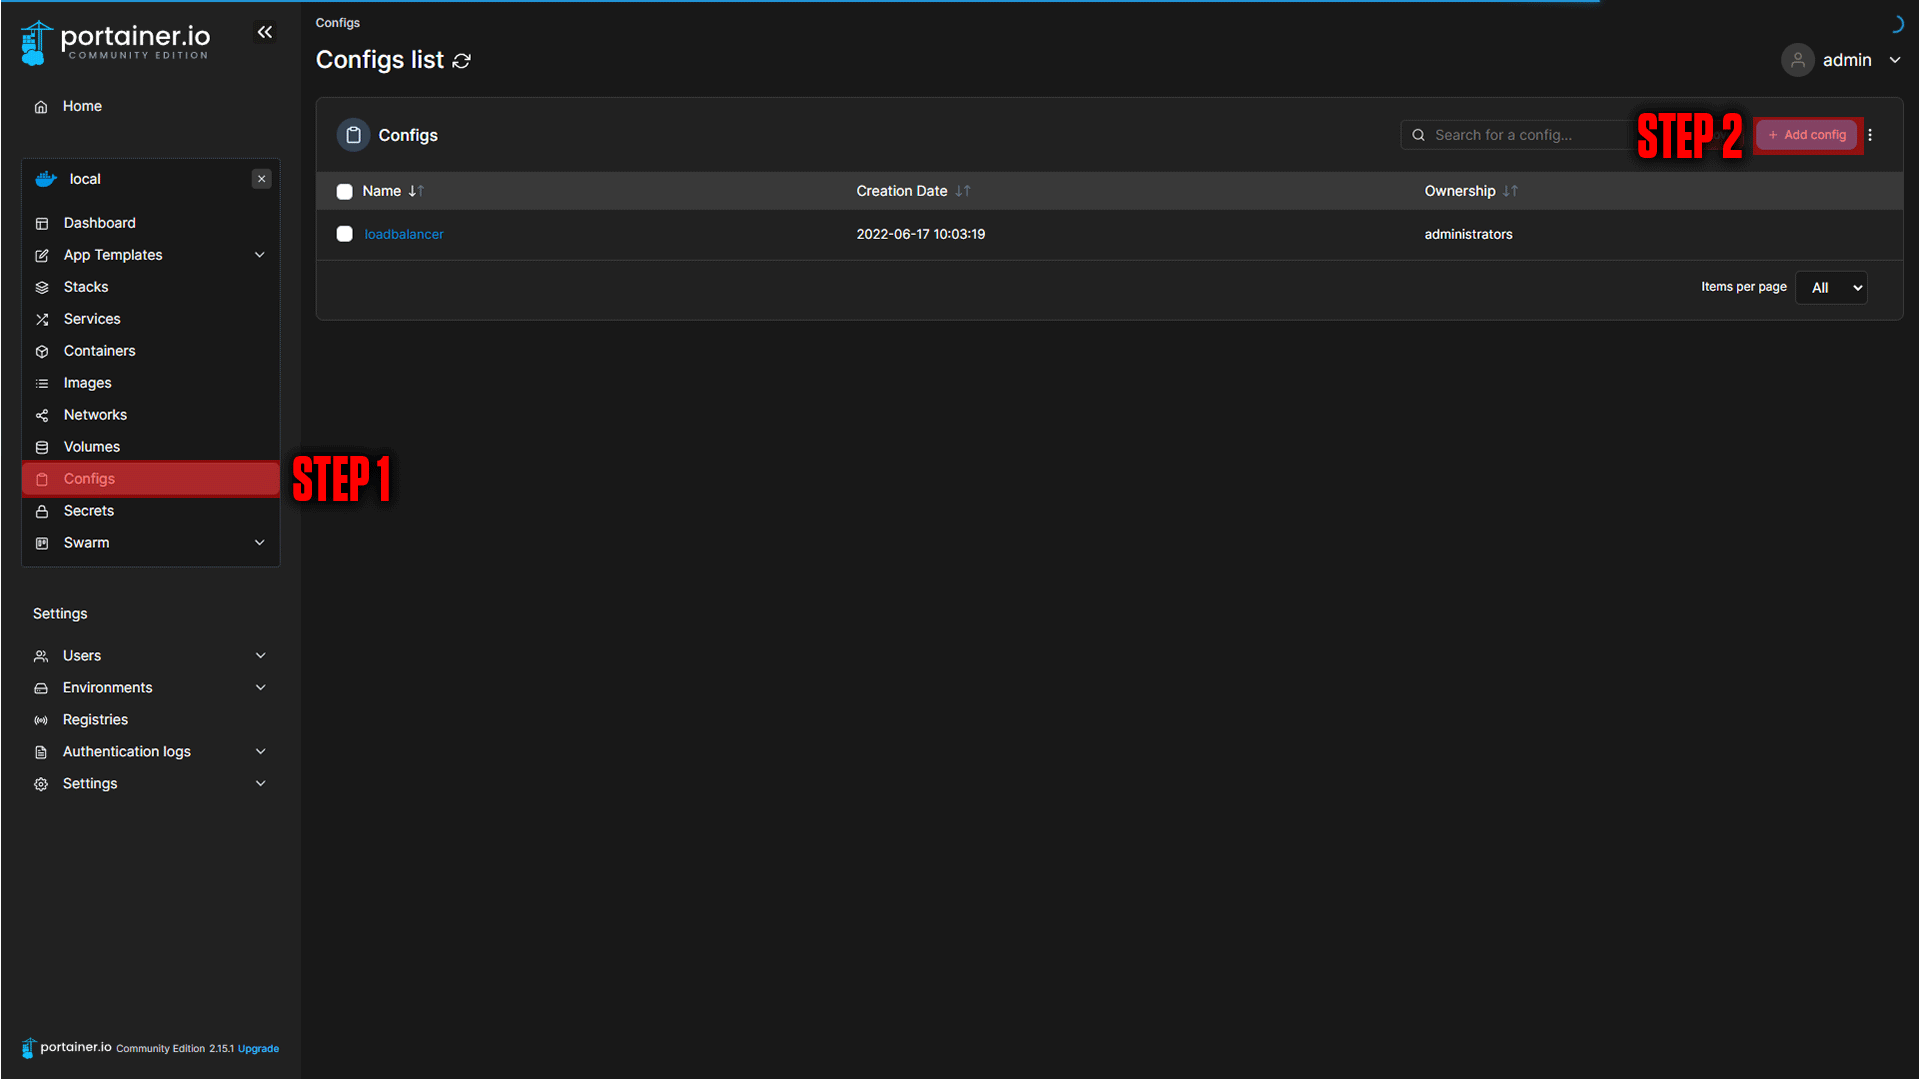
Step 1: Go to Configs.
Step 2: Click Add Config.
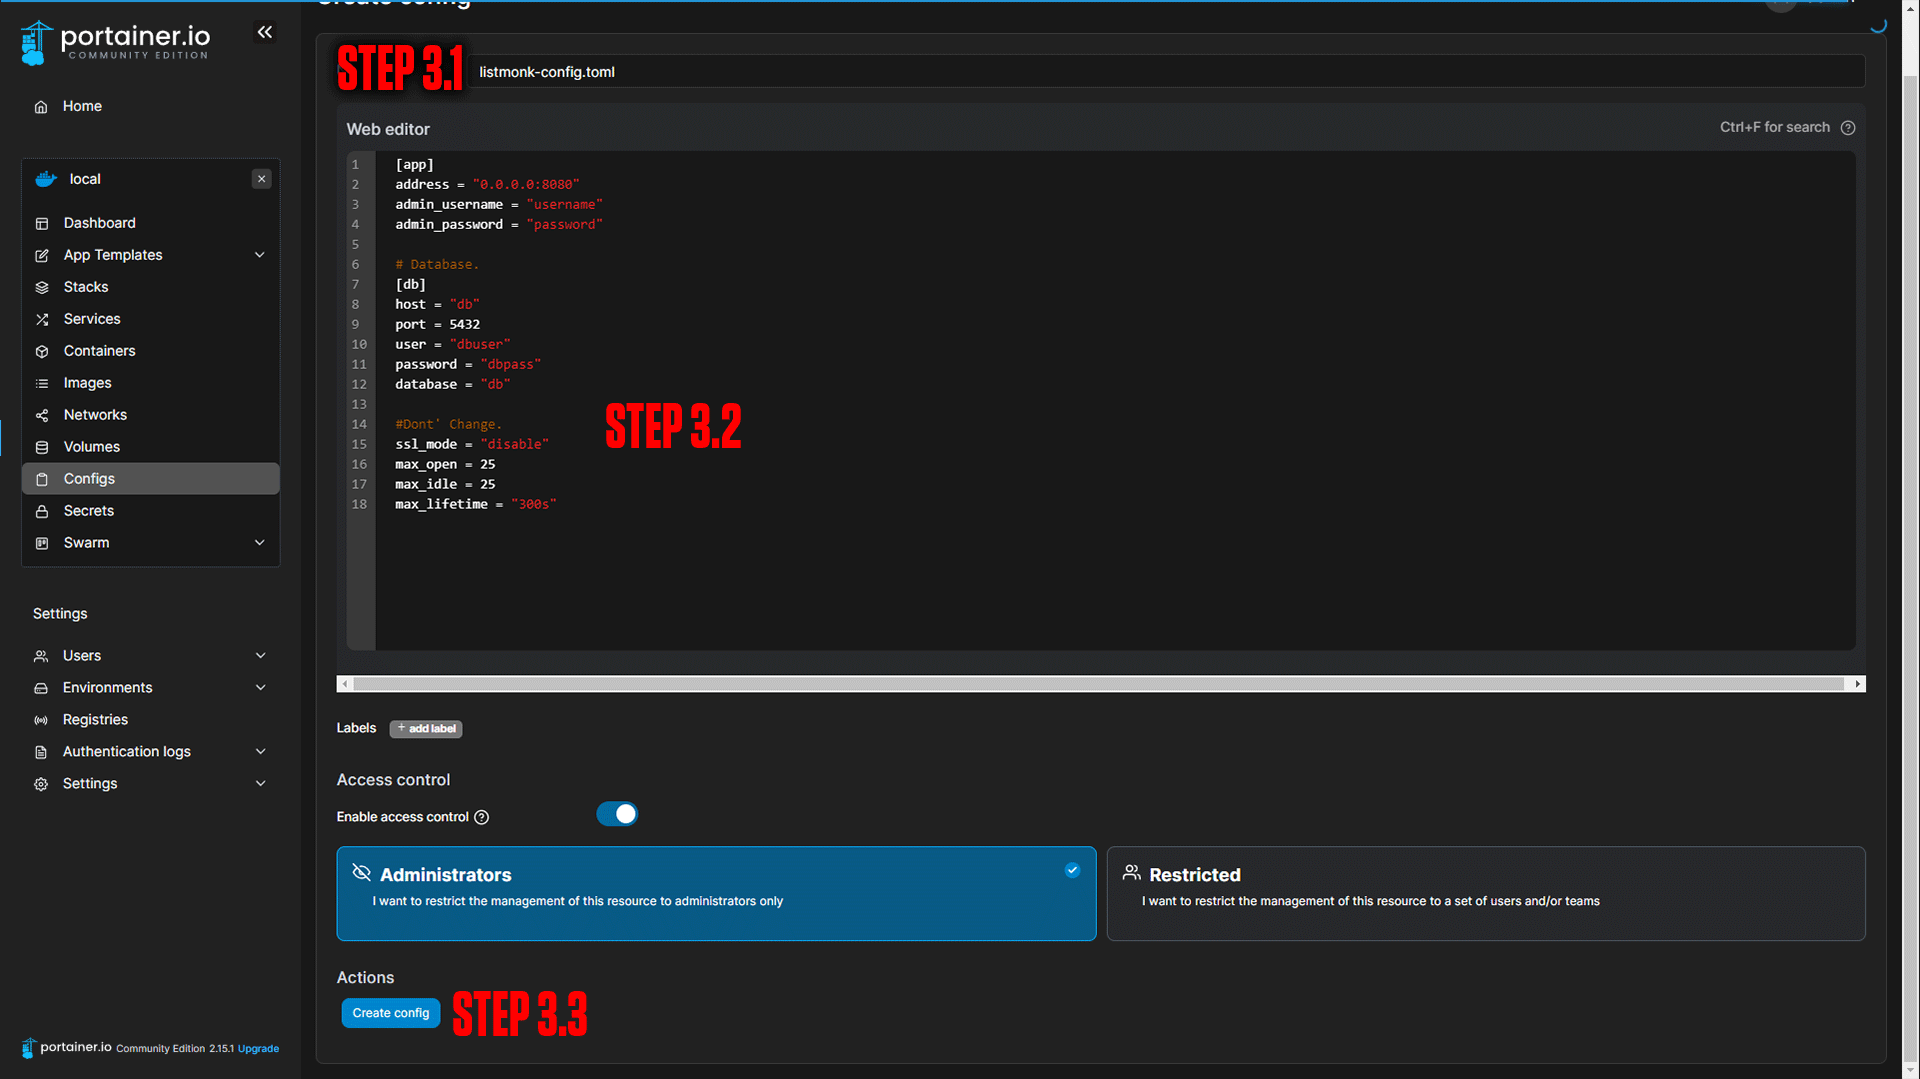
Step 3: Paste the name of the file and code. (Make sure to change anything surrounded by {} (ex. {login_username}) at the bottom of the config.)
|
|
[app]
address = "0.0.0.0:8080"
admin_username = "{login_username}"
admin_password = "{login_password}"

# Database.
[db]
host = "db"
port = 5432
user = "{listmonk-dbuser}"
password = "{database_password}"
database = "{listmonk-db}"

#Dont' Change.
ssl_mode = "disable"
max_open = 25
max_idle = 25
max_lifetime = "300s"
¶ Docker-Compose
The first step is our Docker-Compose. We will be deploying this with Portainer.
If you are not familiar with Portainer or Docker-Compose here are the official docs:
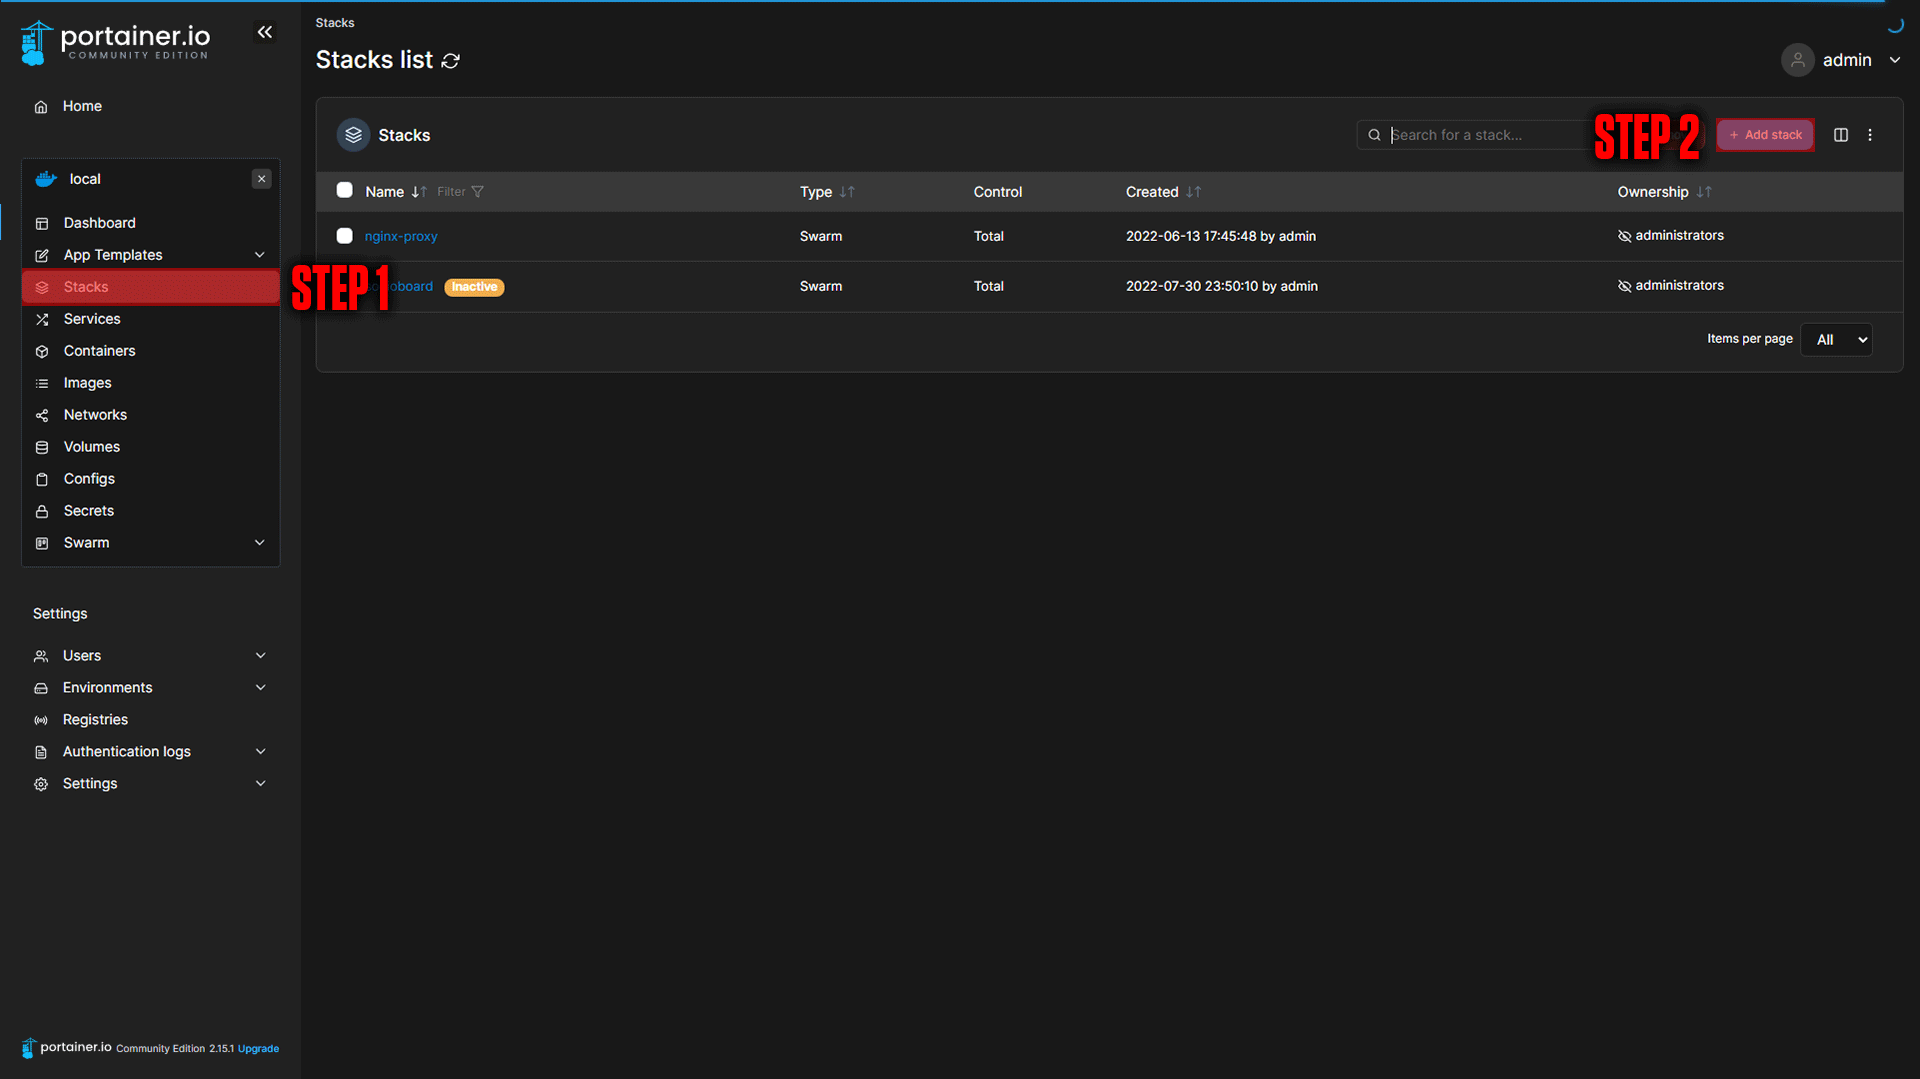
Step 1: Go to Stacks.
Step 2: Click Add Stack.
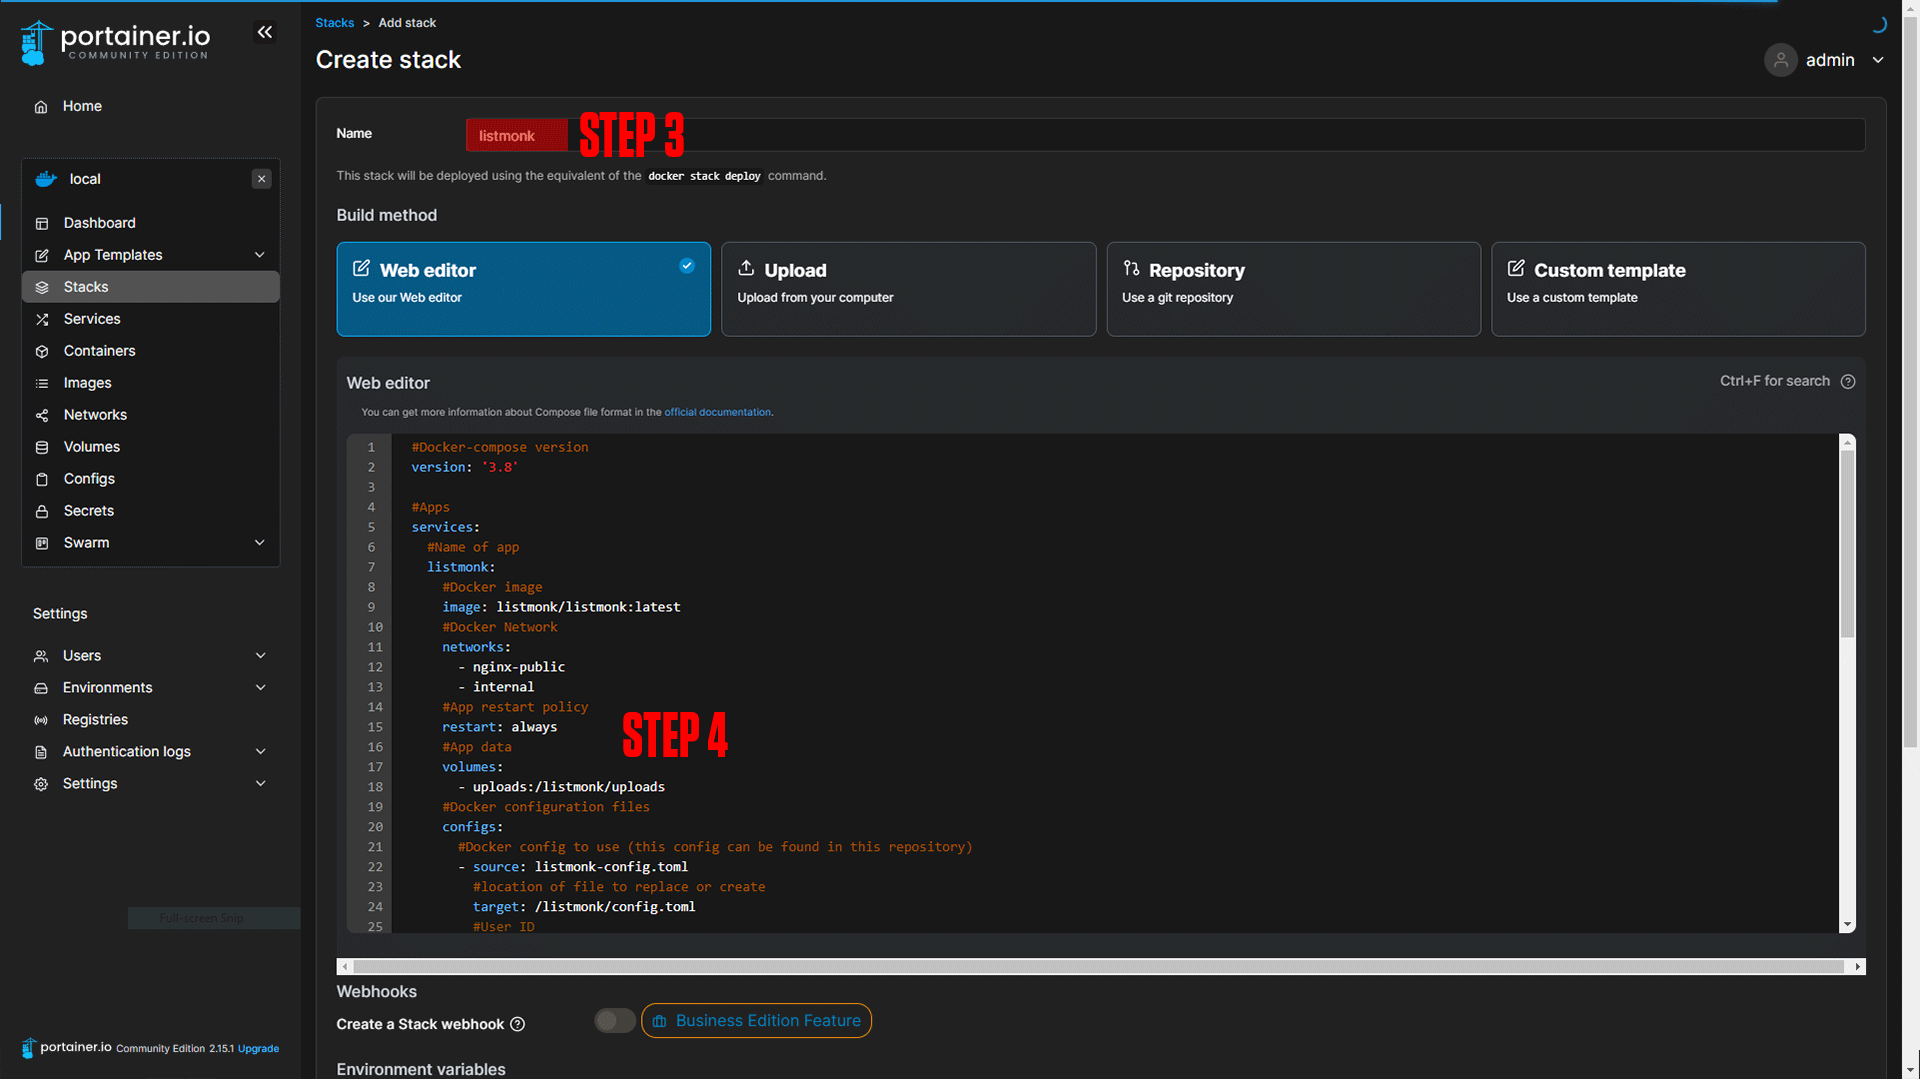
Step 3: Name your stack (Ex. listmonk).
Step 4: Paste in the Docker-Compose below:
|
|

|
#Docker-compose version
version: '3.8'

#Apps
services:
  #Name of app
  listmonk:
    #Docker image
    image: listmonk/listmonk:latest
    #Docker Network
    networks:
      - nginx-public
      - internal
    #App restart policy
    restart: always
    #App data
    volumes:
      - uploads:/listmonk/uploads
    #Docker configuration files
    configs:
      #Docker config to use (this config can be found in this repository)
      - source: listmonk-config.toml
        #location of file to replace or create
        target: /listmonk/config.toml
        #User ID
        uid: '0'
        #Group ID
        gid: '0'
        #permissions for file (Learn more here: http://permissions-calculator.org/)
        mode: 0644
    depends_on:
      - db
    command: ${COMMAND}

  #Name of app
  db:
    #Docker image
    image: postgres:14.5
    #Docker Network
    networks:
     - internal
    #Environmental variables
    environment:
      POSTGRES_ROOT_PASSWORD: dbrootpass
      POSTGRES_DB: db
      POSTGRES_USER: dbuser
      POSTGRES_PASSWORD: dbpass
    #App data
    volumes:
      - dbdata:/var/lib/postgresql/data

volumes:
  uploads:
  dbdata:
configs:
  listmonk-config.toml:
  	external: true
networks:
  nginx-public:
    external: true
  internal:
external: falseStep 5: Paste in the environmental variable.
COMMAND=./listmonk --install --yes
Step 6: Deploy the stack.
¶ Installing Listmonk
We are using the COMMAND environmental variable to run 3 different commands for our container. You will run them as followed:
- ./listmonk --install --yes
- ./listmonk --upgrade --yes
- ./listmonk
Be sure to monitor the logs of the container and make sure the commands have finished running before moving on to the next one.
This is a one-time process to get Postgres and Listmonk working and will not be needed again (possibly the update command but this is untested and has not been needed so far)
¶ Nginx-Proxy-Manager
After running the final command we will configure our domain. If you followed our Nginx-Proxy-Manager stack setup you should be able to copy everything we do step by step.
¶ Listmonk Domain Setup
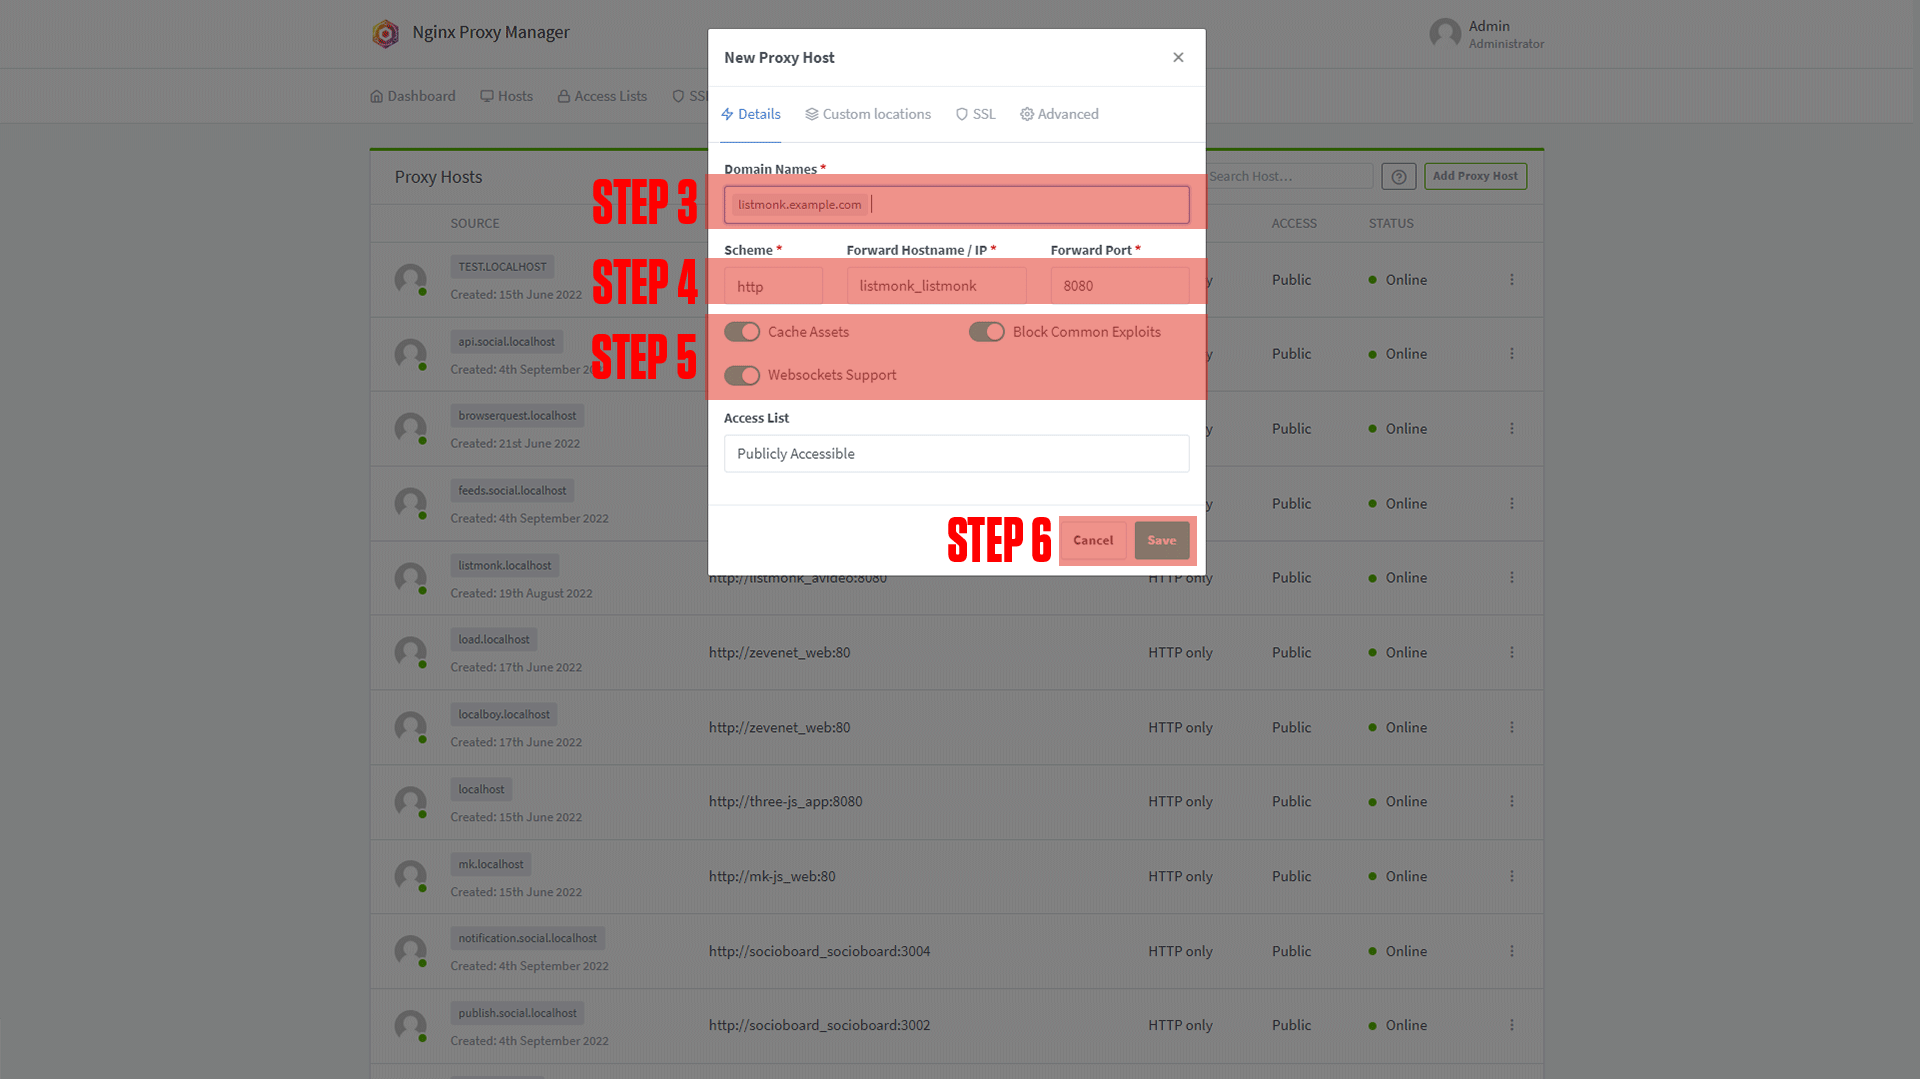
Step 1: Copy the Nextcloud service name.
This should be listmonk_listmonk if you did not change the names of apps.
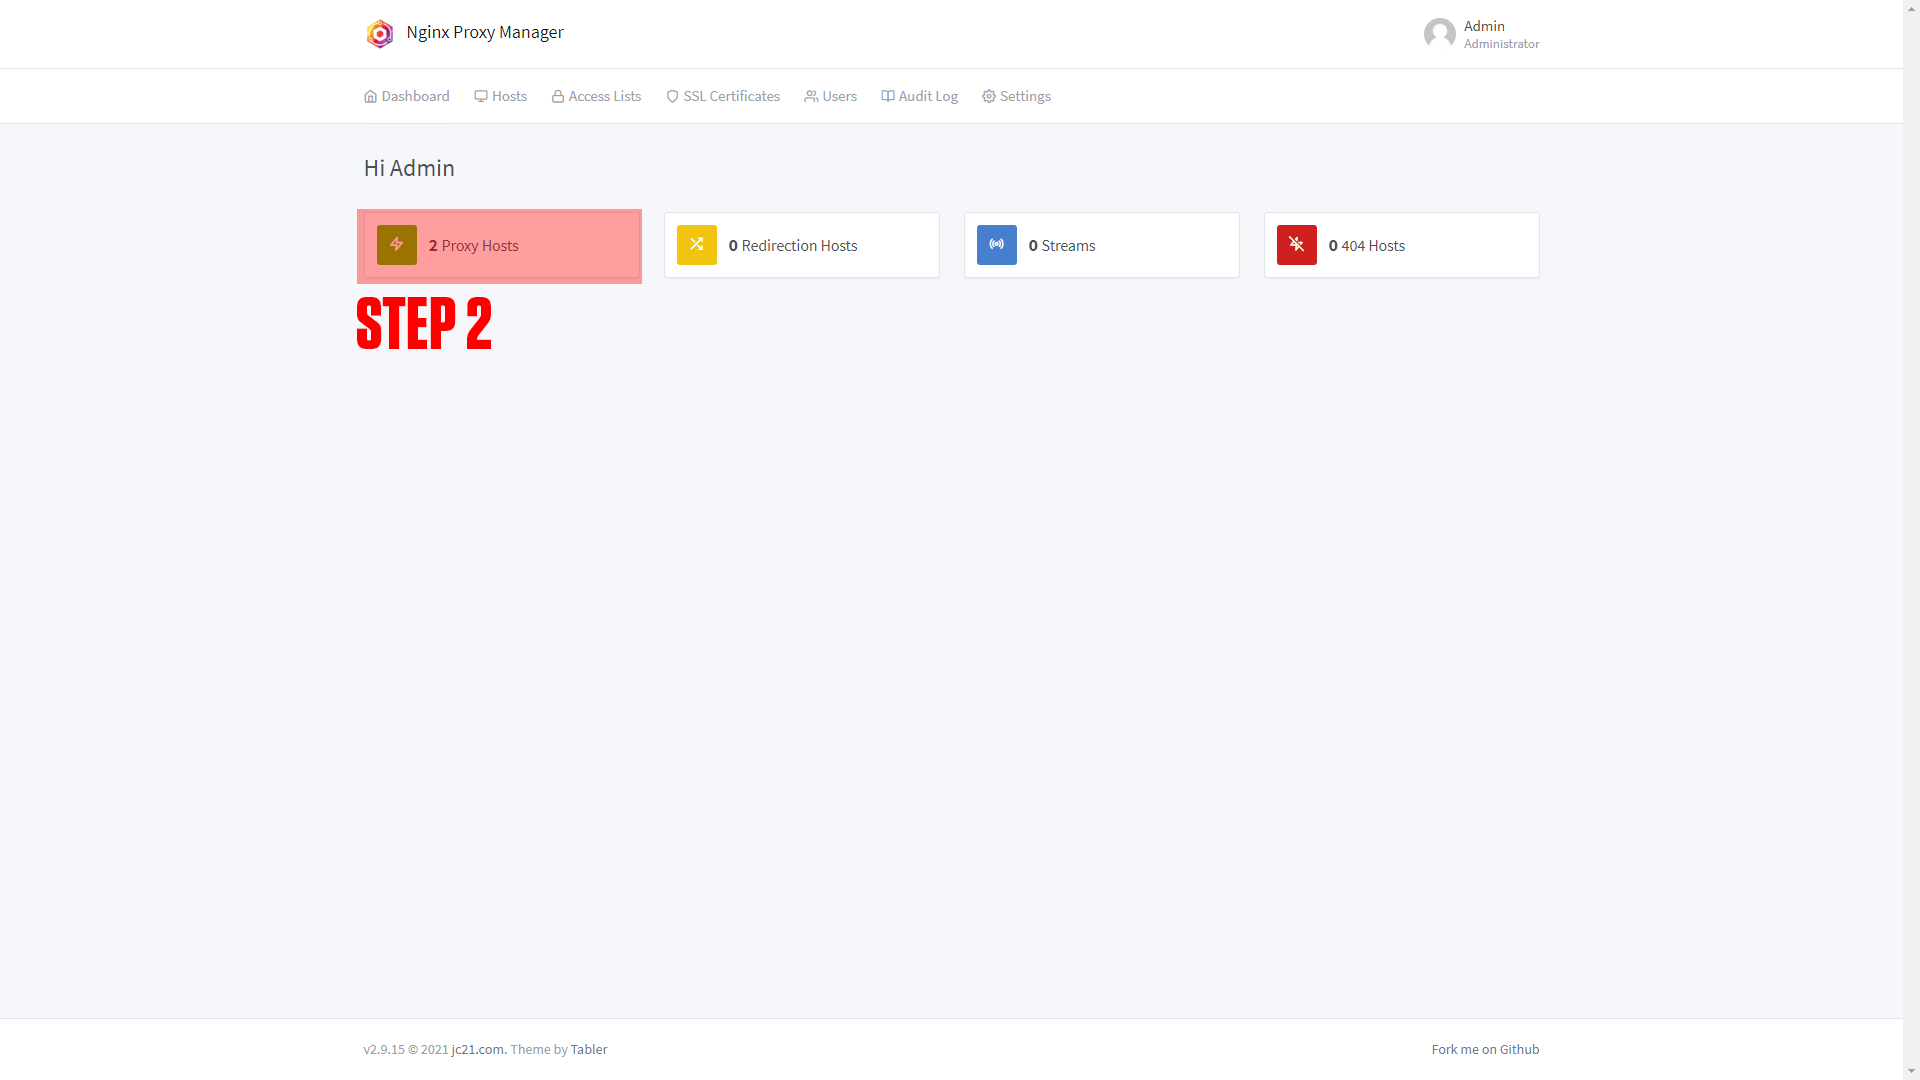
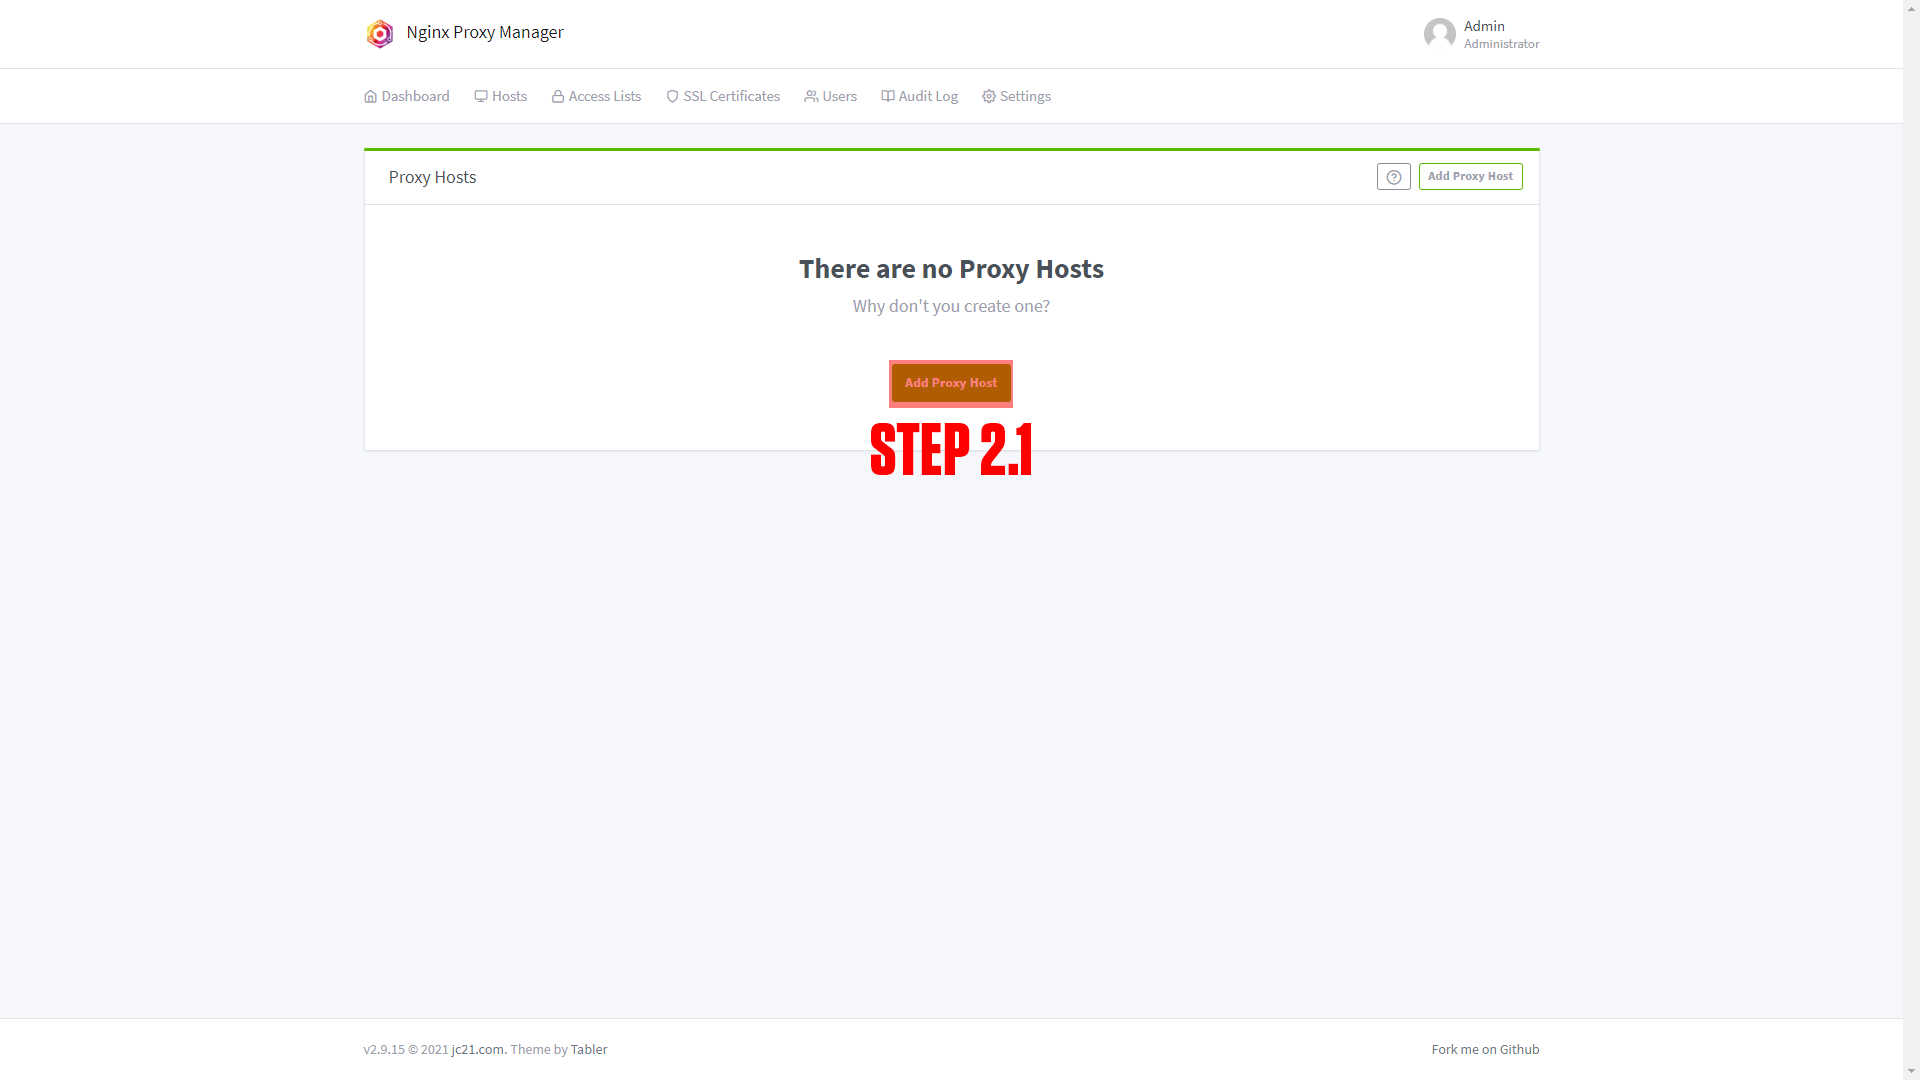
Step 2: Log in to Nginx-Proxy-Manager and create a new proxy host.
Step 3: Enter your Domain name (Ex. listmonk.example.com)
Step 4: Add the service name to the Forward Hostname / IP at port 8080.
Step 5: Enable Cache Assets, Block Common Exploits, and Websockets Support.
Step 6: Click Save.
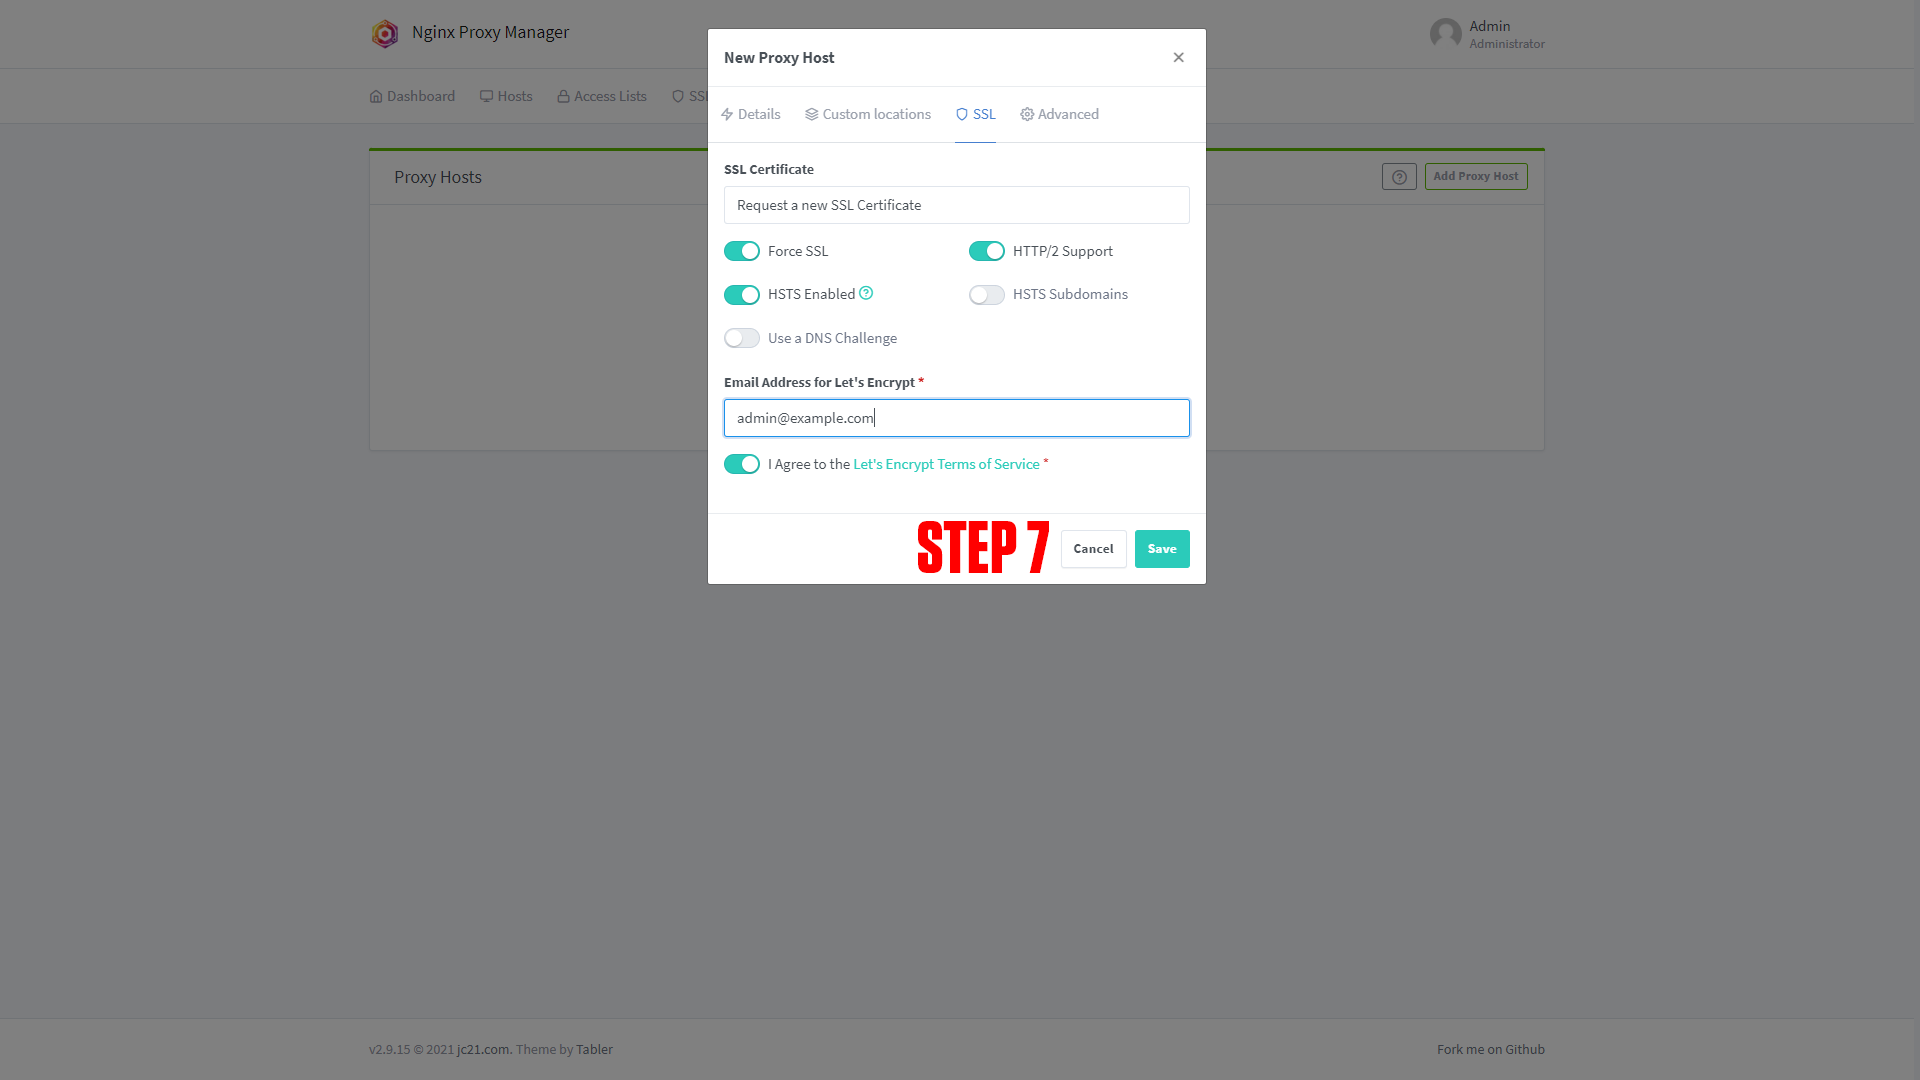
Step 7 (Optional): Enable SSL (we say this is optional, but you should always have an SSL cert if possible).
|
|
|
|
¶ Configuring Listmonk
After setting up your domain name it's time to finish configuring the app. Go to the URL you chose for your application. You should arrive at a screen like this!
|
|
(If you do not arrive at a screen like this then something is wrong! Our premium members can open a support ticket Here!)
Login with the information from listmonk-config.toml.
¶ Conclusion
This is the basic setup for Listmonk, as mentioned at the beginning we have a more in-depth course available at TrueFreedomTech.com.