¶ n8n: Workflow Automation
n8n is an open-source workflow automation tool used to integrate tons of apps together easily. it's a perfect tool to sync data between database types, create posts on WordPress websites, copy data to a google sheet, and more! You can learn more about n8n using the links below:
¶ Introduction
n8n is incredibly useful for making complex integrations very easy to accomplish. if you are a web dev running many services that need to talk to each other, n8n may be a perfect solution. there is a ton of functionality in this service, we have found example workflows for sending orders to shipment processing, sending emails to telegram, sending telegram commands to Spotify, and a tweet generator powered by OpenAI. this doesn't even scratch the surface of n8n's possibilities. We won't be showing you any workflows here, but you can find example workflows on n8n.io that will help you understand what is possible with n8n.
We are going to show you how to get a self-hosted n8n container running using Docker, Docker-Compose, Portainer, and Nginx Proxy Manager. We have an advanced course on how to do this at TrueFreedomTech.com covering multiple configurations and separating data from compute, deploying with git, and more.
¶ Overview
We are going to assume you already have a working server with Docker, Portainer, and Nginx Proxy Manager running. We will go over the compose for the stack and configuring Nginx-Proxy-Manager. We are not using our own images for this stack so please consult the Docker hub and GitHub links for more information regarding the Docker image and source code.
This is strictly how to get the app running. Once again, we cover how to do this at TrueFreedomTech.com in much more detail! This should be good enough to get beginners running, and experts should be able to adapt this to their own configuration with relative ease.
¶ Docker-Compose
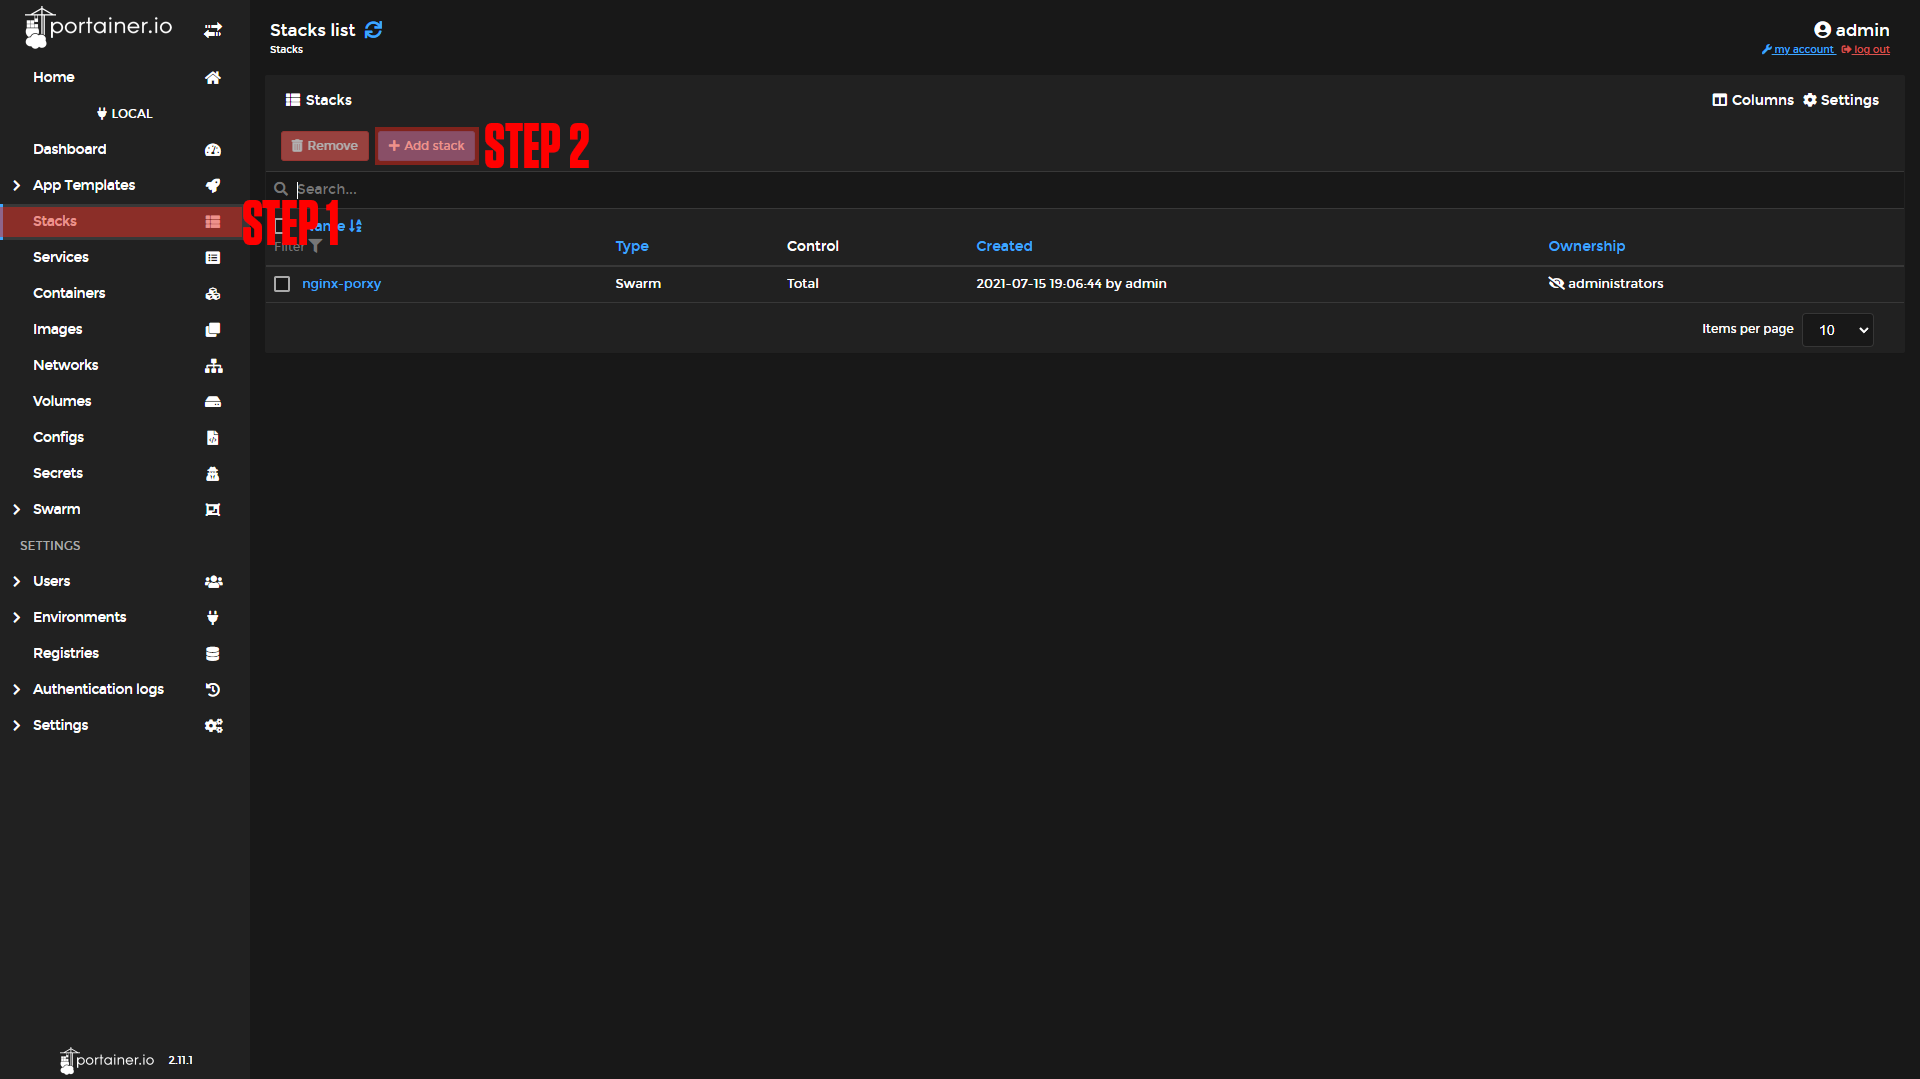
Step 1: Go to Stacks.
Step 2: Click Add Stack.
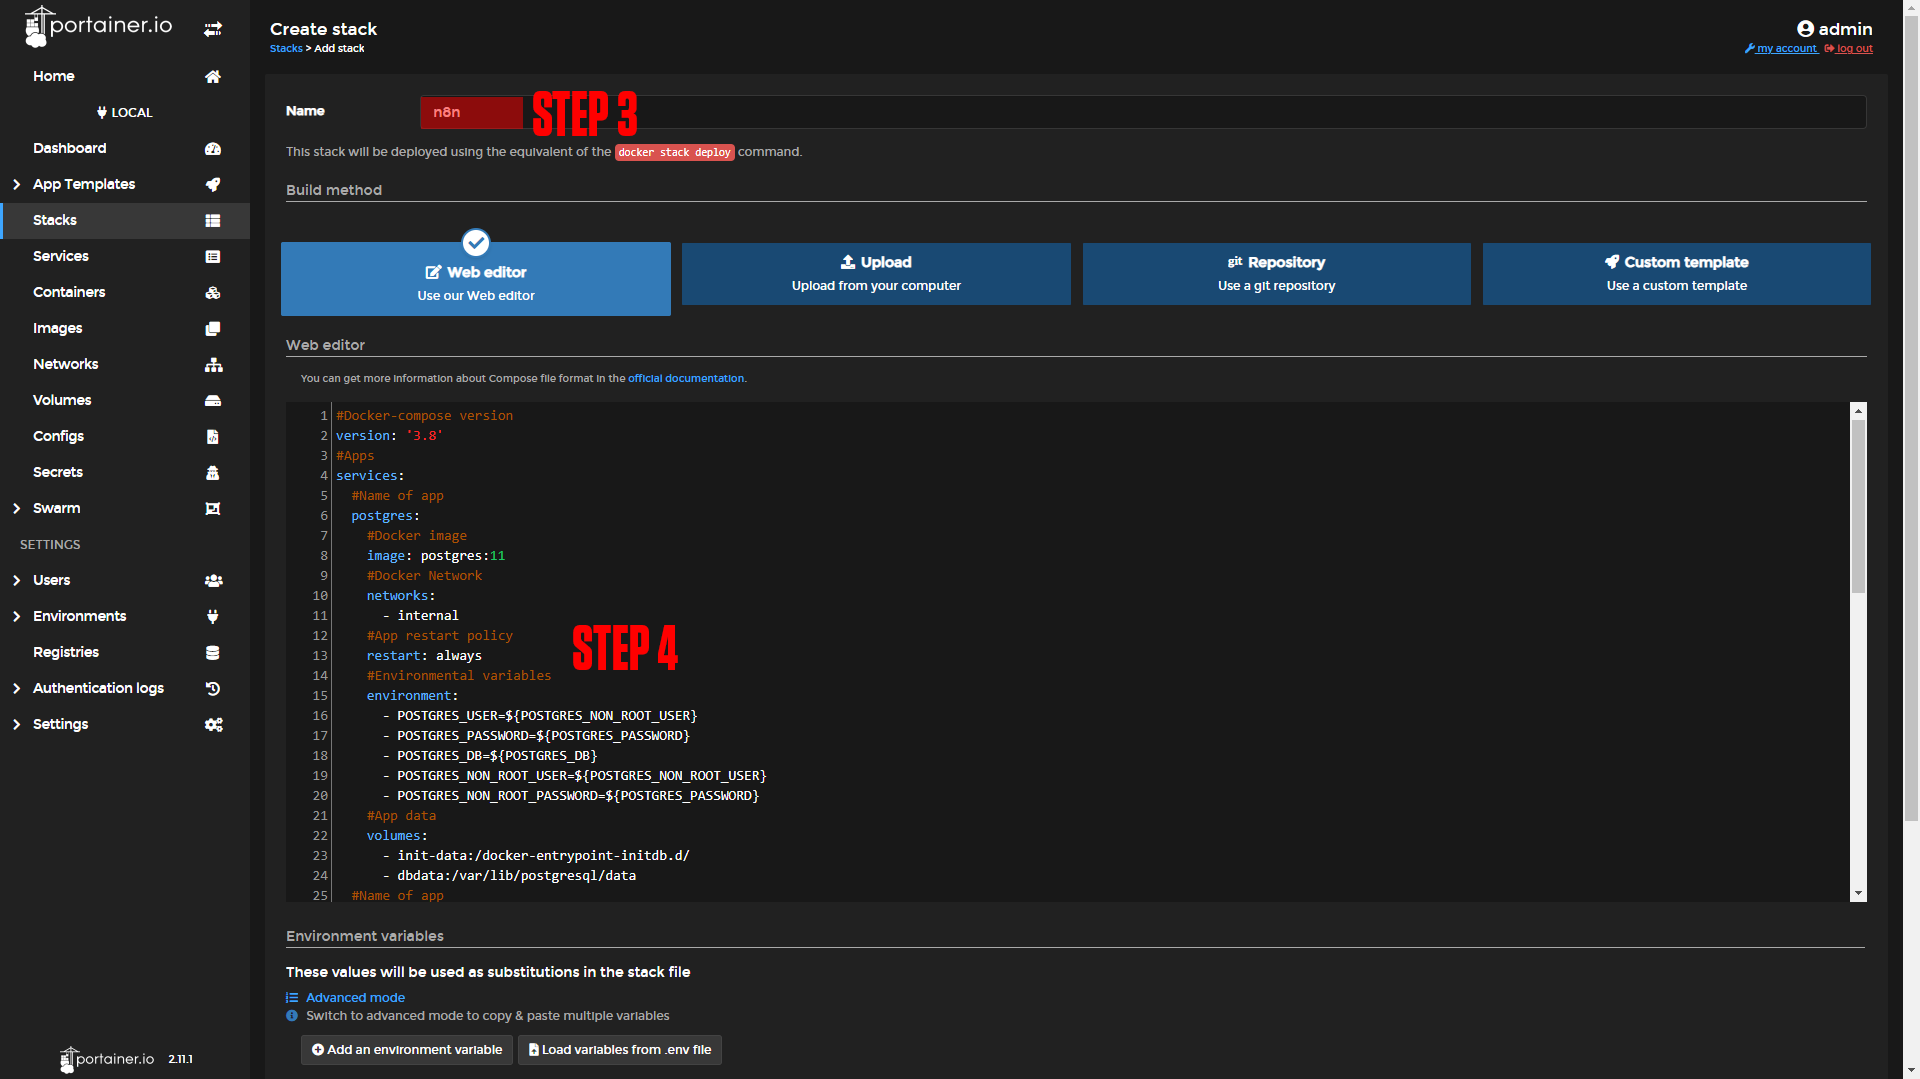
Step 3: Name your stack (Ex. n8n).
Step 4: Paste in the contents below:
|
|
#Docker-compose version
version: '3.8'
#Apps
services:
  #Name of app
  postgres:
    #Docker image
    image: postgres:11
    #Docker Network
    networks:
      - internal
    #App restart policy
    restart: always
    #Environmental variables
    environment:
      - POSTGRES_USER=${POSTGRES_NON_ROOT_USER}
      - POSTGRES_PASSWORD=${POSTGRES_PASSWORD}
      - POSTGRES_DB=${POSTGRES_DB}
      - POSTGRES_NON_ROOT_USER=${POSTGRES_NON_ROOT_USER}
      - POSTGRES_NON_ROOT_PASSWORD=${POSTGRES_PASSWORD}
    #App data
    volumes:
      - init-data:/docker-entrypoint-initdb.d/
      - dbdata:/var/lib/postgresql/data
  #Name of app
  n8n:
    #Docker image
    image: n8nio/n8n
    #Docker Network
    networks:
      - nginx-public
      - internal
    #Ports to expose
#    ports:
#      - 5678:5678
    #App restart policy
    restart: always
    #Environmental variables
    environment:
      - DB_TYPE=postgresdb
      - DB_POSTGRESDB_HOST=postgres
      - DB_POSTGRESDB_PORT=5432
      - DB_POSTGRESDB_DATABASE=${POSTGRES_DB}
      - DB_POSTGRESDB_USER=${POSTGRES_NON_ROOT_USER}
      - DB_POSTGRESDB_PASSWORD=${POSTGRES_PASSWORD}
      - N8N_BASIC_AUTH_ACTIVE=true
      - N8N_BASIC_AUTH_USER=USER
      - N8N_BASIC_AUTH_PASSWORD=PASS
    #App data
    volumes:
      - n8n:/home/node/
    # Wait 5 seconds to start n8n to make sure that PostgreSQL is ready
    # when n8n tries to connect to it
    links:
      - postgres
    command: /bin/sh -c "sleep 5; n8n start"

networks:
  nginx-public:
    external: true
  internal:
    external: false
volumes:
  init-data:
  dbdata:
  n8n:
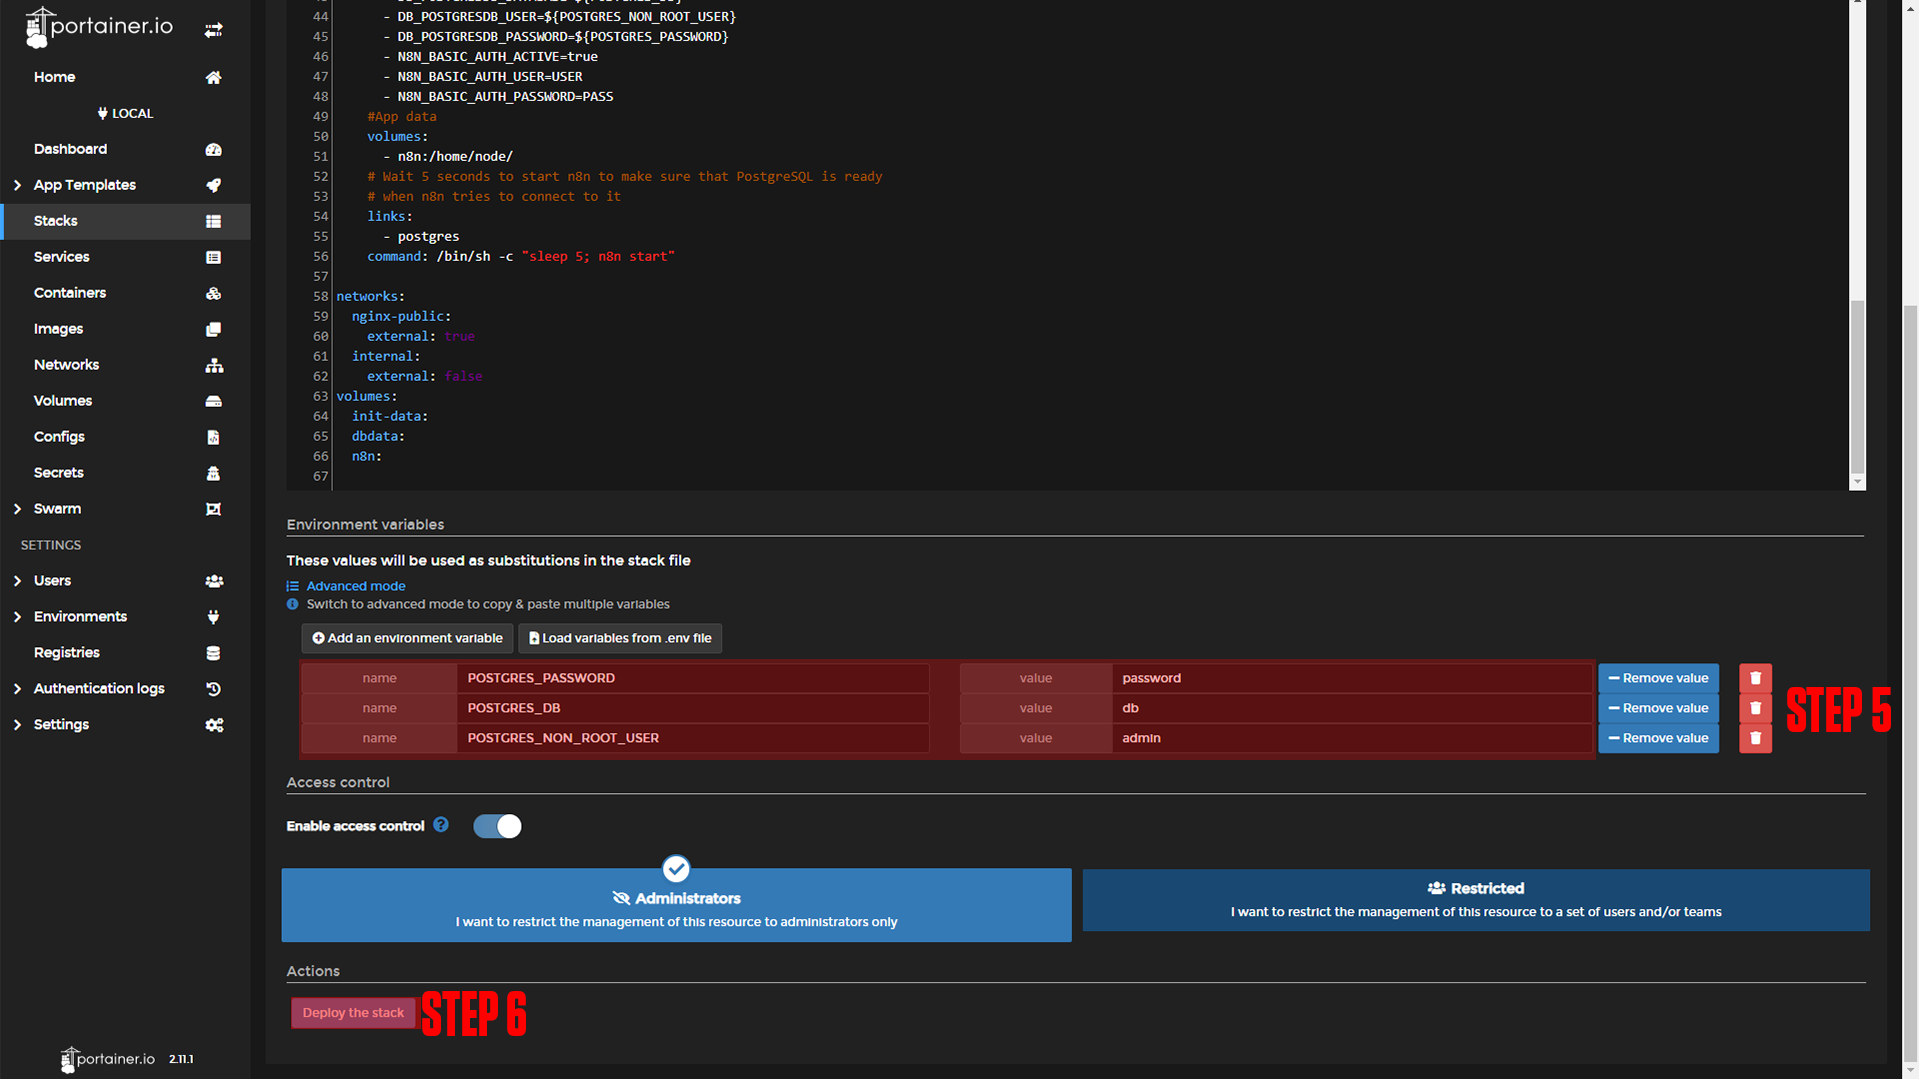
Step 5: Add the environmental variables:
POSTGRES_PASSWORD =
POSTGRES_DB = db
POSTGRES_NON_ROOT_USER = adminStep 6: Press Deploy the Stack.
¶ Nginx-Proxy-Manager
Before we configure our apps, we will set up our domains using Nginx-Proxy-Manager. If you followed our Nginx-Proxy-Manager stack setup you should be able to copy everything we do step by step.
¶ n8n Domain Setup
Step 1: Copy the n8n service name.
This should be n8n_n8n if you did not change the names of apps.
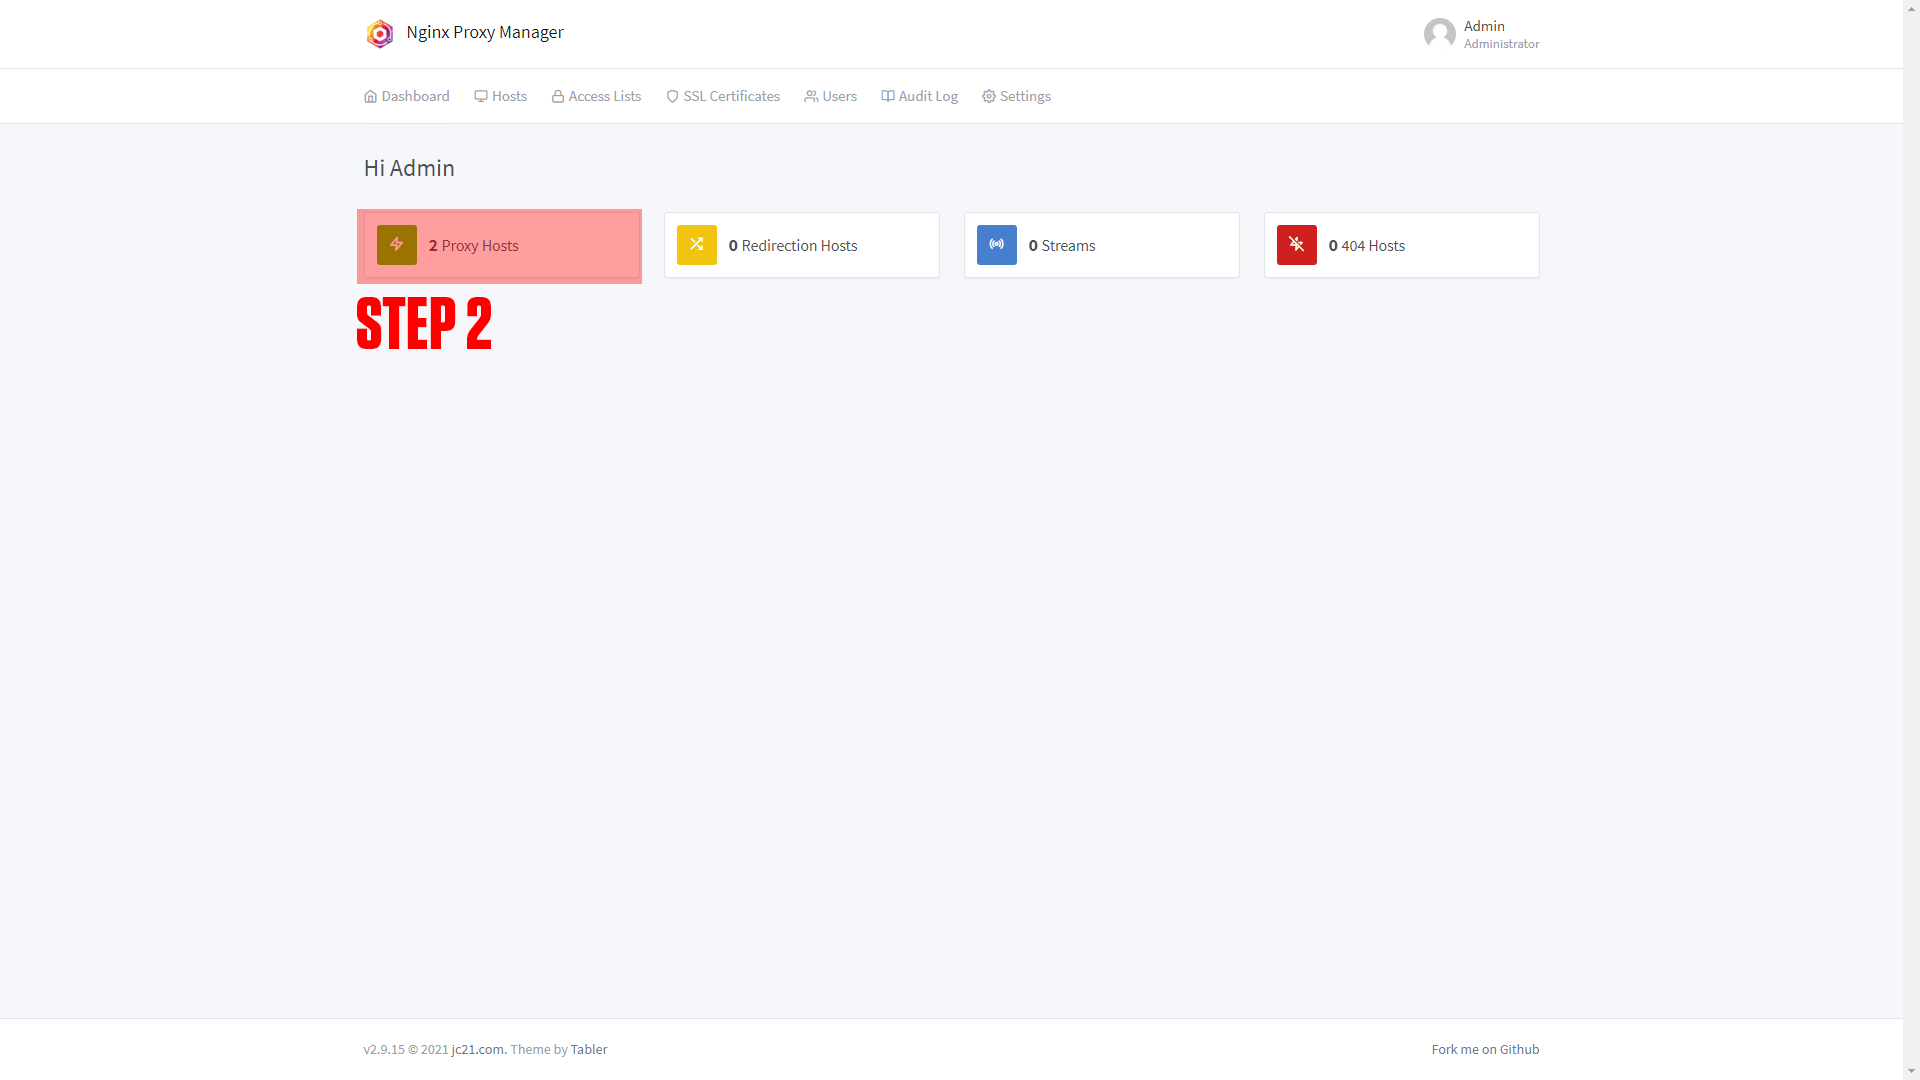
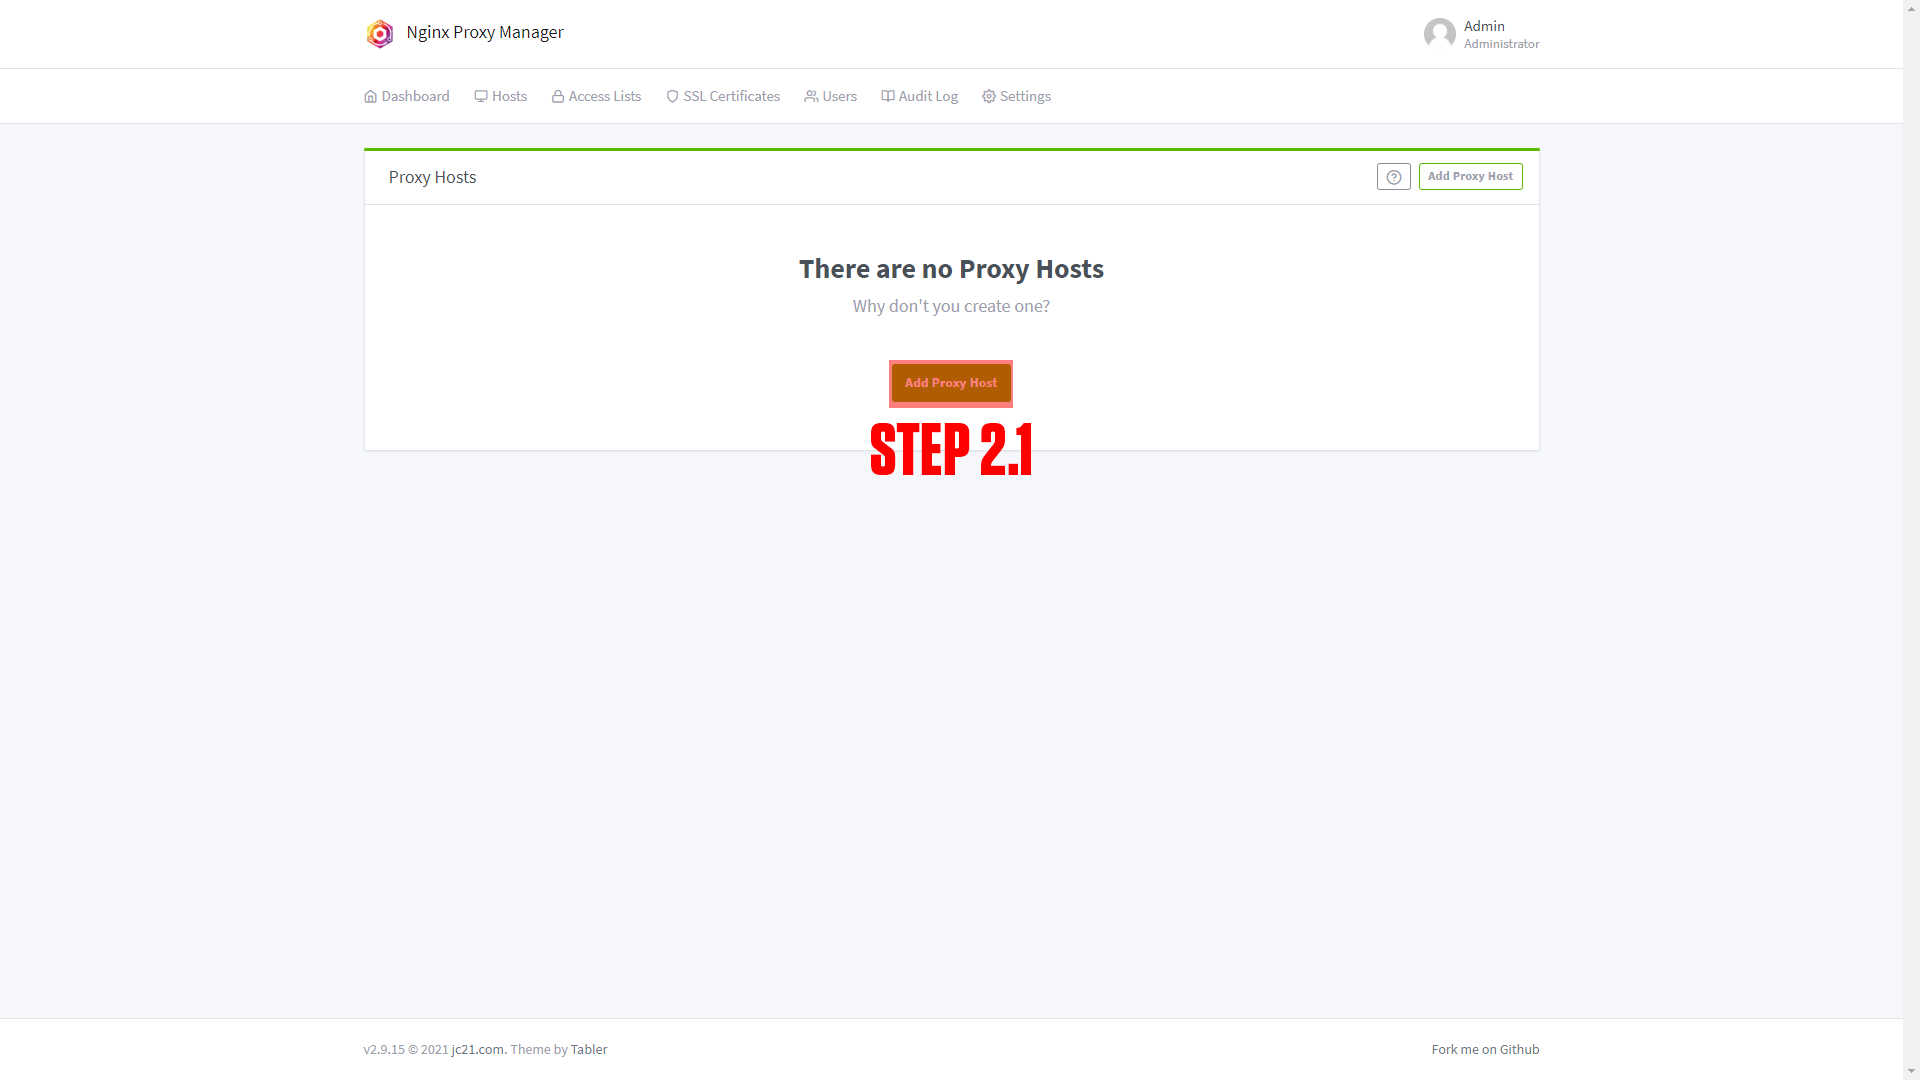
Step 2: Log in to Nginx-Proxy-Manager and create a new proxy host.
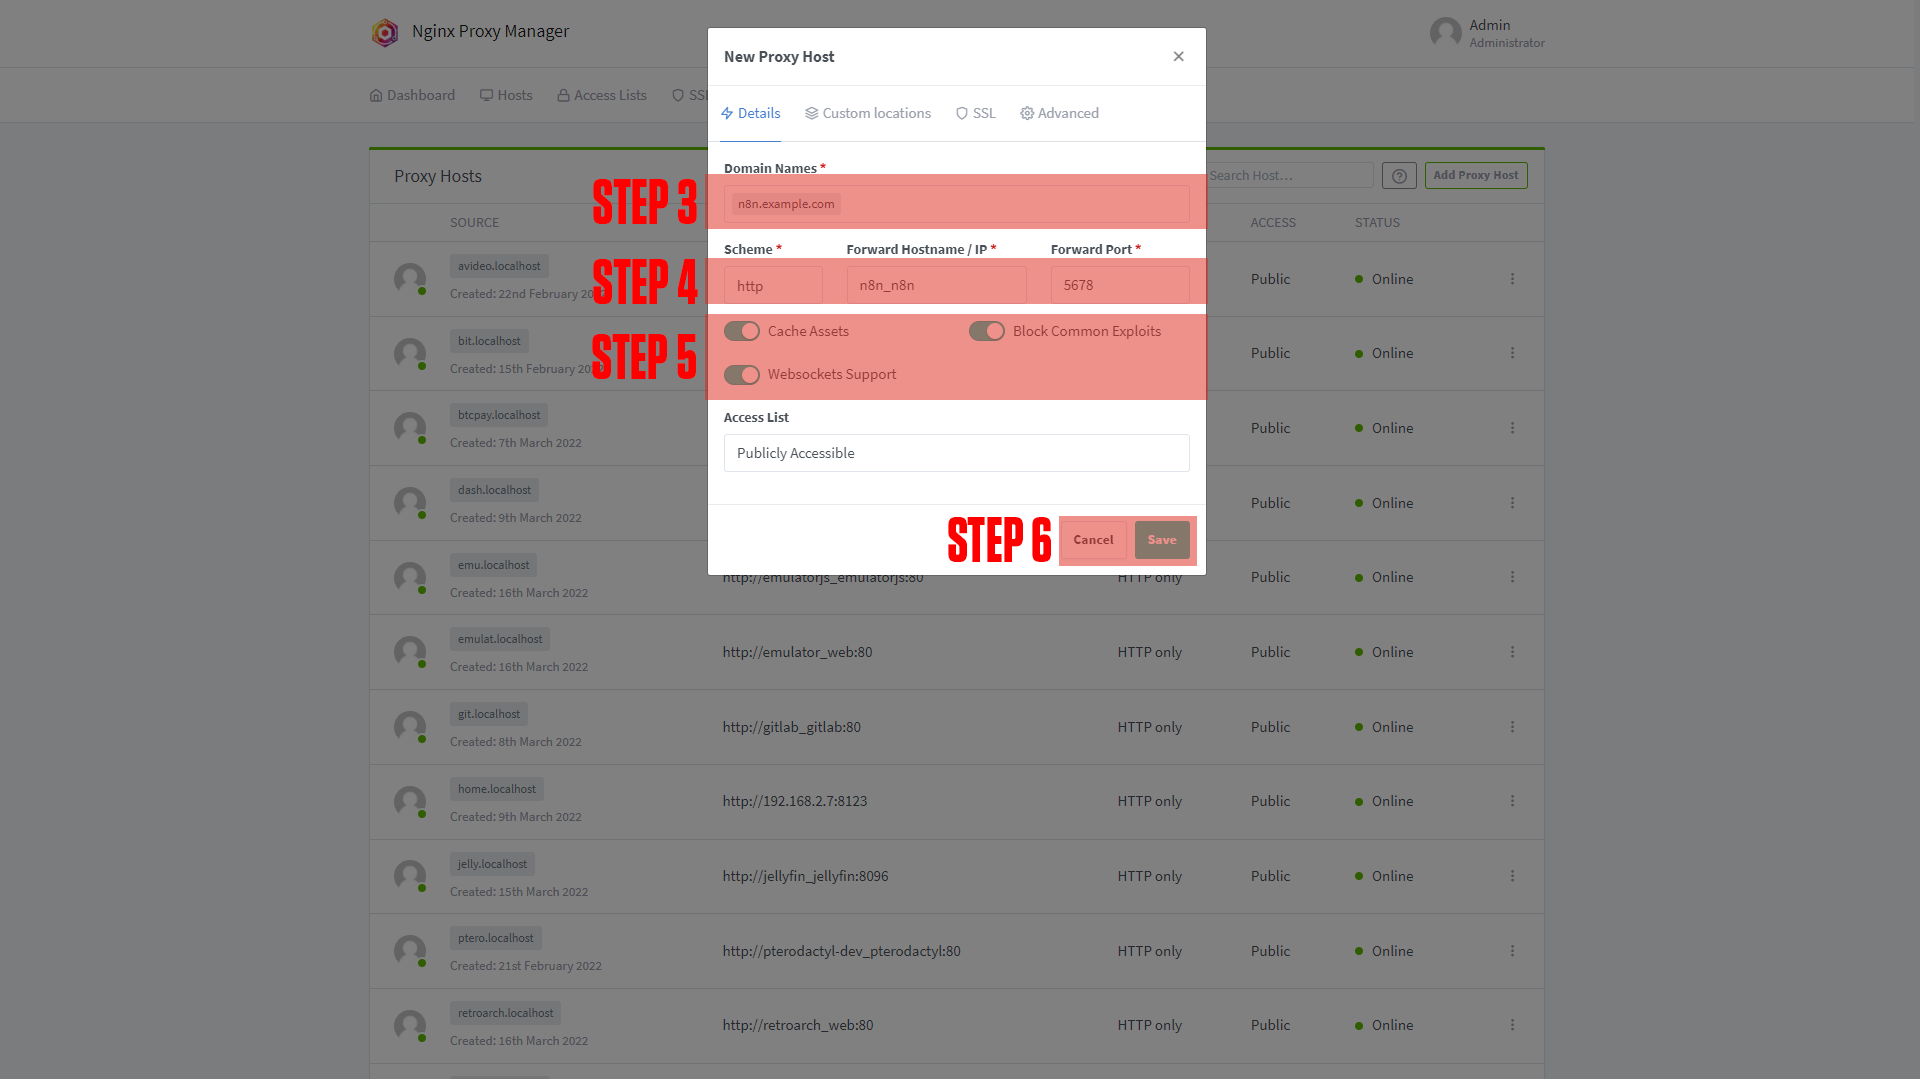
Step 3: Enter your Domain name (Ex. n8n.example.com)
Step 4: Add the service name to the Forward Hostname / IP at port 5678.
Step 5: Enable Cache Assets, Block Common Exploits, and Websockets Support.
Step 6: Click Save.
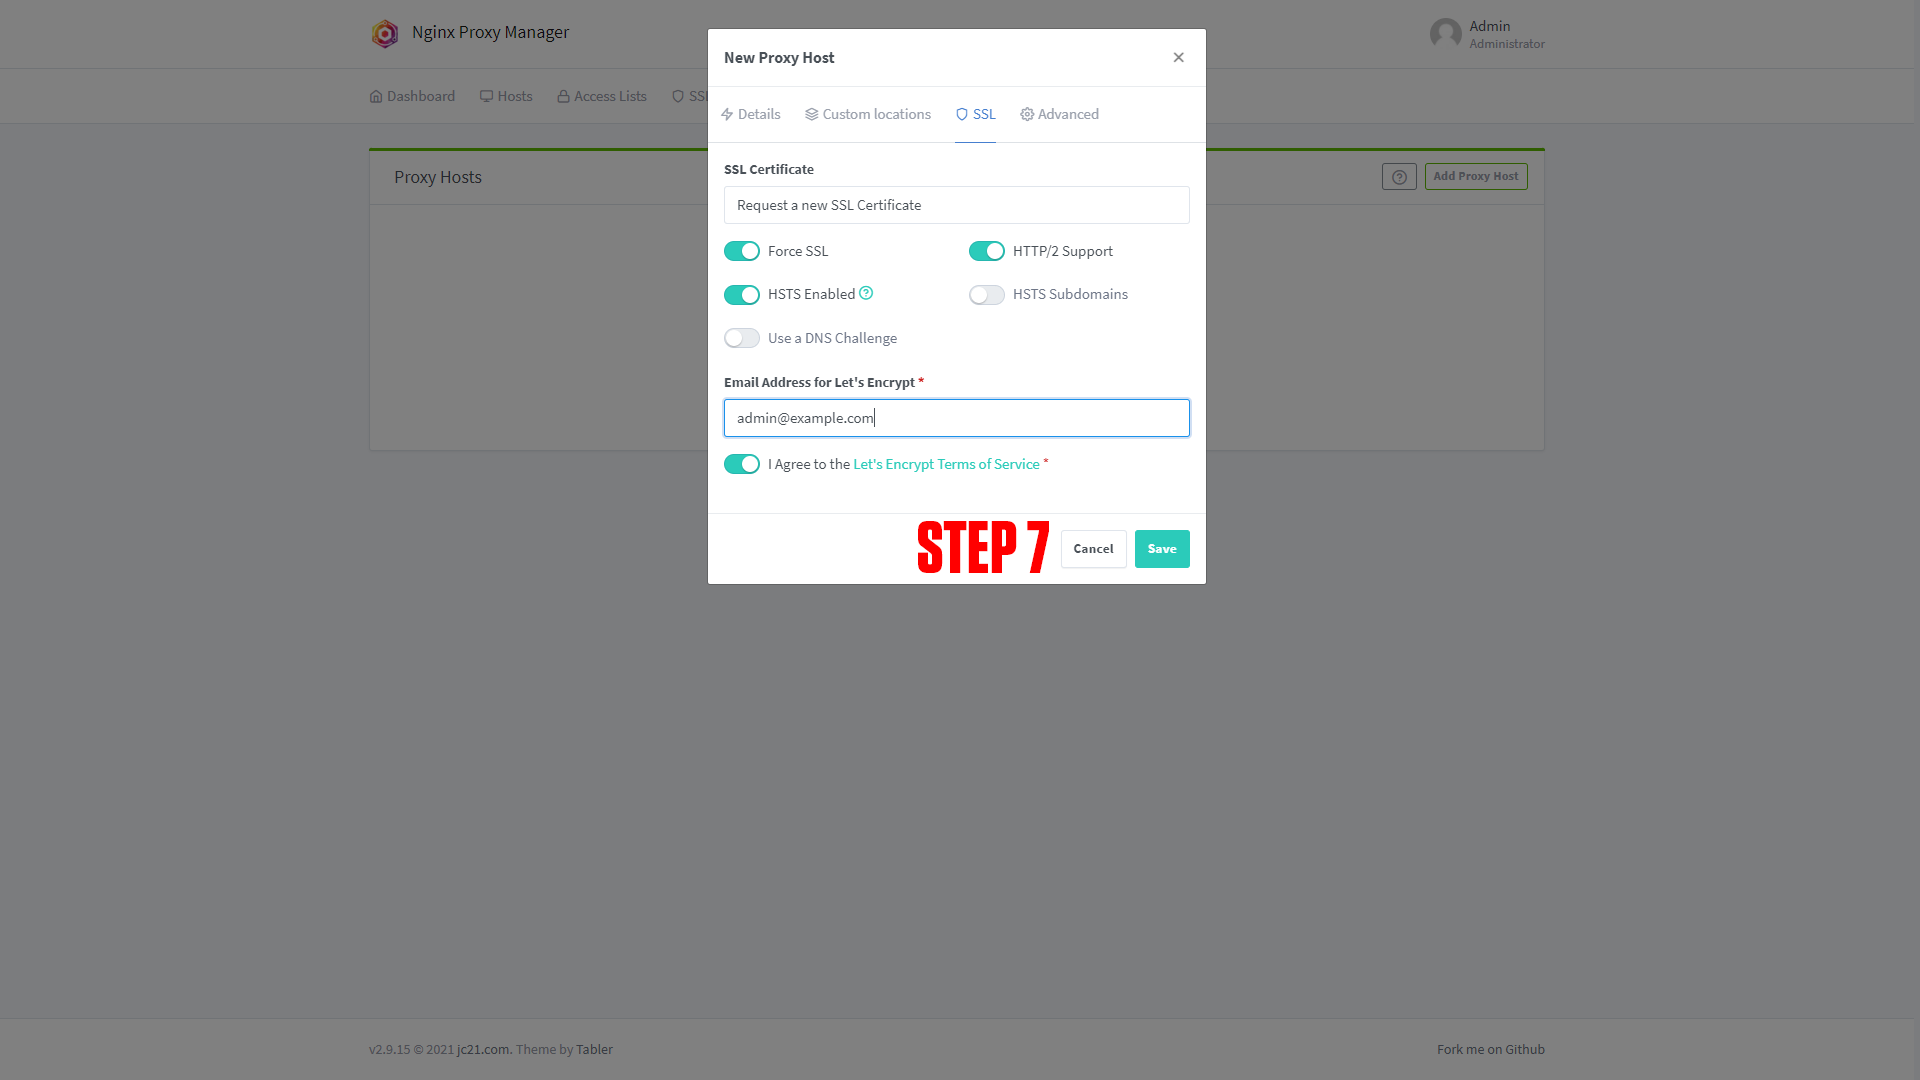
Step 7 (Optional): Enable SSL (we say this is optional, but you should always have an SSL cert if possible).
|
|
|
|
¶ Configuring n8n
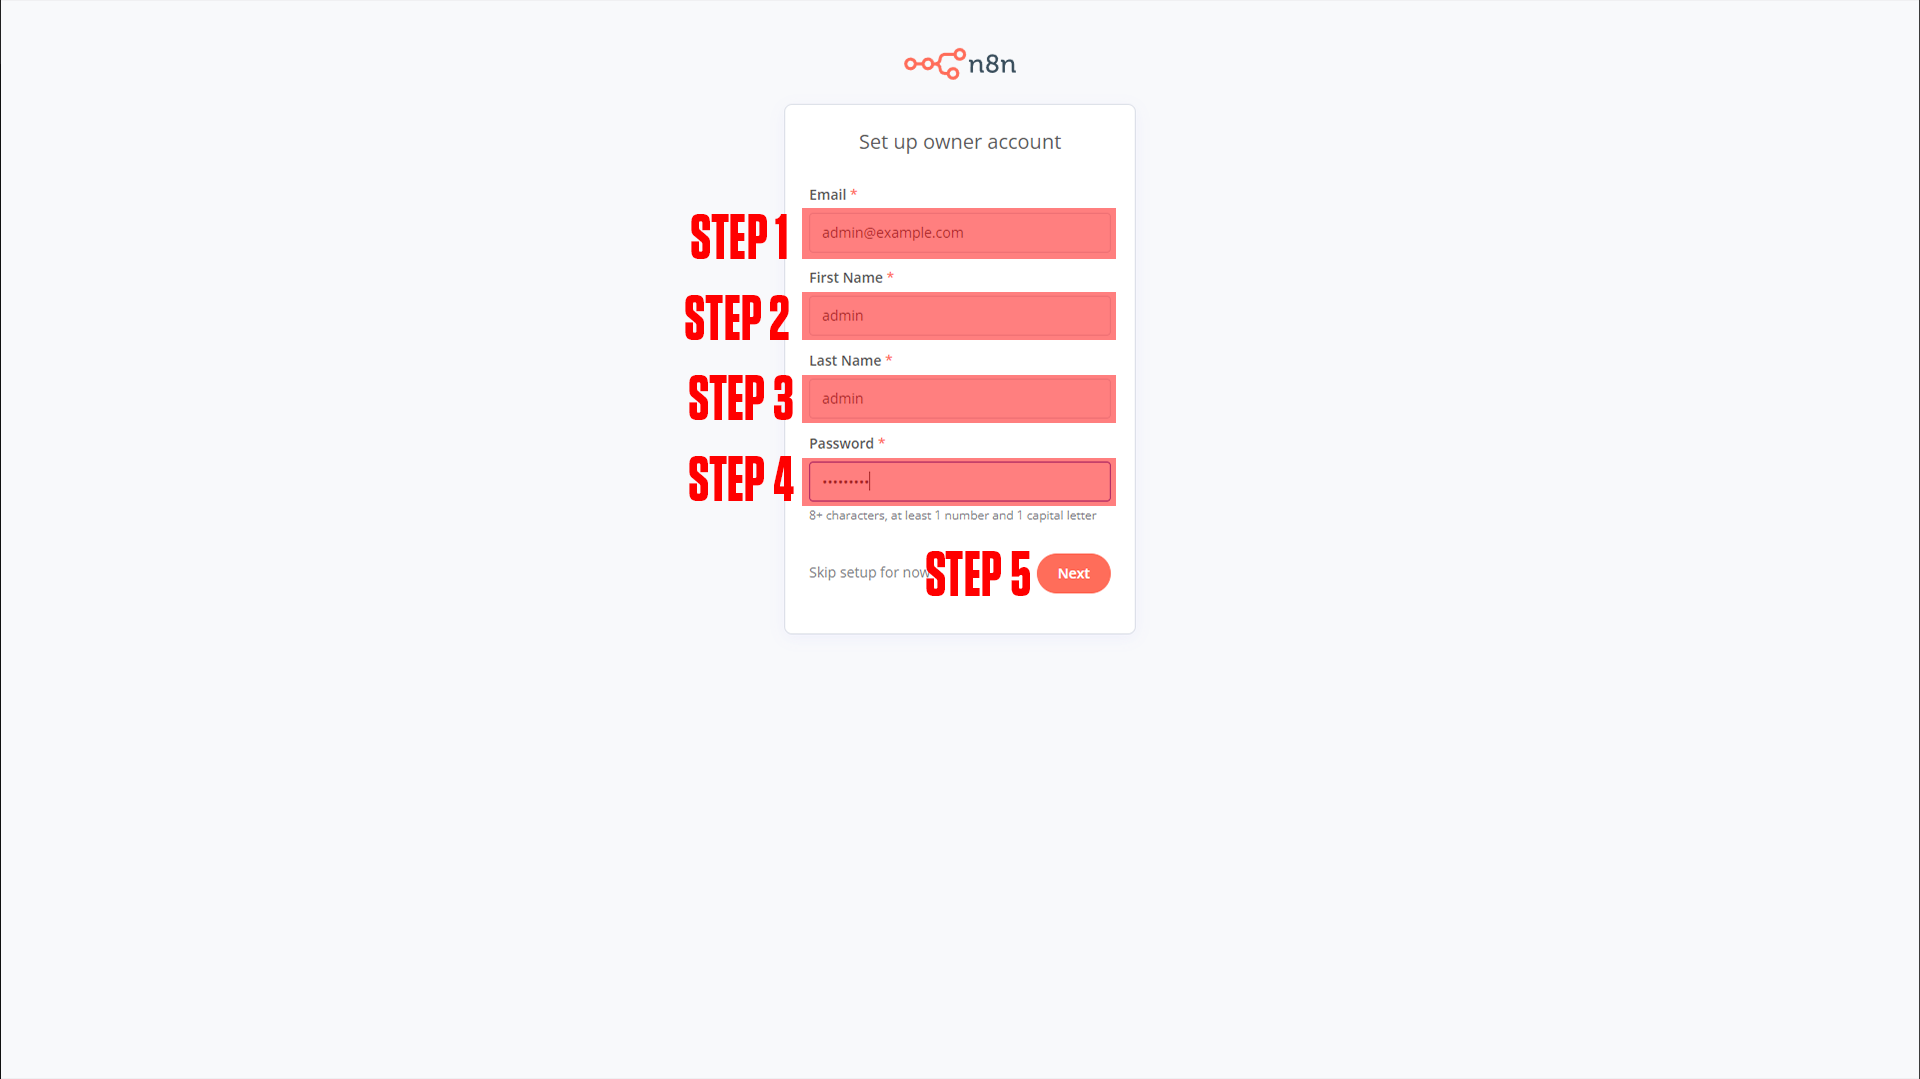
After setting up your domain name it's time to finish configuring the app. Go to the URL you chose for your application. You should arrive at a screen like this!
(If you do not arrive at a screen like this then something is wrong! Our premium members can open a support ticket Here!)
Step 1: Enter your email.
Step 2: Enter your first name.
Step 3: Enter your last name.
Step 4: Enter your password.
Step 5: Press Next.
You will go through a short questionnaire about what you will use n8n for before finalizing the installation and starting your workflows!
¶ Conclusion
This is the basic setup for n8n, as mentioned at the beginning we have a more in-depth course available at TrueFreedomTech.com.