¶ Nextcloud: Collaboration, Tasking, File Storage, Etc.
Nextcloud is an open-source cloud that allows you to store files, manage your calendar, take notes with self-hosted office software, communicate internally with other users on your cloud, share files externally, and much more. You can learn more about Nextcloud from the links below:
¶ Introduction
We will be covering how to run Nextcloud using Docker, Docker-compose, Portainer, and Nginx Proxy Manager.
We have an advanced course on how to do this at TrueFreedomTech.com covering multiple configurations and separating data from compute, deploying with git, and more.
¶ Overview
We are going to assume you already have a working server with Docker, Portainer, and Nginx Proxy Manager running. We will go over the compose for the stack and configuring Nginx-Proxy-Manager.
¶ Docker-Compose
The next step is our Docker-Compose. We will be deploying this with Portainer.
If you are not familiar with Portainer or Docker-Compose here are the official docs:
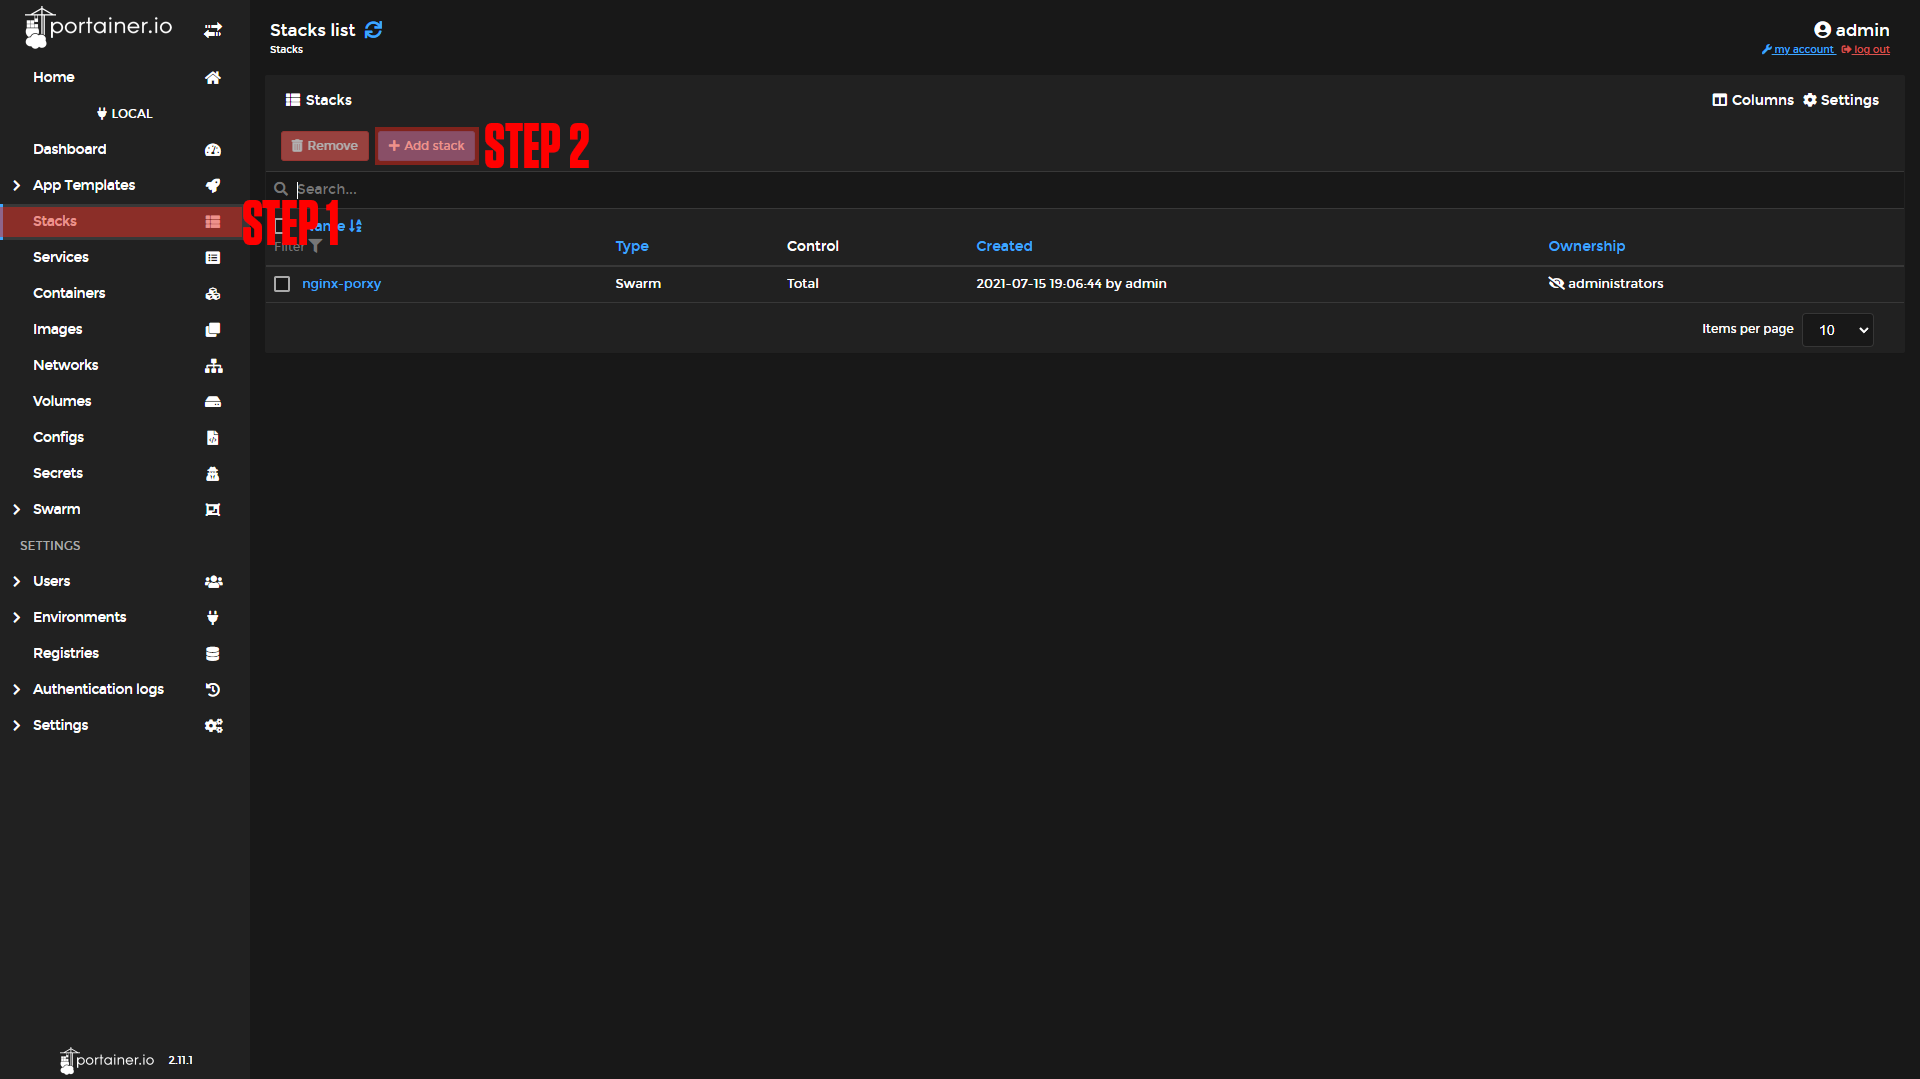
Step 1: Go to Stacks.
Step 2: Click Add Stack.
Step 3: Name your stack (Ex. nextcloud).
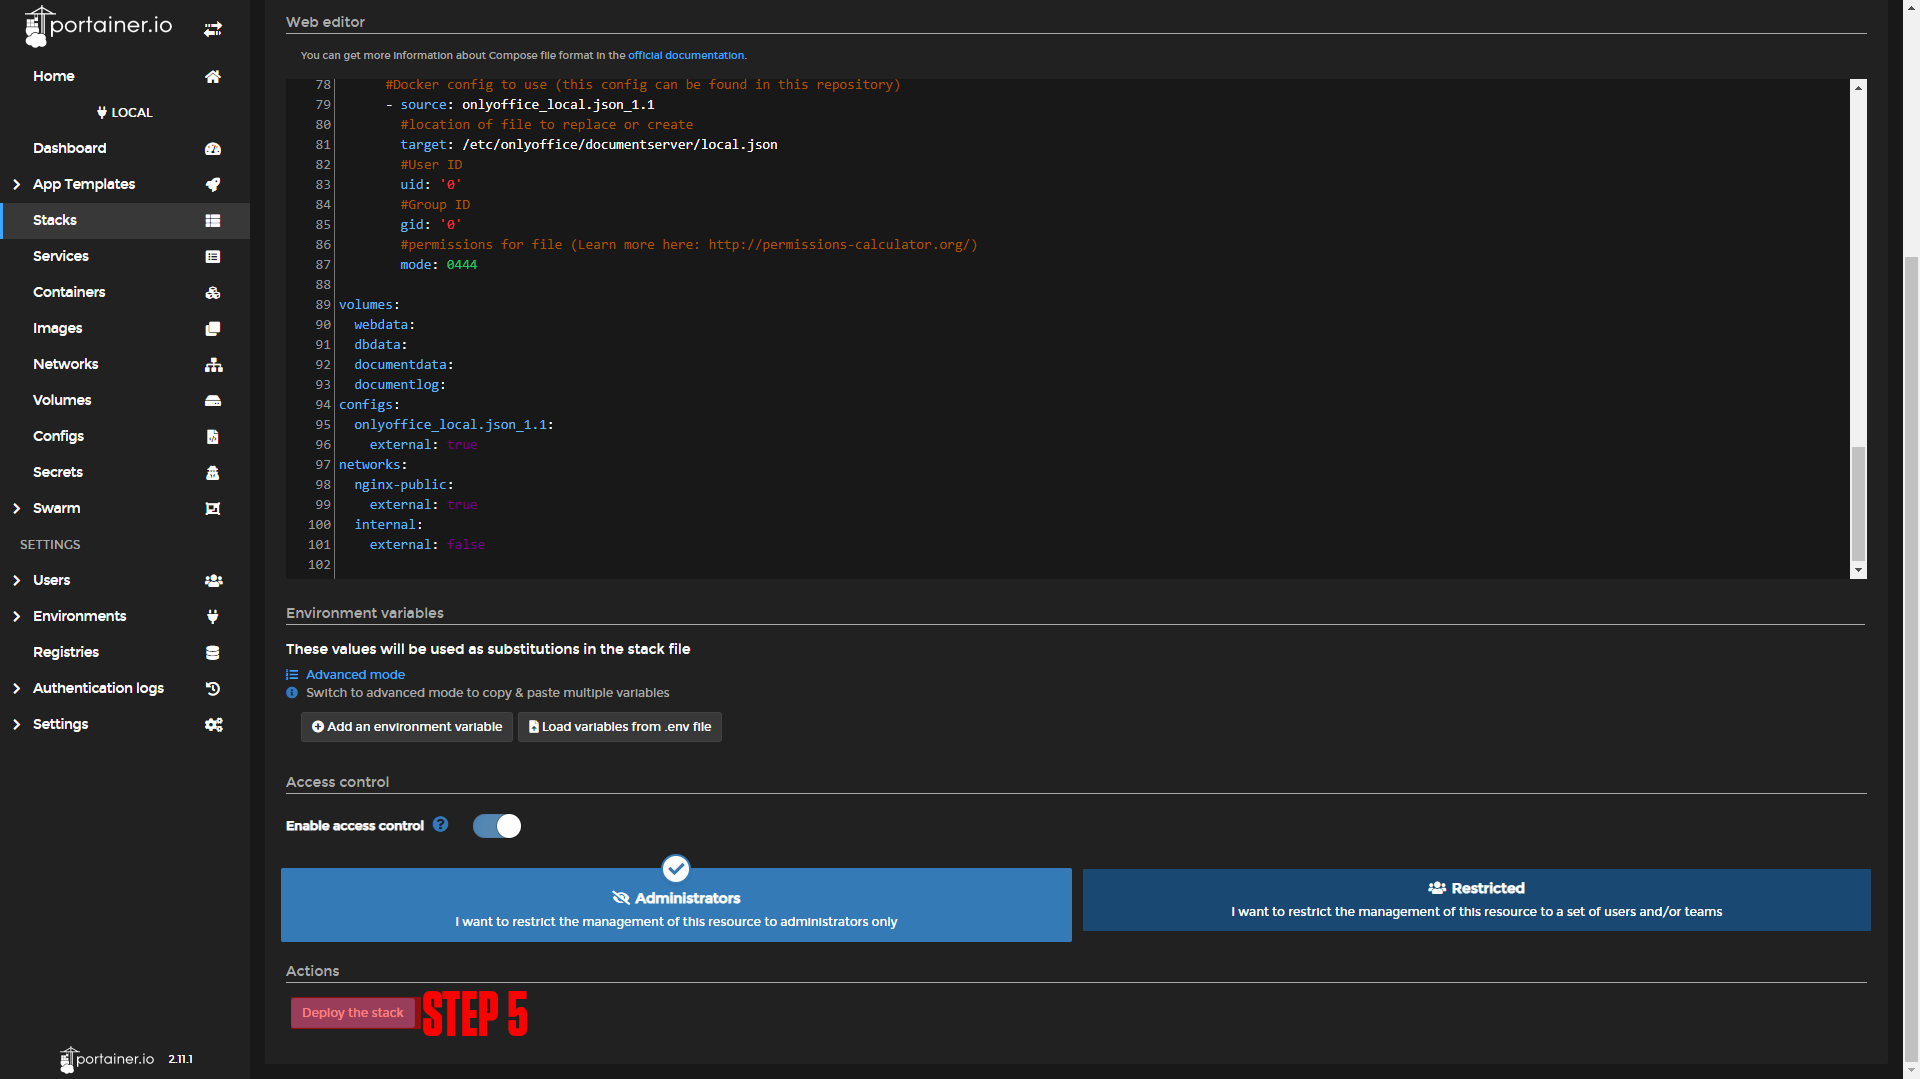
Step 4: Paste in the contents below (Don't forget to change the trusted domain in the stack):
Step 5: Deploy the stack.
|

|
|
#Docker-compose version
version: '3.8'

#Apps
services:
  #Name of app
  nc:
    #Docker image
    image: nextcloud:latest
    #Docker Network
    networks:
      - nginx-public
      - internal
    #App data
    volumes:
      - webdata:/var/www/html
    #Environmental variables
    environment:
      - OVERWRITEPROTOCOL=https
      - MYSQL_HOST=nc-db
      - MYSQL_DB=db
      - MYSQL_USER=dbuser
      - MYSQL_PASSWORD=dbpass
      #CHANGE THIS!!!
      - NEXTCLOUD_TRUSTED_DOMAINS=example.your-domain.com
    depends_on:
      - nc-db

  #Name of app
  nc-db:
    #Docker image
    image: mariadb:10.9
    #Docker Network
    networks:
     - internal
    #App restart policy
    restart: always
    #App data
    volumes:
      - dbdata:/var/lib/mysql
    #Environmental variables
    environment:
      MYSQL_ROOT_USER: dbuser
      MYSQL_ROOT_PASSWORD: dbpass
      MYSQL_DATABASE: db

  #Name of app
  nc-cron:
    #Docker image
    image: nextcloud:latest
    #Docker Network
    networks:
     - internal
    #App data
    volumes:
      - webdata:/var/www/html
    entrypoint:
      - /cron.sh
    depends_on:
      - nc-db

  #Name of app
  onlyoffice-document-server:
    #Docker image
    image: onlyoffice/documentserver:latest
    #Docker Network
    networks:
      - nginx-public
      - internal
    #App restart policy
    restart: always
    #Environment Variables
    environment:
      #!!!!!! CHANGEME
      JWT_SECRET:SECRET
    #App data
    volumes:
      - documentdata:/var/www/onlyoffice/Data
      - documentlog:/var/log/onlyoffice

volumes:
  webdata:
  dbdata:
  documentdata:
  documentlog:
networks:
  nginx-public:
    external: true
  internal:
external: false¶ Nginx-Proxy-Manager
Before we configure our apps, we will set up our domains using Nginx-Proxy-Manager. If you followed our Nginx-Proxy-Manager stack setup you should be able to copy everything we do step by step.
¶ Nextcloud Domain Setup
Step 1: Copy the Nextcloud service name.
This should be nextcloud_nc if you did not change the names of apps.
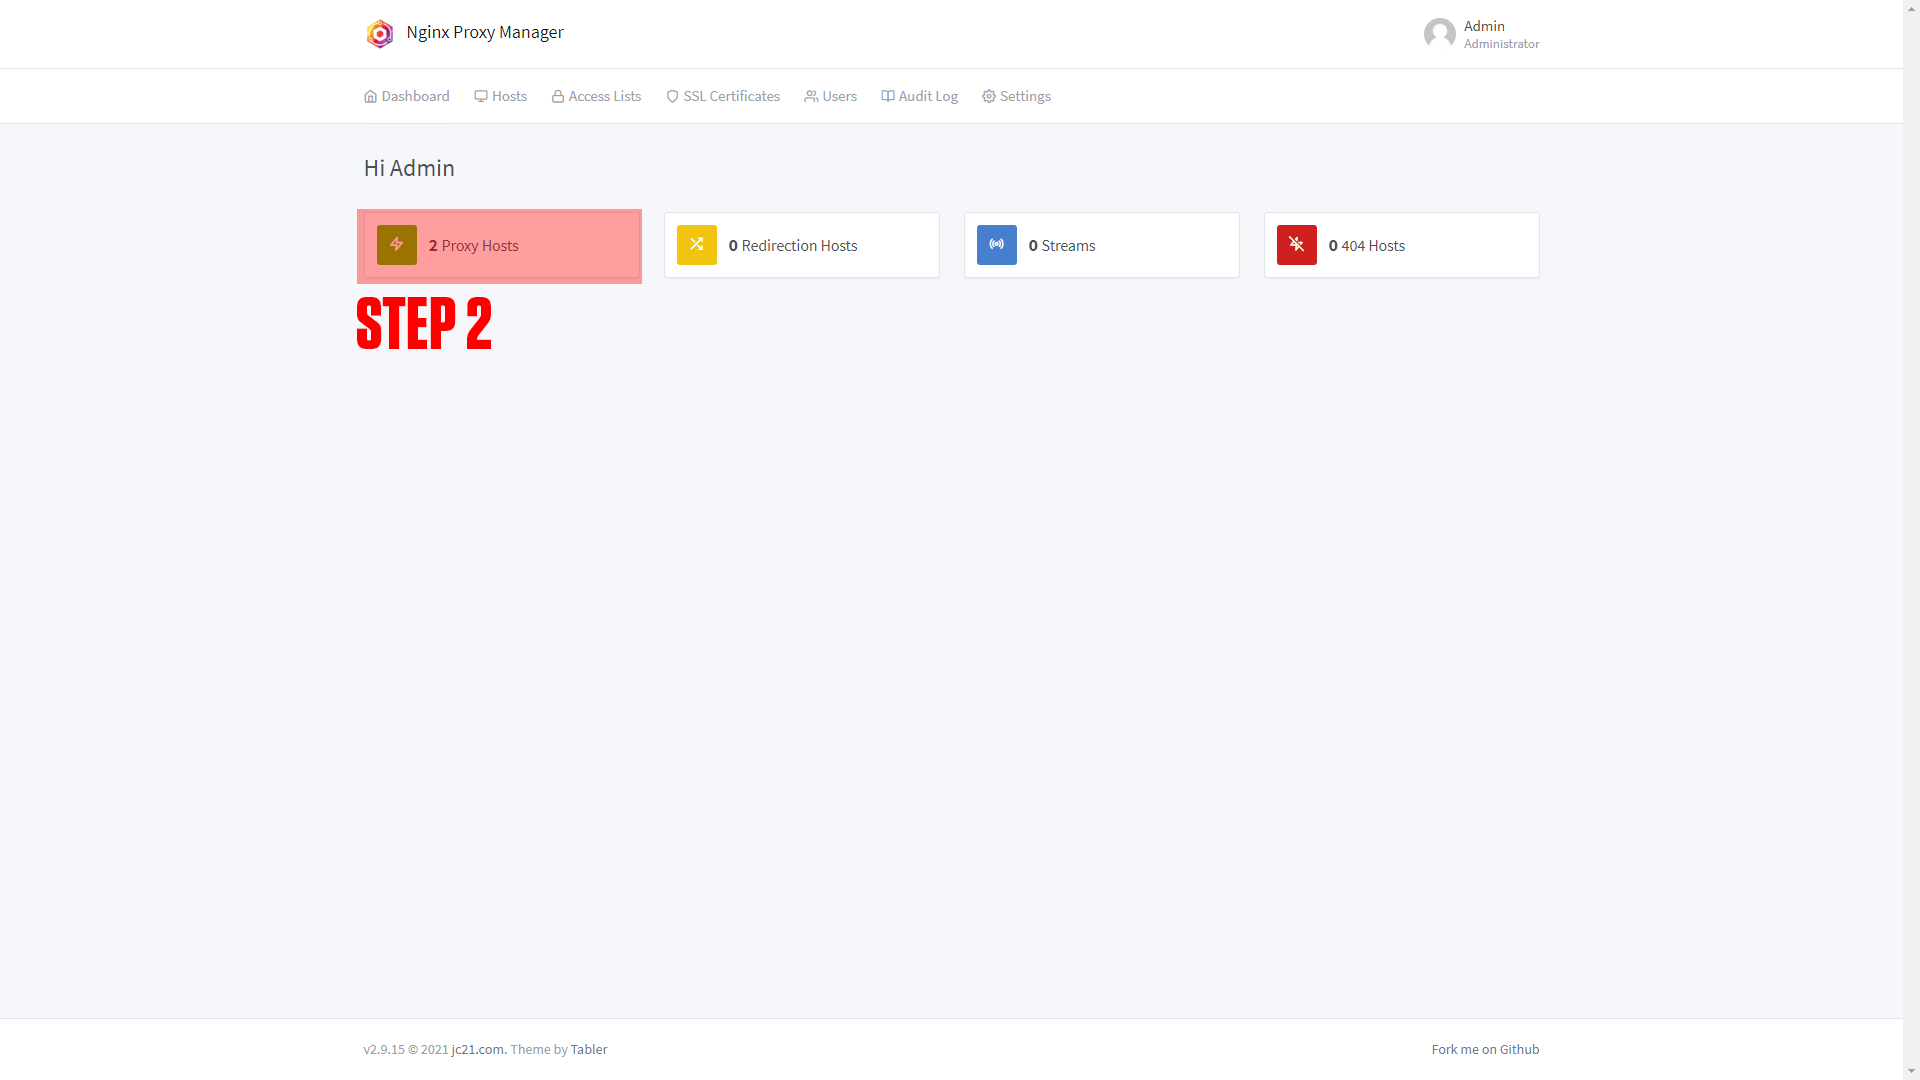
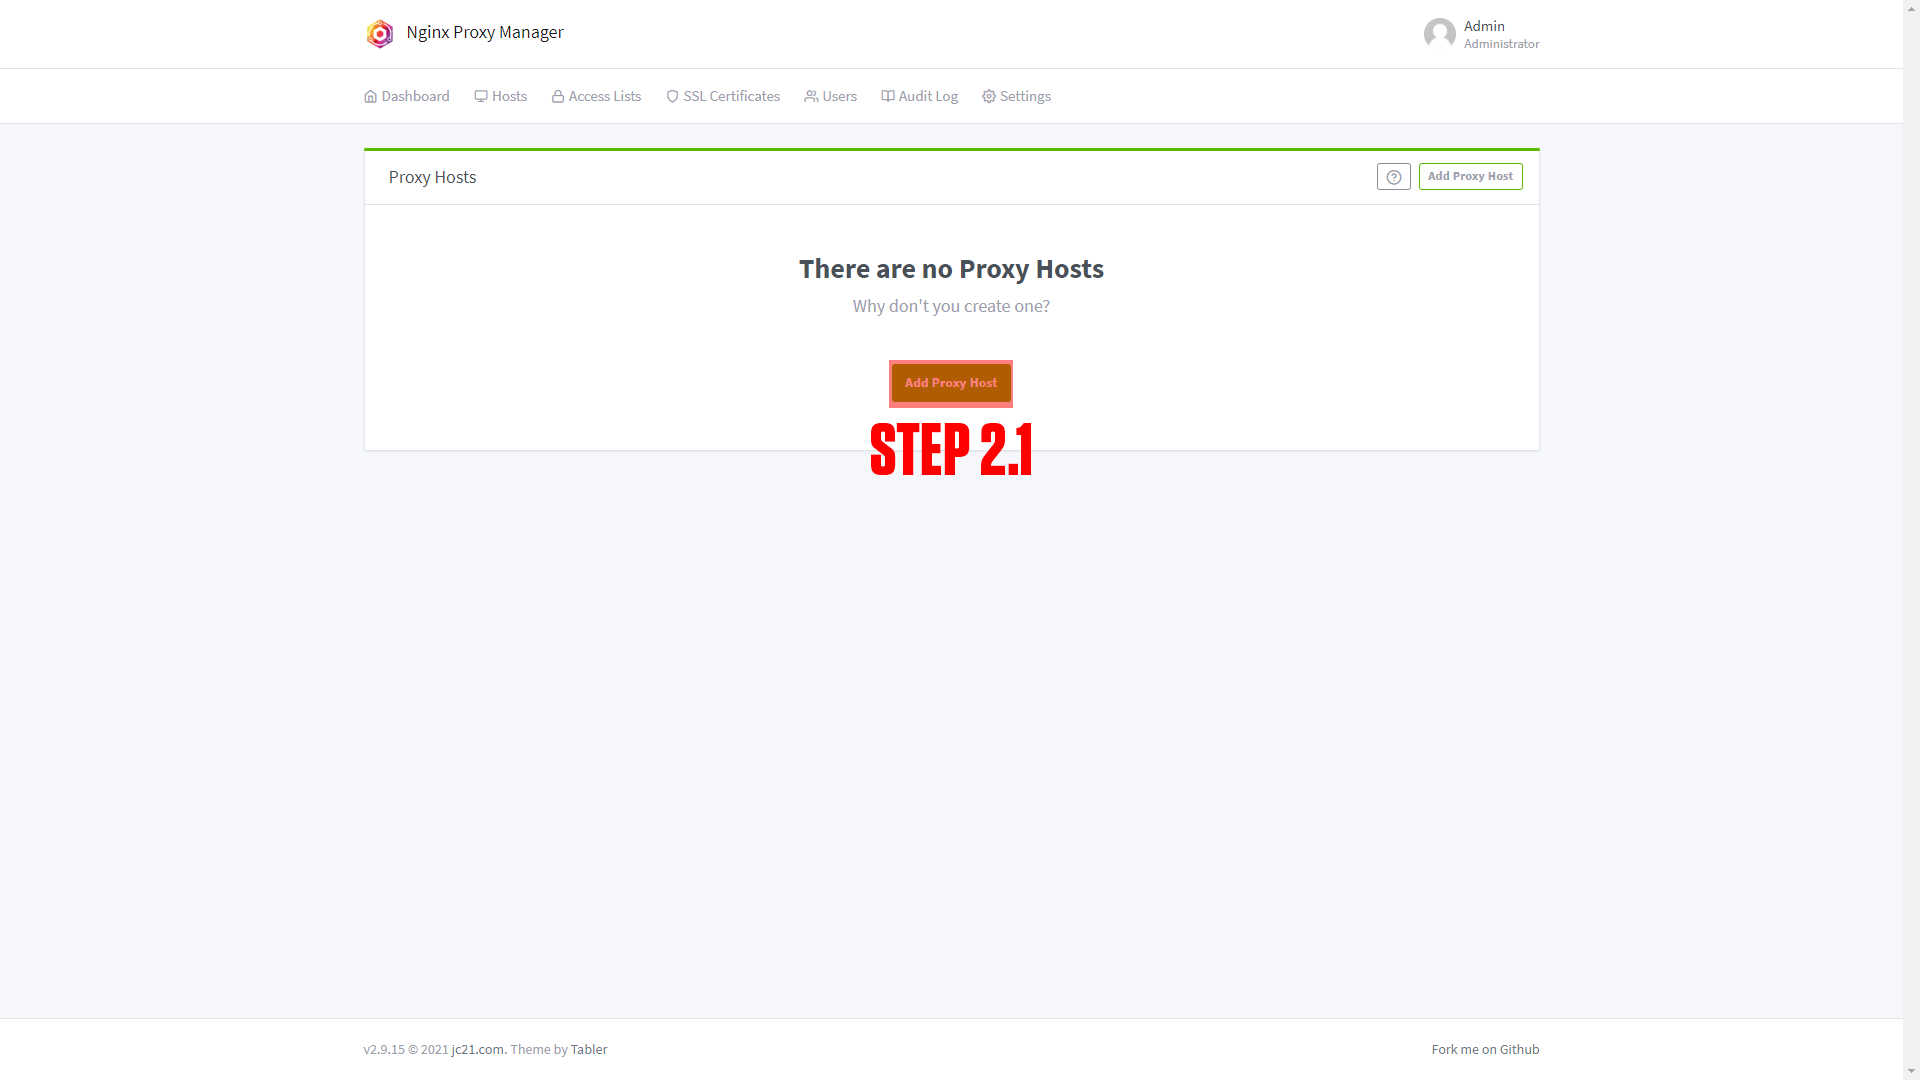
Step 2: Log in to Nginx-Proxy-Manager and create a new proxy host.
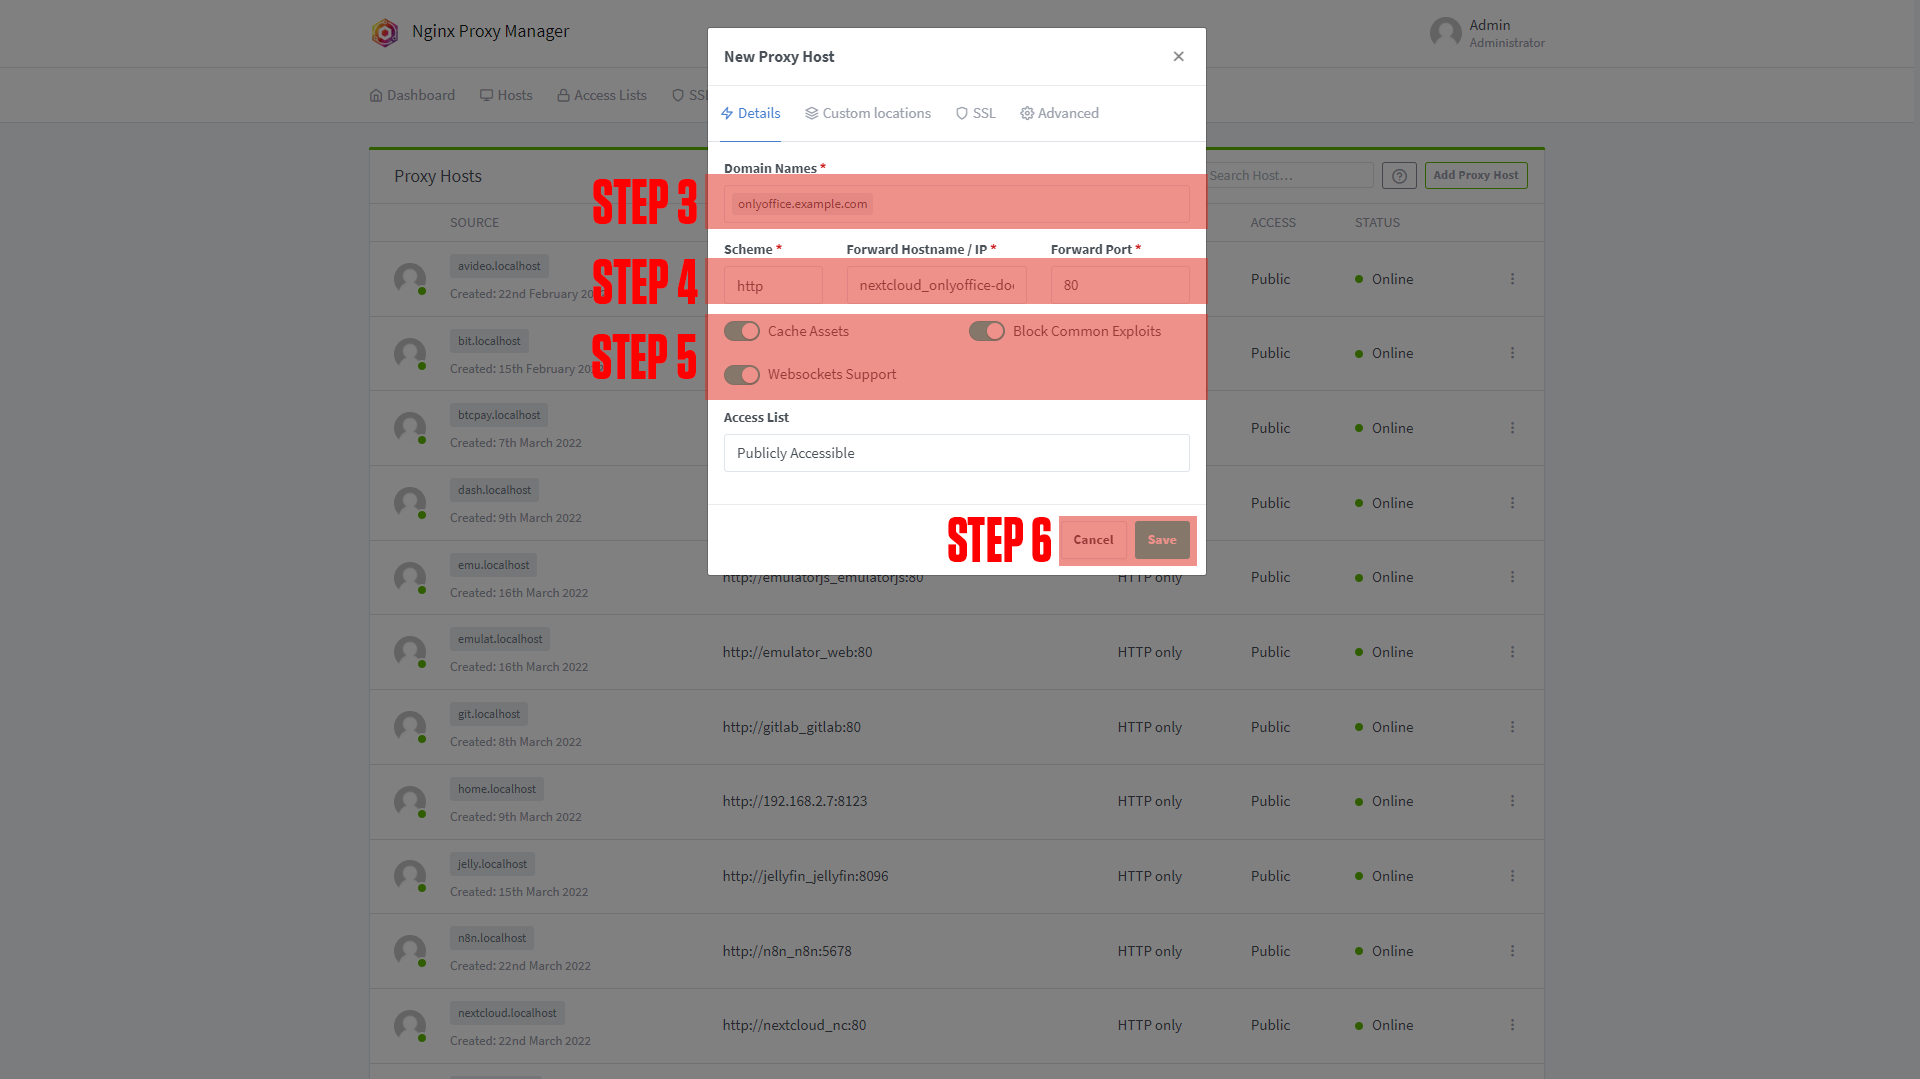
Step 3: Enter your Domain name (Ex. nextcloud.example.com)
Step 4: Add the service name to the Forward Hostname / IP at port 80.
Step 5: Enable Cache Assets, Block Common Exploits, and Websockets Support.
Step 6: Click Save.
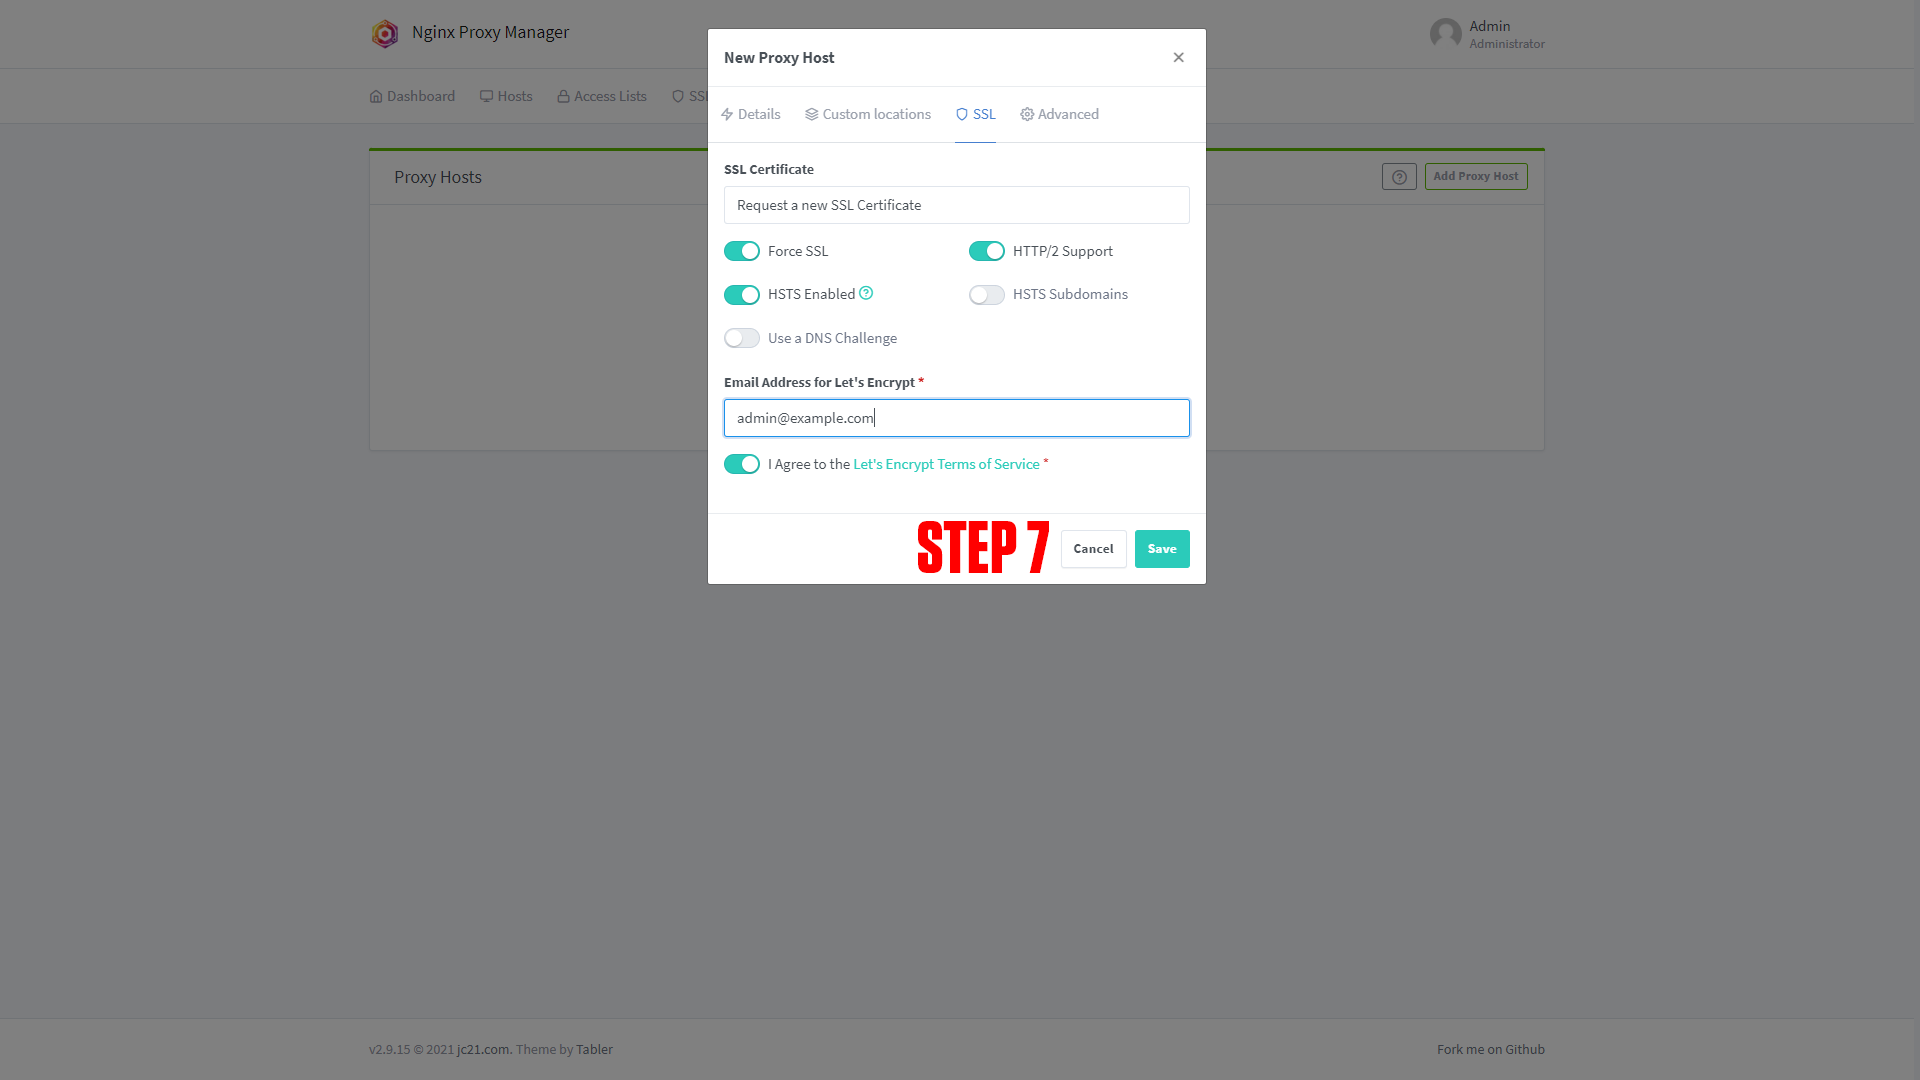
Step 7 (Optional): Enable SSL (we say this is optional, but you should always have an SSL cert if possible).
|
|

|
|
¶ Only Office Domain Setup
Step 1: Copy the Onlyoffice service name.
This should be nextcloud_onlyoffice-document-server if you did not change the names of apps.
Step 2: Log in to Nginx-Proxy-Manager and create a new proxy host.
Step 3: Enter your Domain name (Ex. onlyoffice.example.com)
Step 4: Add the service name to the Forward Hostname / IP at port 80.
Step 5: Enable Cache Assets, Block Common Exploits, and Websockets Support.
Step 6: Click Save.
Step 7 (Optional): Enable SSL (we say this is optional, but you should always have an SSL cert if possible).
|
|
|
|
|
¶ Configuring Nextcloud
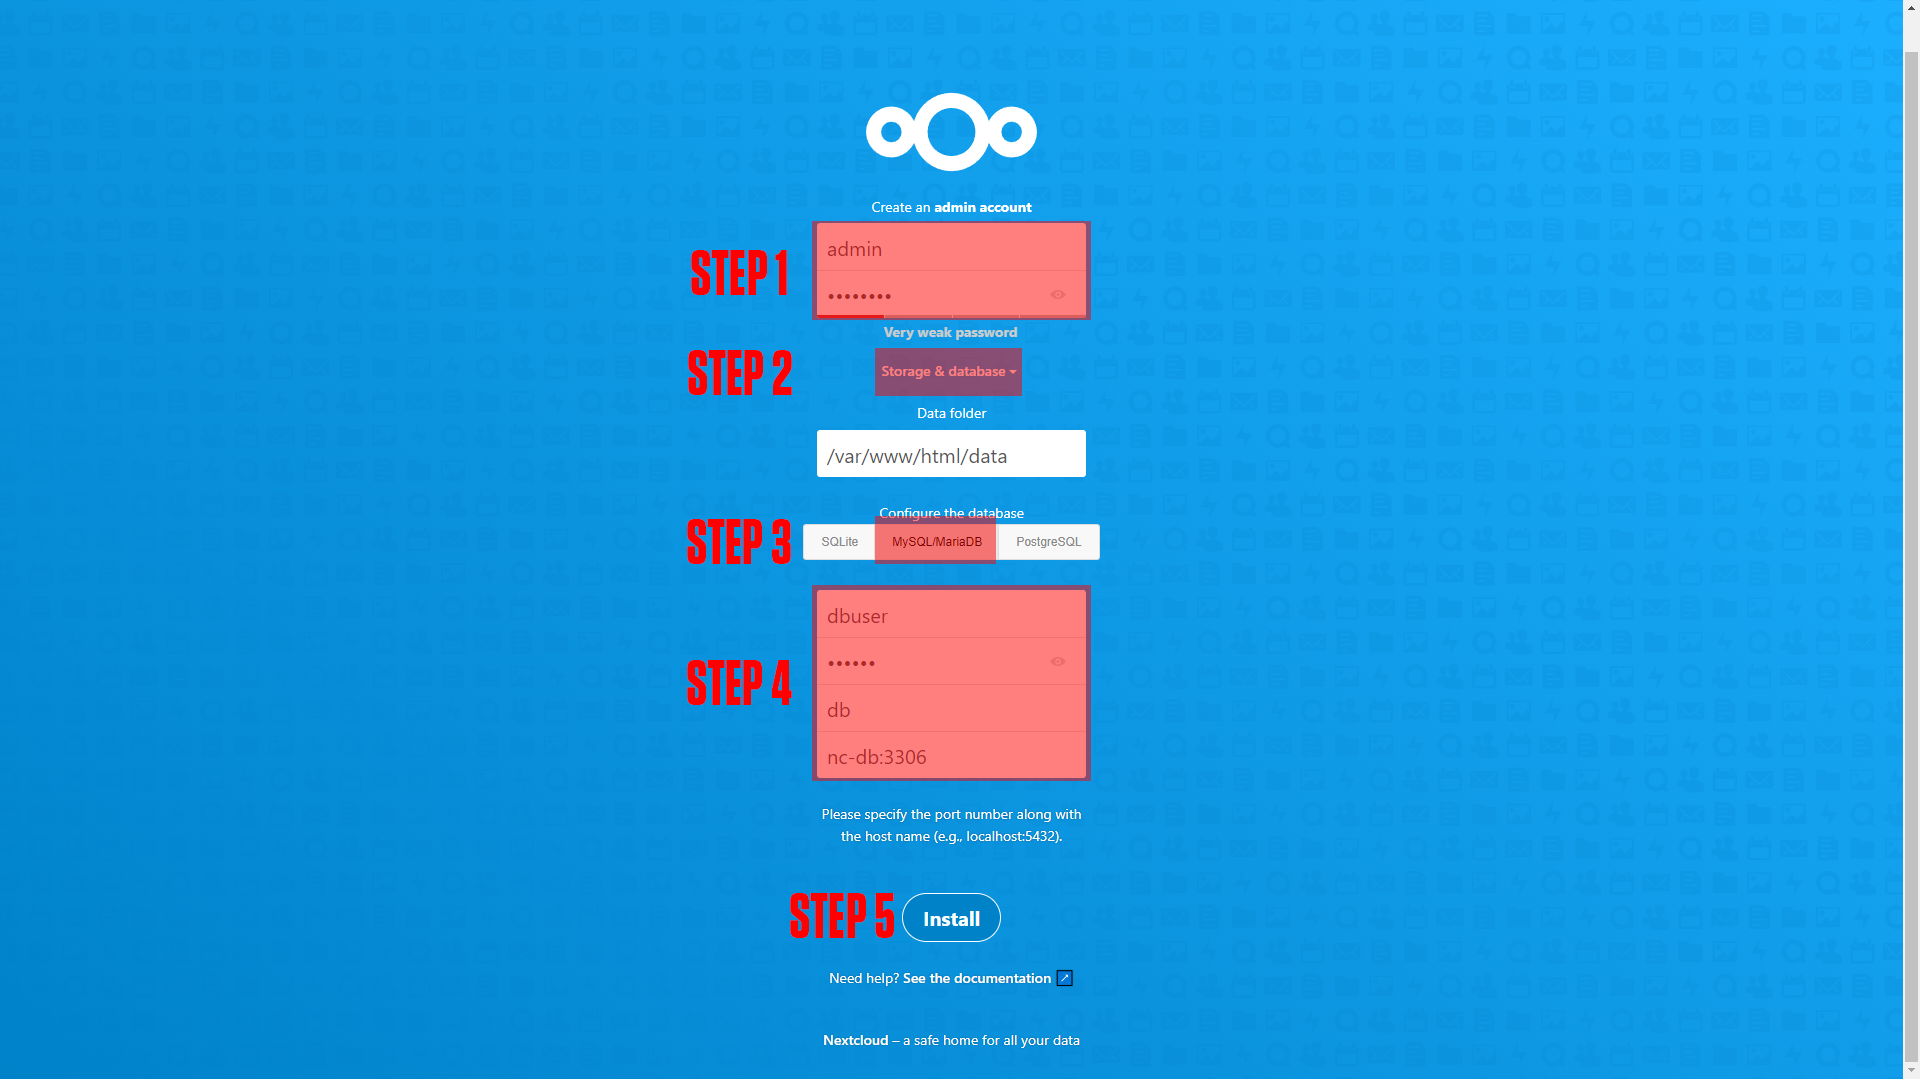
After setting up your domain name it's time to finish configuring the app. Go to the URL you chose for your application. You should arrive at a screen like this!
(If you do not arrive at a screen like this then something is wrong! Our premium members can open a support ticket Here!)
Step 1: Create your admin username and password.
Step 2: Click Storage & Database.
Step 3: Choose MySQL/MariaDB
Step 4: Enter your database credentials:
dbuserdbpassdbnc-db:3306
Step 5: Install Nextcloud.
**Note: If you are not using SSL after installation your Nextcloud may break!
¶ Conclusion
This is the basic setup for AVideo, as mentioned at the beginning we have a more in-depth course available at TrueFreedomTech.com.