¶ Uptime Kuma: Website Uptime Monitor
Uptime Kuma is an open-source website monitoring tool with some extra functionality. Uptime Kuma can monitor HTTP/HTTPS traffic, steam game servers, hosts by pinging, TCP ports, and DNS records. You can create multiple dashboards and add monitors to view them publicly. Uptime Kuma has the ability to use 2FA, import & export backups, and send notifications when a site goes down or comes back online. You can view the Uptime Kuma source code and demo site below:
¶ Introduction
Uptime Kuma is a great solution to a self-hosted Uptime Monitor. We use Uptime Kuma as our internal uptime monitor and share that publically (Here). Since Uptime Kuma can deliver emails about uptime status, you can ensure that all your services are running correctly. You can customize Uptime Kuma's Health check duration and retry count to your liking. We have changed our monitor configuration to retry 3 times before a service is considered down to avoid false flags from things like WordPress updates. Uptime Kuma is perfect if you have a lot of websites, or steam servers where uptime is essential. We have not found a better uptime monitor yet, and now we are going to show you how to run one!
We will be running Uptime Kuma using Docker, Docker-Compose, Portainer, and Nginx Proxy Manager. We have an advanced course on how to do this at TrueFreedomTech.com covering multiple configurations and separating data from compute.
¶ Overview
We are going to assume you already have a working server with Docker, Portainer, and Nginx Proxy Manager running. We will go over the docker-compose, and configuring Nginx-Proxy-Manager. We are not using our own images for this stack so please consult the Docker hub and Github links for more information regarding the Docker image and source code.
¶ Docker-Compose
Step one is our Docker-Compose. We will be deploying this with Portainer.
If you are not familiar with Portainer or Docker-Compose here are the official docs:
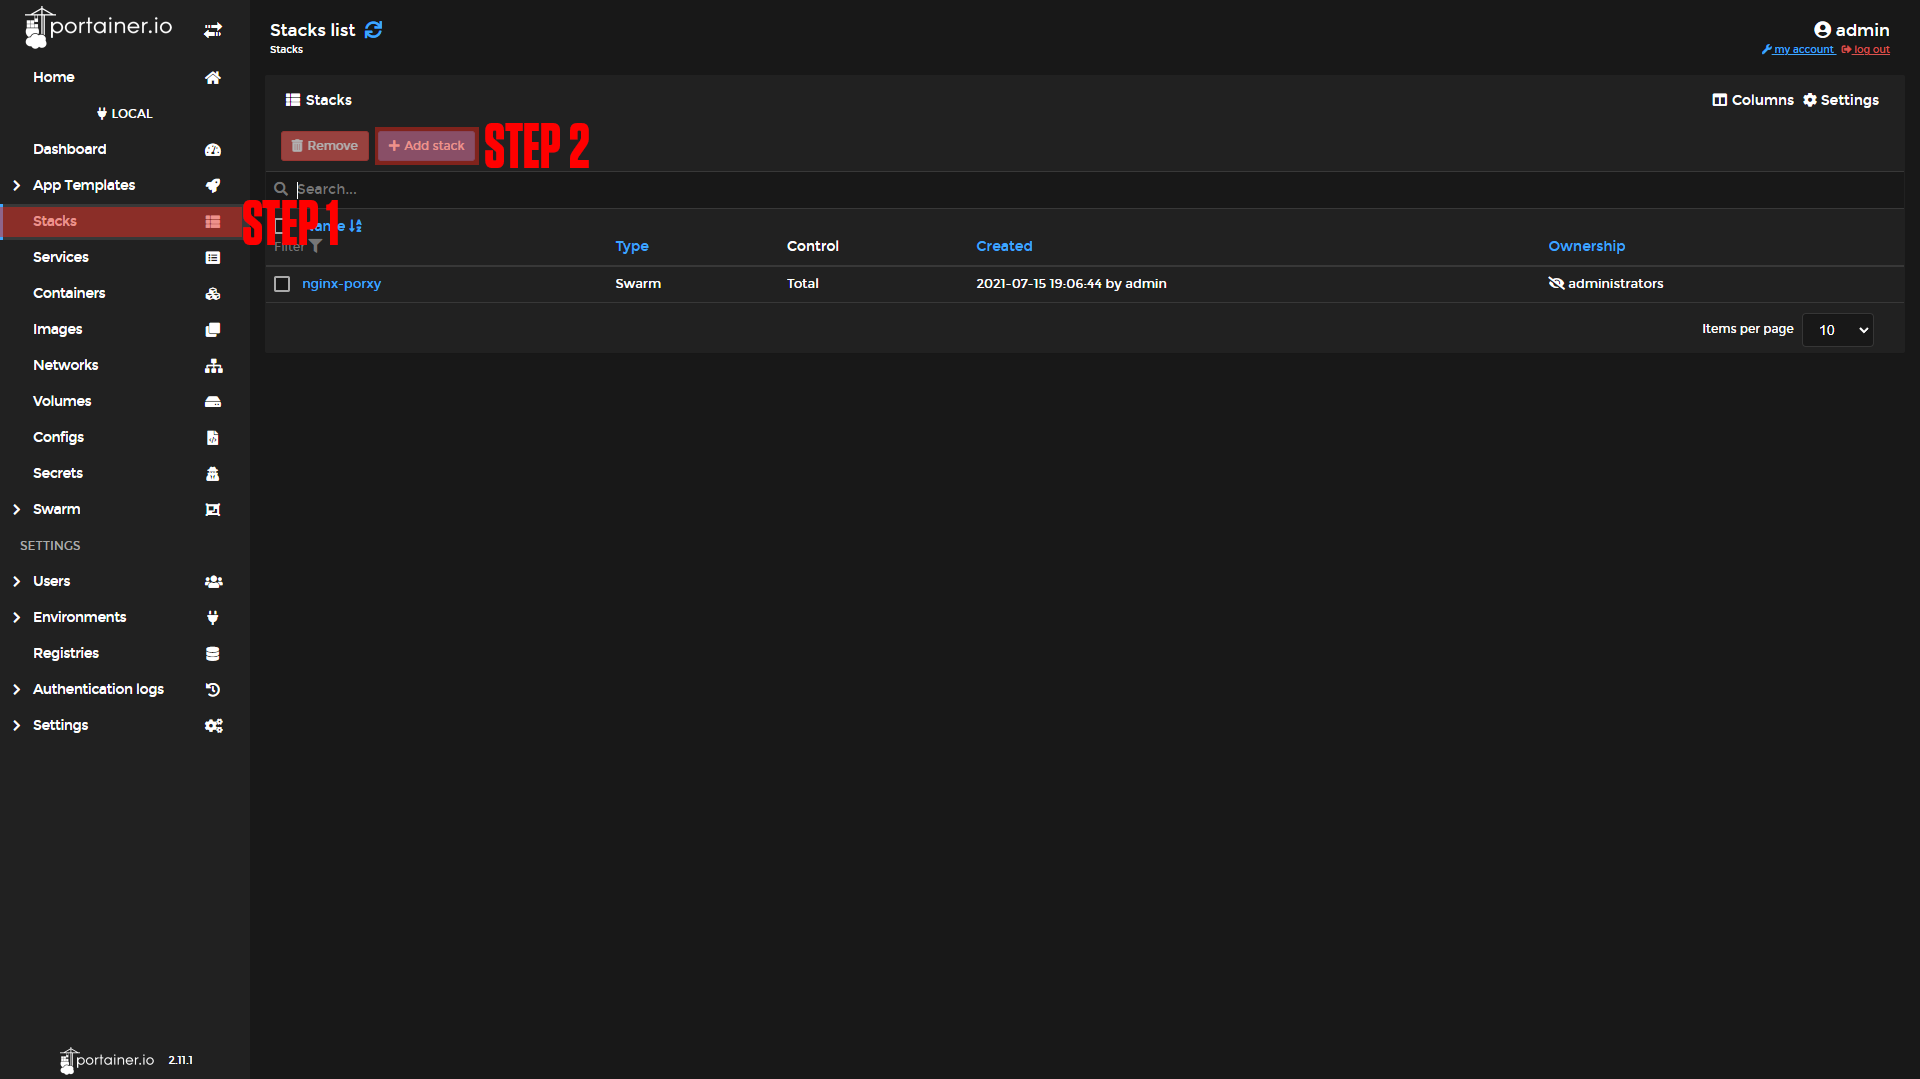
Step 1: Go to Stacks.
Step 2: Click Add Stack.
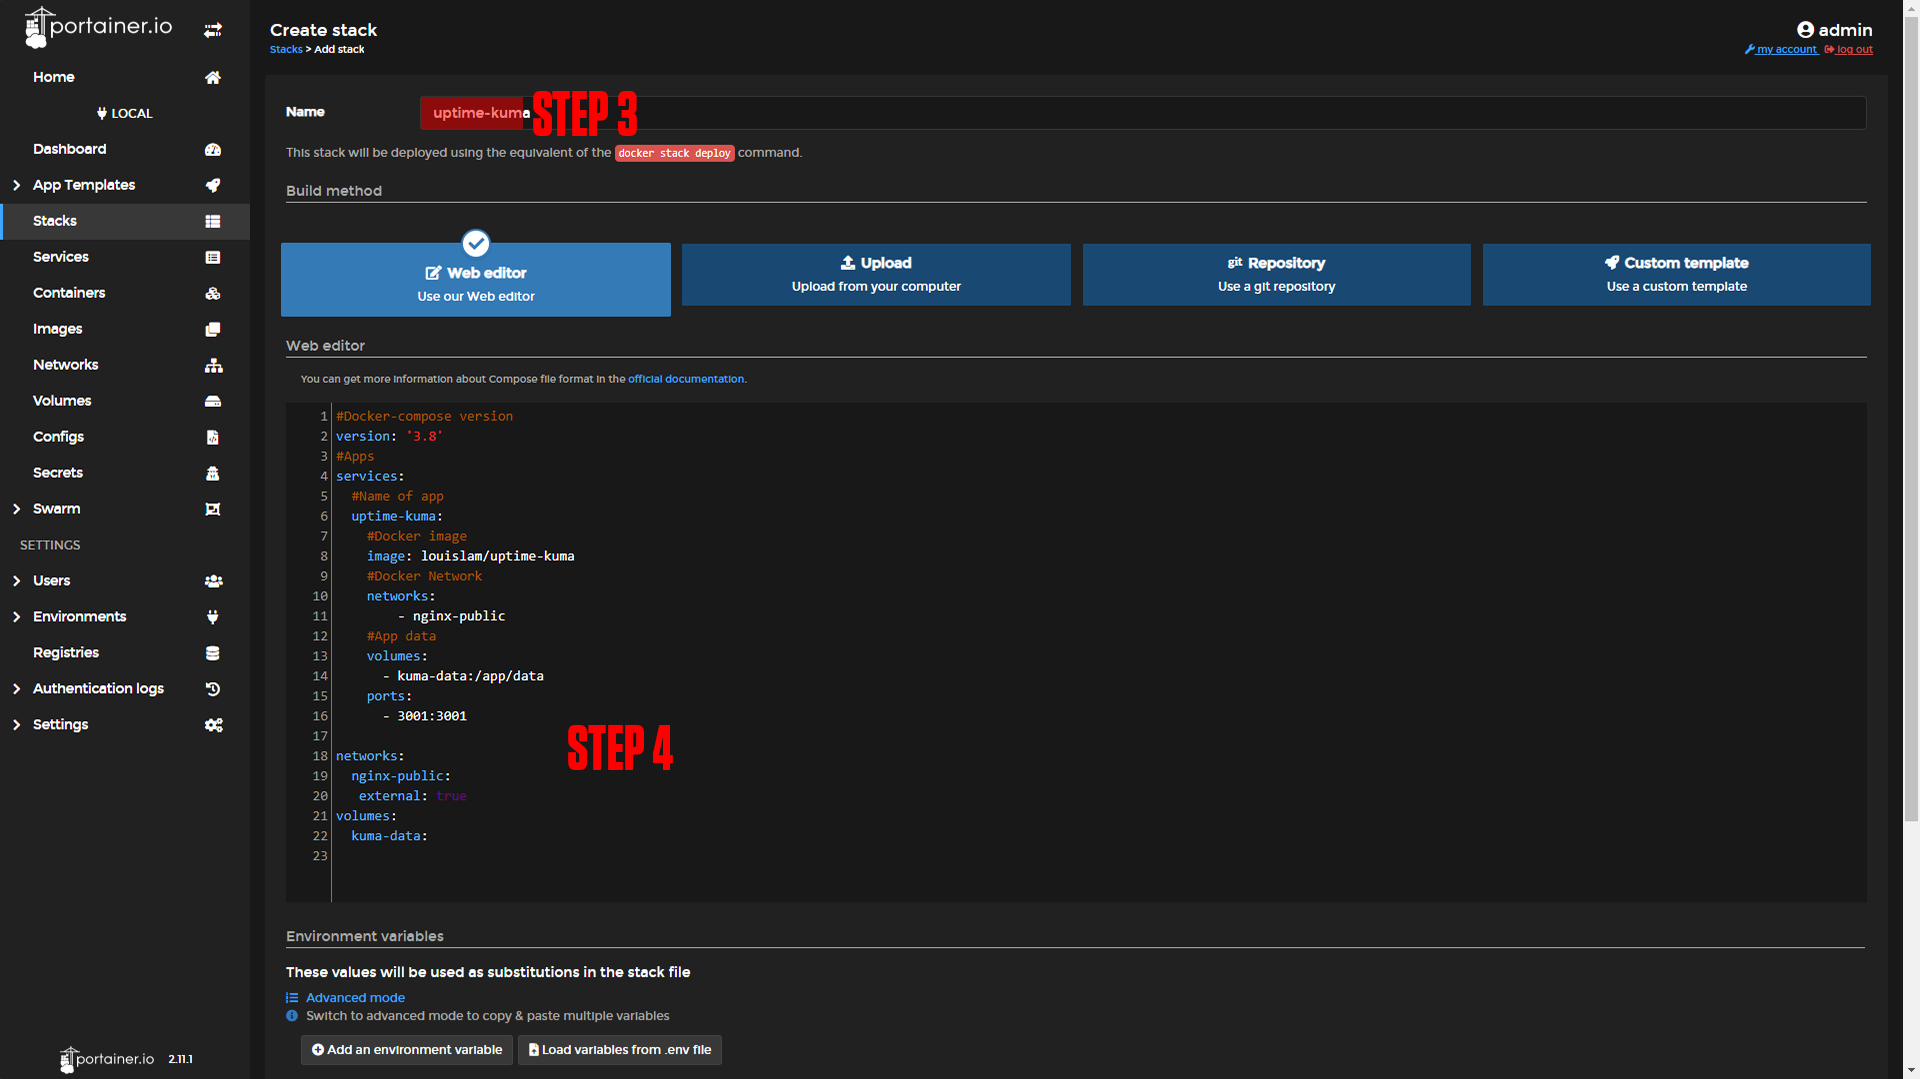
Step 3: Name your Stack (Ex. Uptime-Kuma)
Step 4: Paste in the Contents Below.
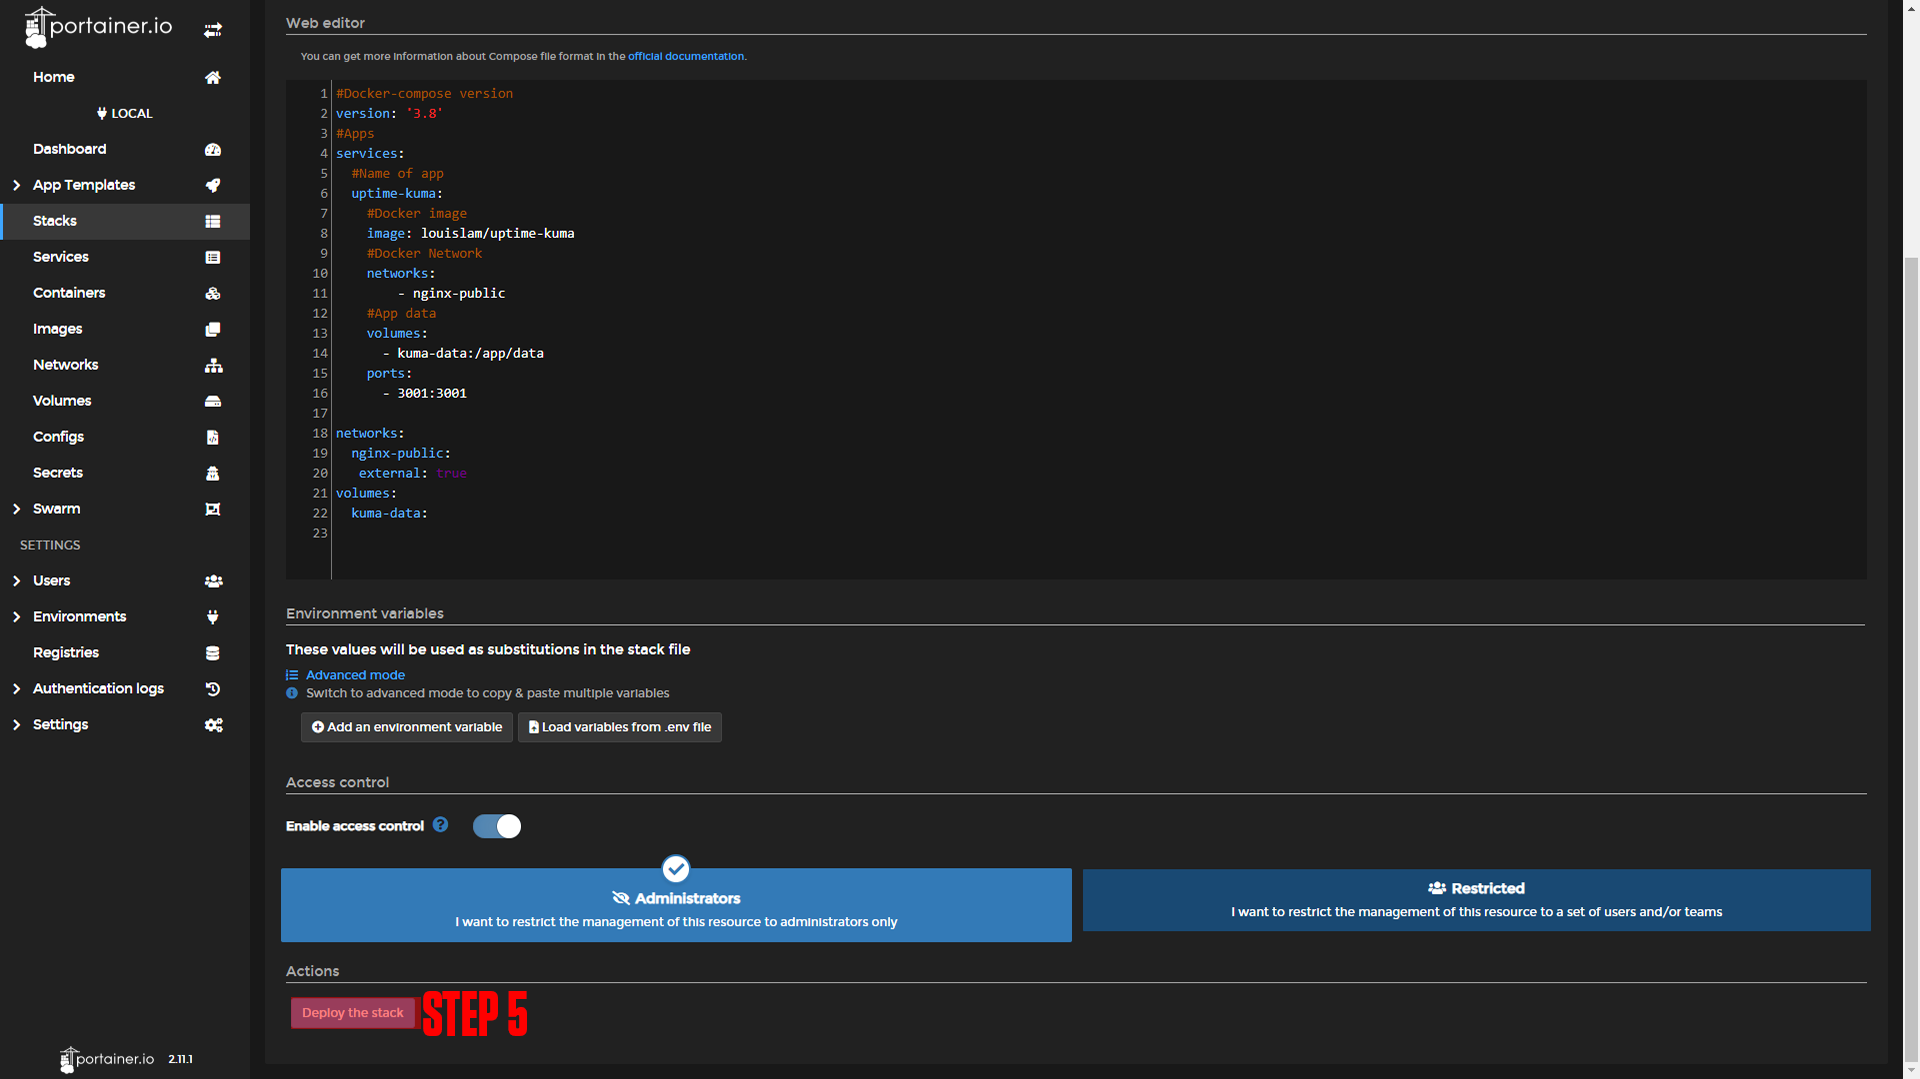
Step 5: Deploy the Stack.
|
|
|
|
#Docker-compose version
version: '3.8'
#Apps
services:
  #Name of app
  uptime-kuma:
    #Docker image
    image: louislam/uptime-kuma
    #Docker Network
    networks:
        - nginx-public
    #App data
    volumes:
      - kuma-data:/app/data
    ports:
      - 3001:3001

networks:
  nginx-public:
   external: true
volumes:
kuma-data:¶ Nginx-Proxy-Manager
Before we configure our apps, we will set up our domain using Nginx-Proxy-Manager. If you followed our Nginx-Proxy-Manager stack setup you should be able to copy everything we do step by step.
¶ Uptime Kuma Domain Setup
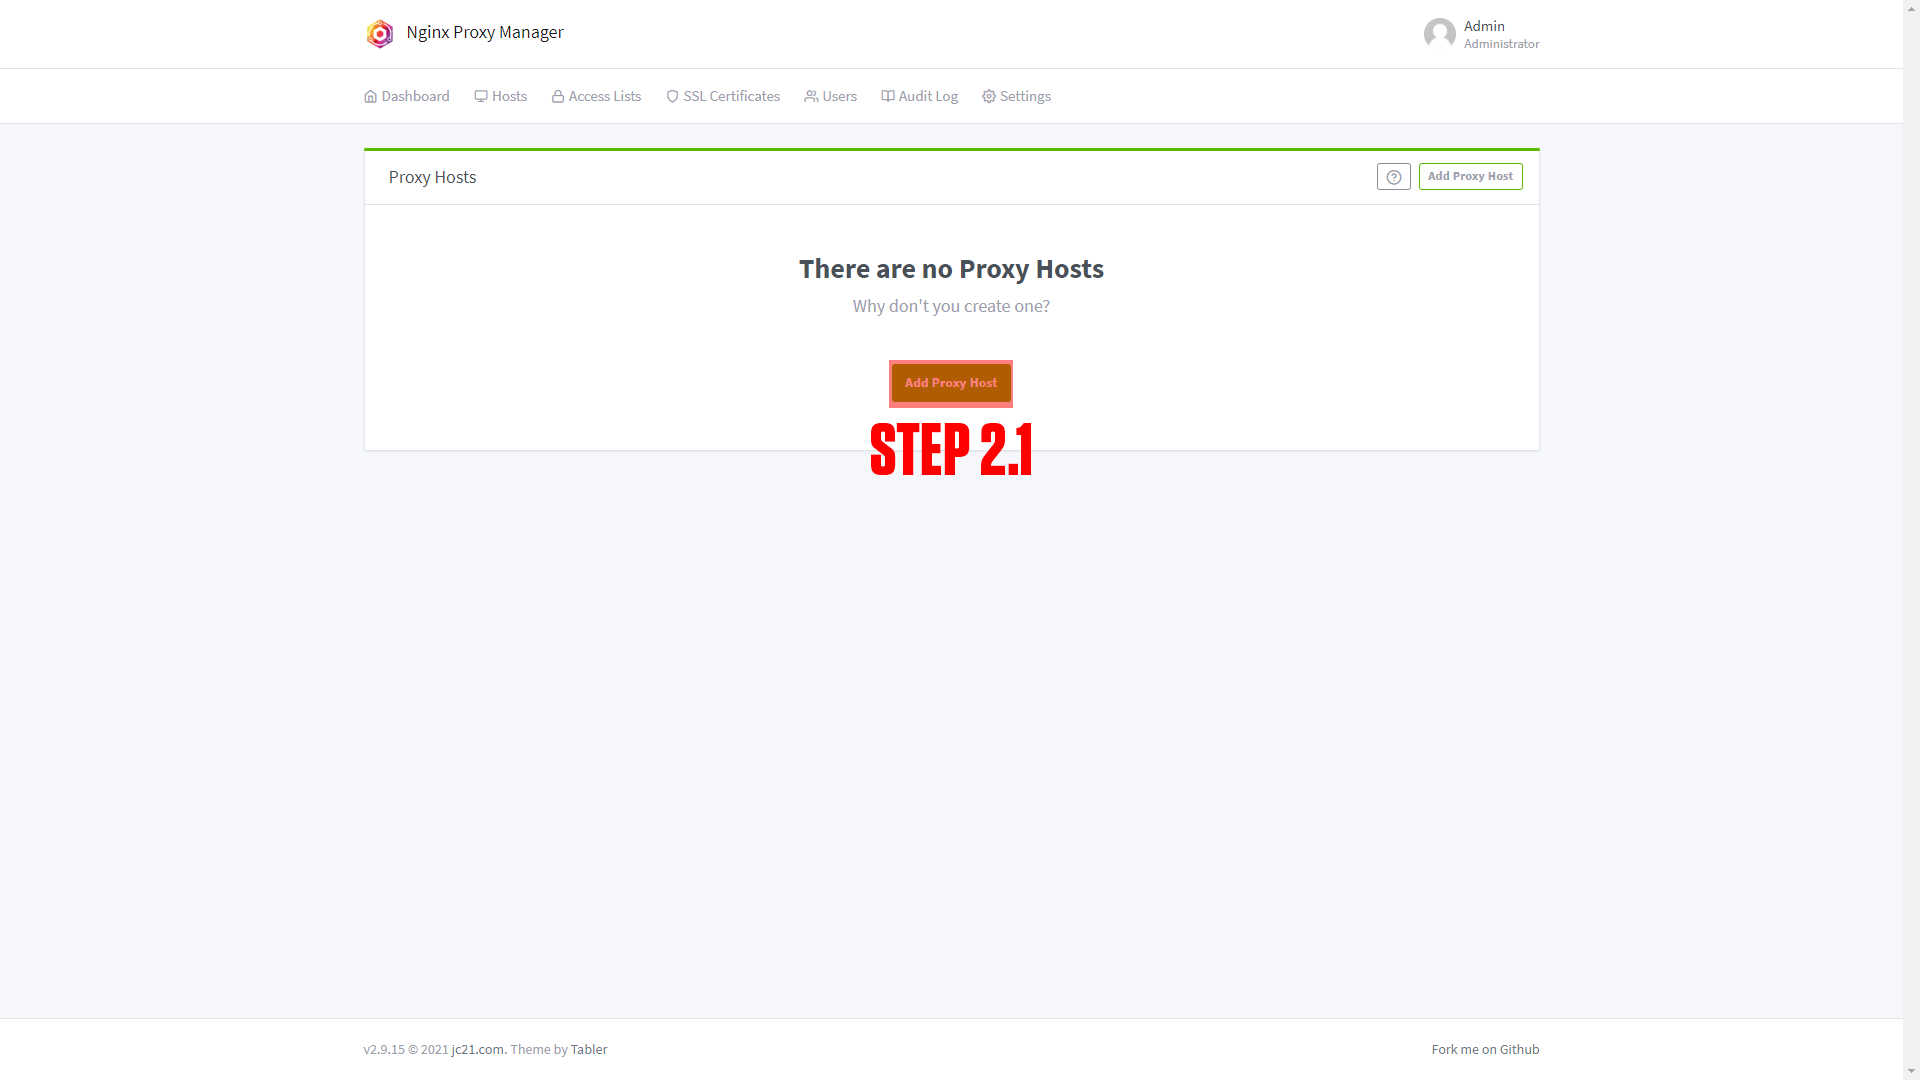
Step 1: Copy the Uptime Kuma service name.
This should be uptime-kuma_uptime-kuma if you did not change the names of apps.
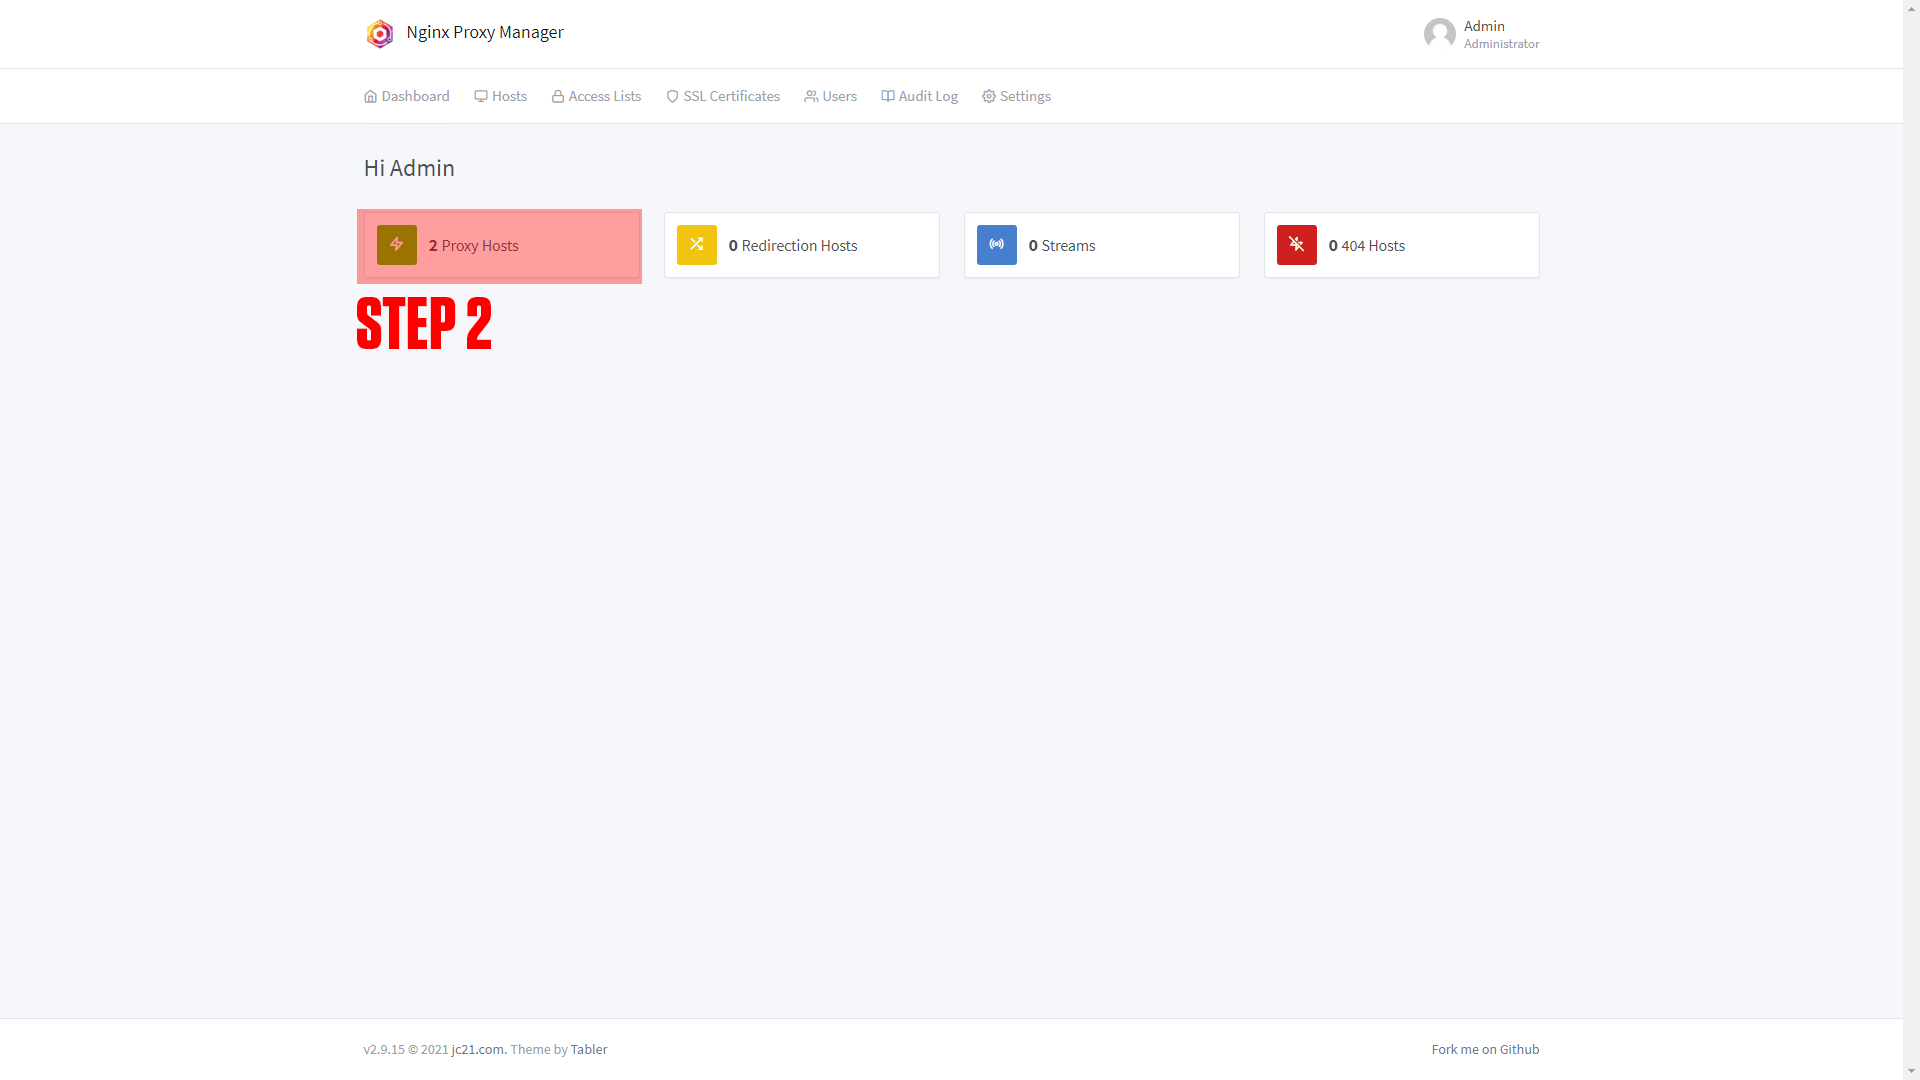
Step 2: Log in to Nginx-Proxy-Manager and create a new proxy host.
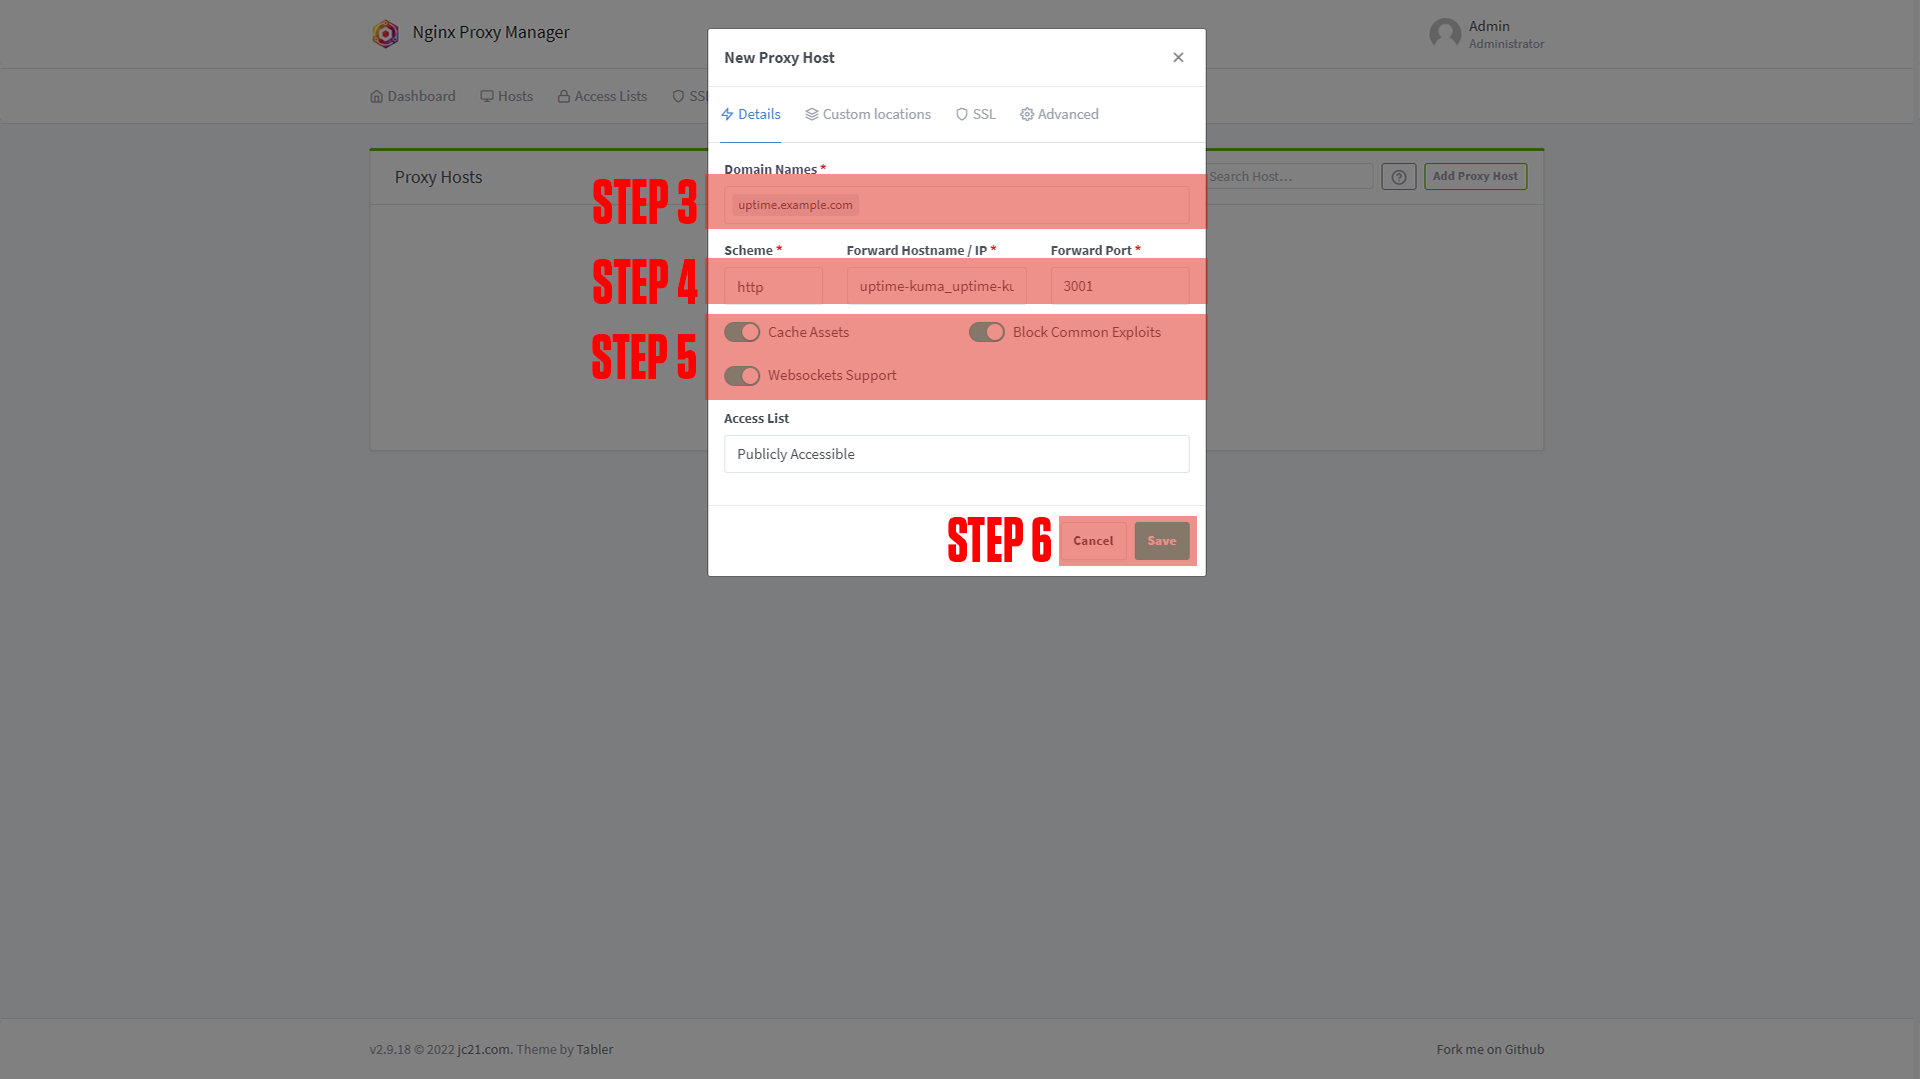
Step 3: Enter your Domain name (Ex. uptime.example.com)
Step 4: Add the service name to the Forward Hostname / IP at port 3001.
Step 5: Enable Cache Assets, Block Common Exploits, and Websockets Support.
Step 6: Click Save.
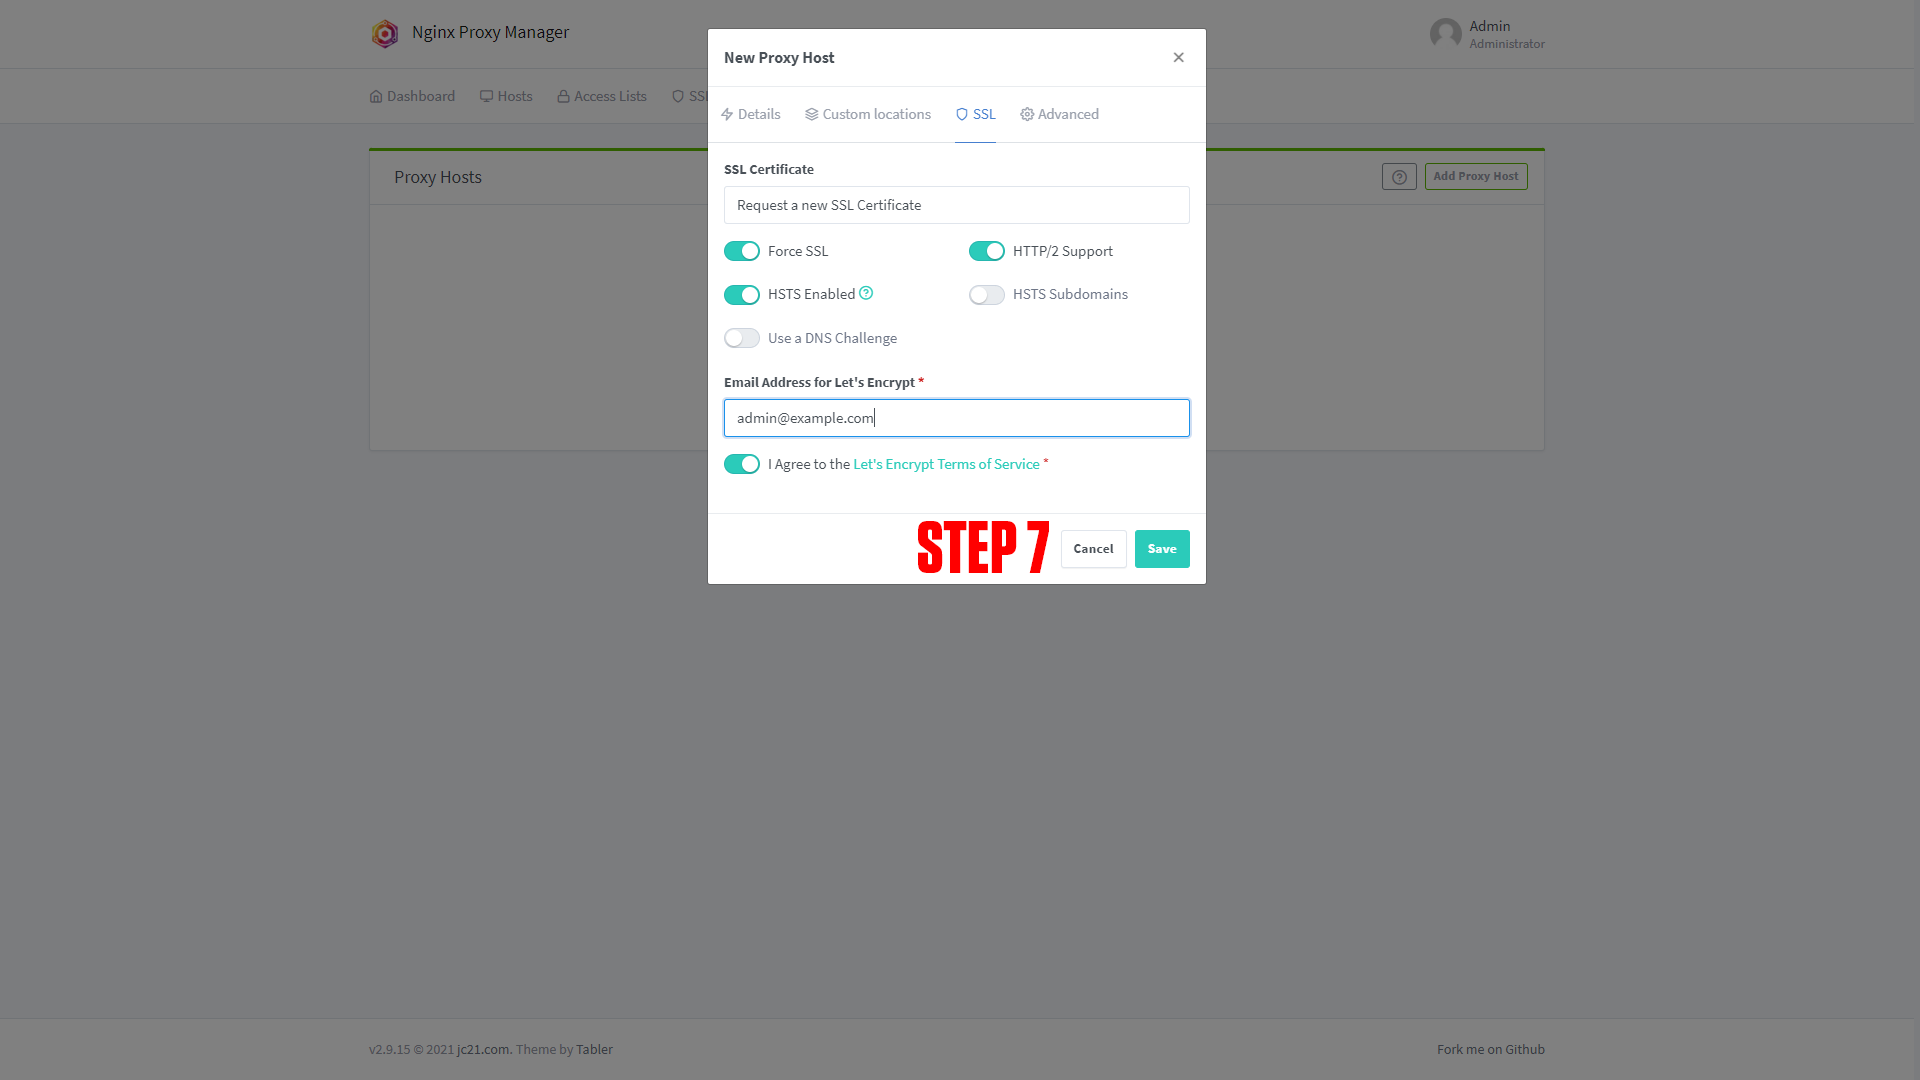
Step 7 (Optional): Enable SSL (we say this is optional, but you should always have an SSL cert if possible).
|
|
|
|
¶ Configuring Uptime Kuma
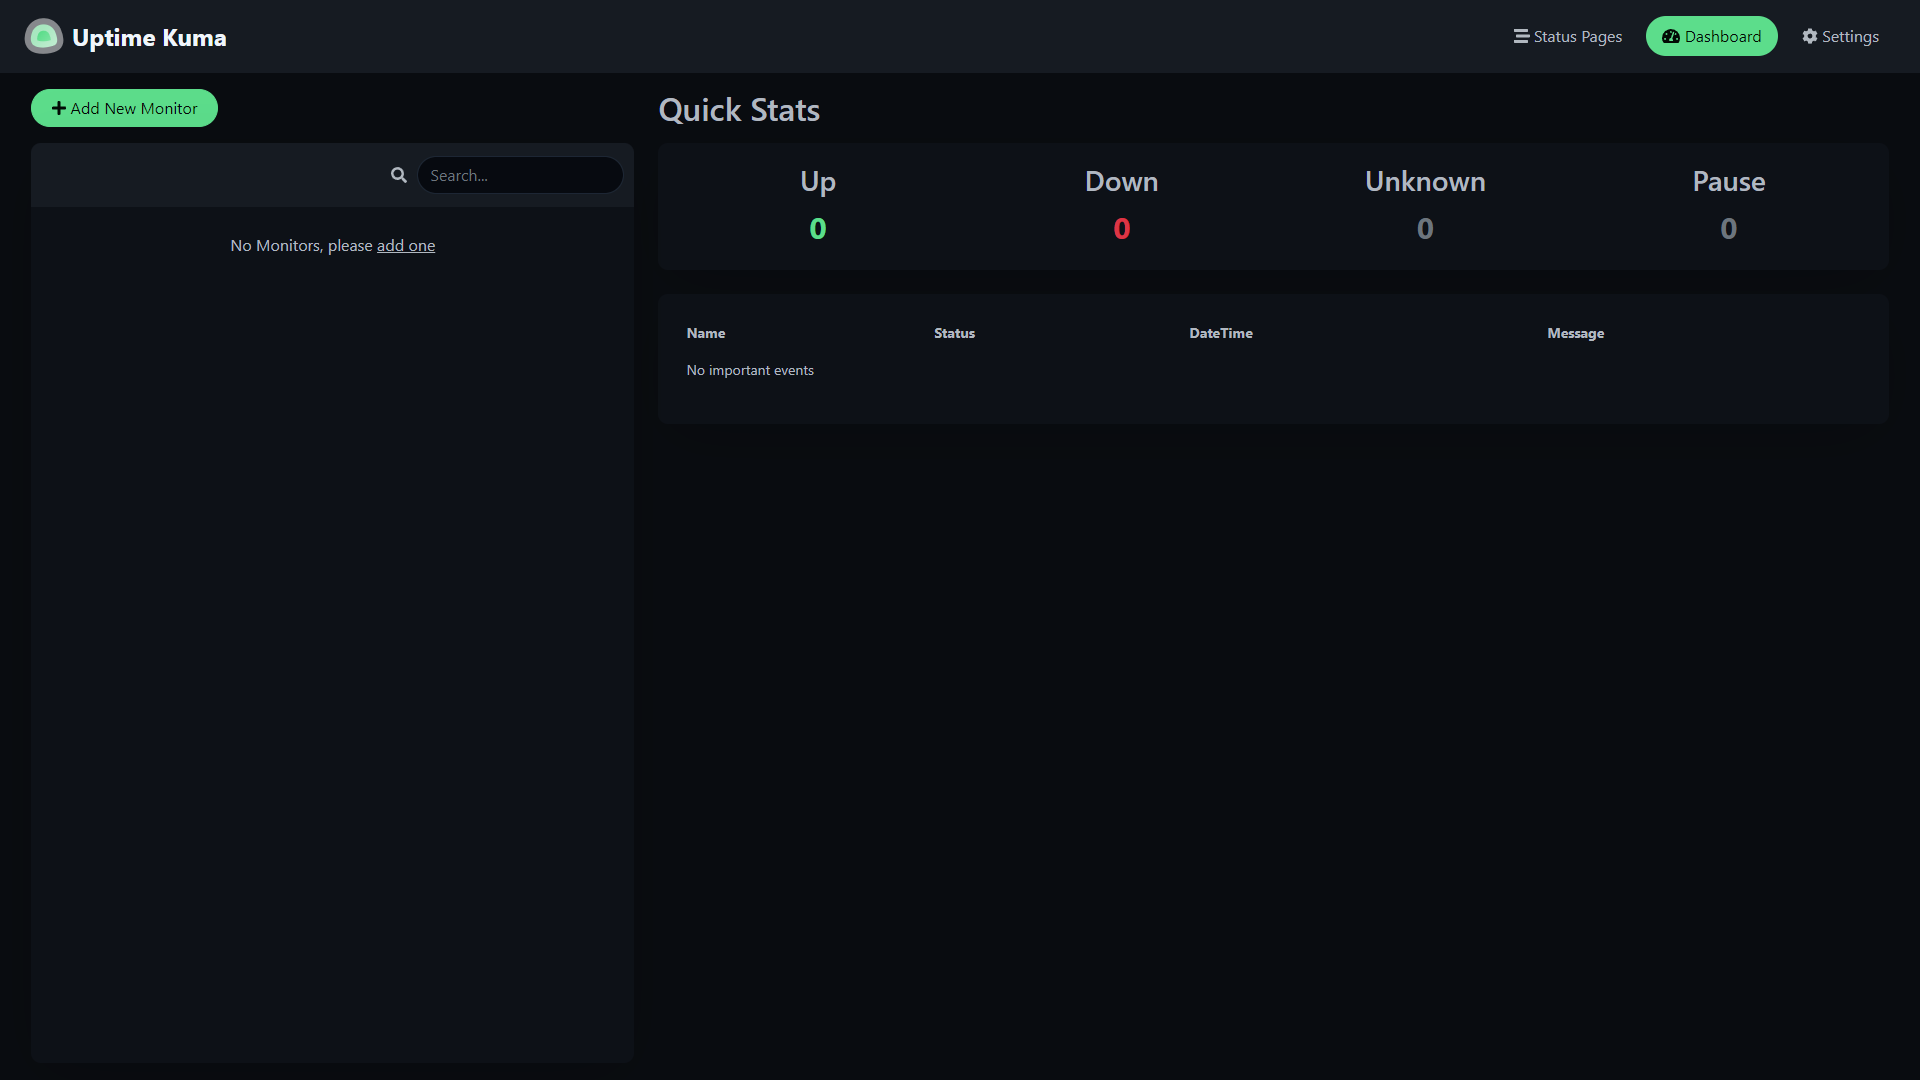
After setting up your domain name it's time to finish configuring the app. Go to the URL you chose for your application. You should arrive at a screen like this!

|
|
(If you do not arrive at a screen like this then something is wrong! Our premium members can open a support ticket Here!)
Step 1: Enter username.
Step 2: Enter password.
Step 3: Click Create.
¶ Conclusion
Congrats! This is the basic setup for Uptime Kuma, as mentioned at the beginning we have a more in-depth course available at TrueFreedomTech.com.