¶ Visual Studio Code (VS Code): Coding platform
Visual Studio Code is a code editor built on open-source that has a lot of functionality like extensions that allow VS Code to understand and provide help for code languages, develop and deploy web servers, build docker images, deploy docker-compose stacks, and tons more! You can learn more about VS Code, and the code container we are using below:
- linuxserver.io
- Linuxserver/docker-code-server on GitHub
- Linuxserver/code-server on Docker Hub
- Code.VisualStudio.com
- Code.VisualStudio.com | Developing inside a Container
¶ Introduction
Every Docker image we have built was tested in a localhost dev environment using Visual Studio Code (Not inside a container) before being added to our CI/CD using Git. We love using Visual Studio Code, especially on windows because it makes it feel more like Linux!
While running Visual Studio Code in a container it is possible to make it work with docker and have the ability to run commands inside the app. Multiple people can connect to the VS Code server by accessing the URL and signing in. changes to files will reflect on save to other users. We have tested this by installing docker and running docker build commands inside VS Code from different “users” (all using the same password). Keep in mind this is a security risk if you were to do something like install docker and allow it access outside the container.
Another example is you could install nodejs & npm and build a website inside this container.
You could build a Dockerfile that installs the packages you need, copy files over using RUN git clone or RUN wget or COPY, and all kinds of other things. We are telling you this to provide a use case of running VS Code in a container.
While testing docker and nodejs and npm inside this container it became pretty clear how useful this could be. Technically you can do all of this with VS Code installed locally, but with docker, you could build images used for certain tasks like the ones listed above, work on them from a web server on any computer, and bind mount this container to other containers to edit their files with the power of VS Code. We will cover some of these things in our advanced course on running VS Code Here!
¶ Overview
We are going to assume you already have a working server with Docker, Portainer, and Nginx Proxy Manager running. We will go over the compose for the stack and configuring Nginx-Proxy-Manager. We are not using our own images for this stack so please consult the Docker hub and GitHub links for more information regarding the Docker image and source code.
This is strictly how to get the app running. Once again, we cover how to do this at TrueFreedomTech.com in much more detail! This should be good enough to get beginners running, and experts should be able to adapt this to their own configuration with relative ease.
¶ Docker-Compose
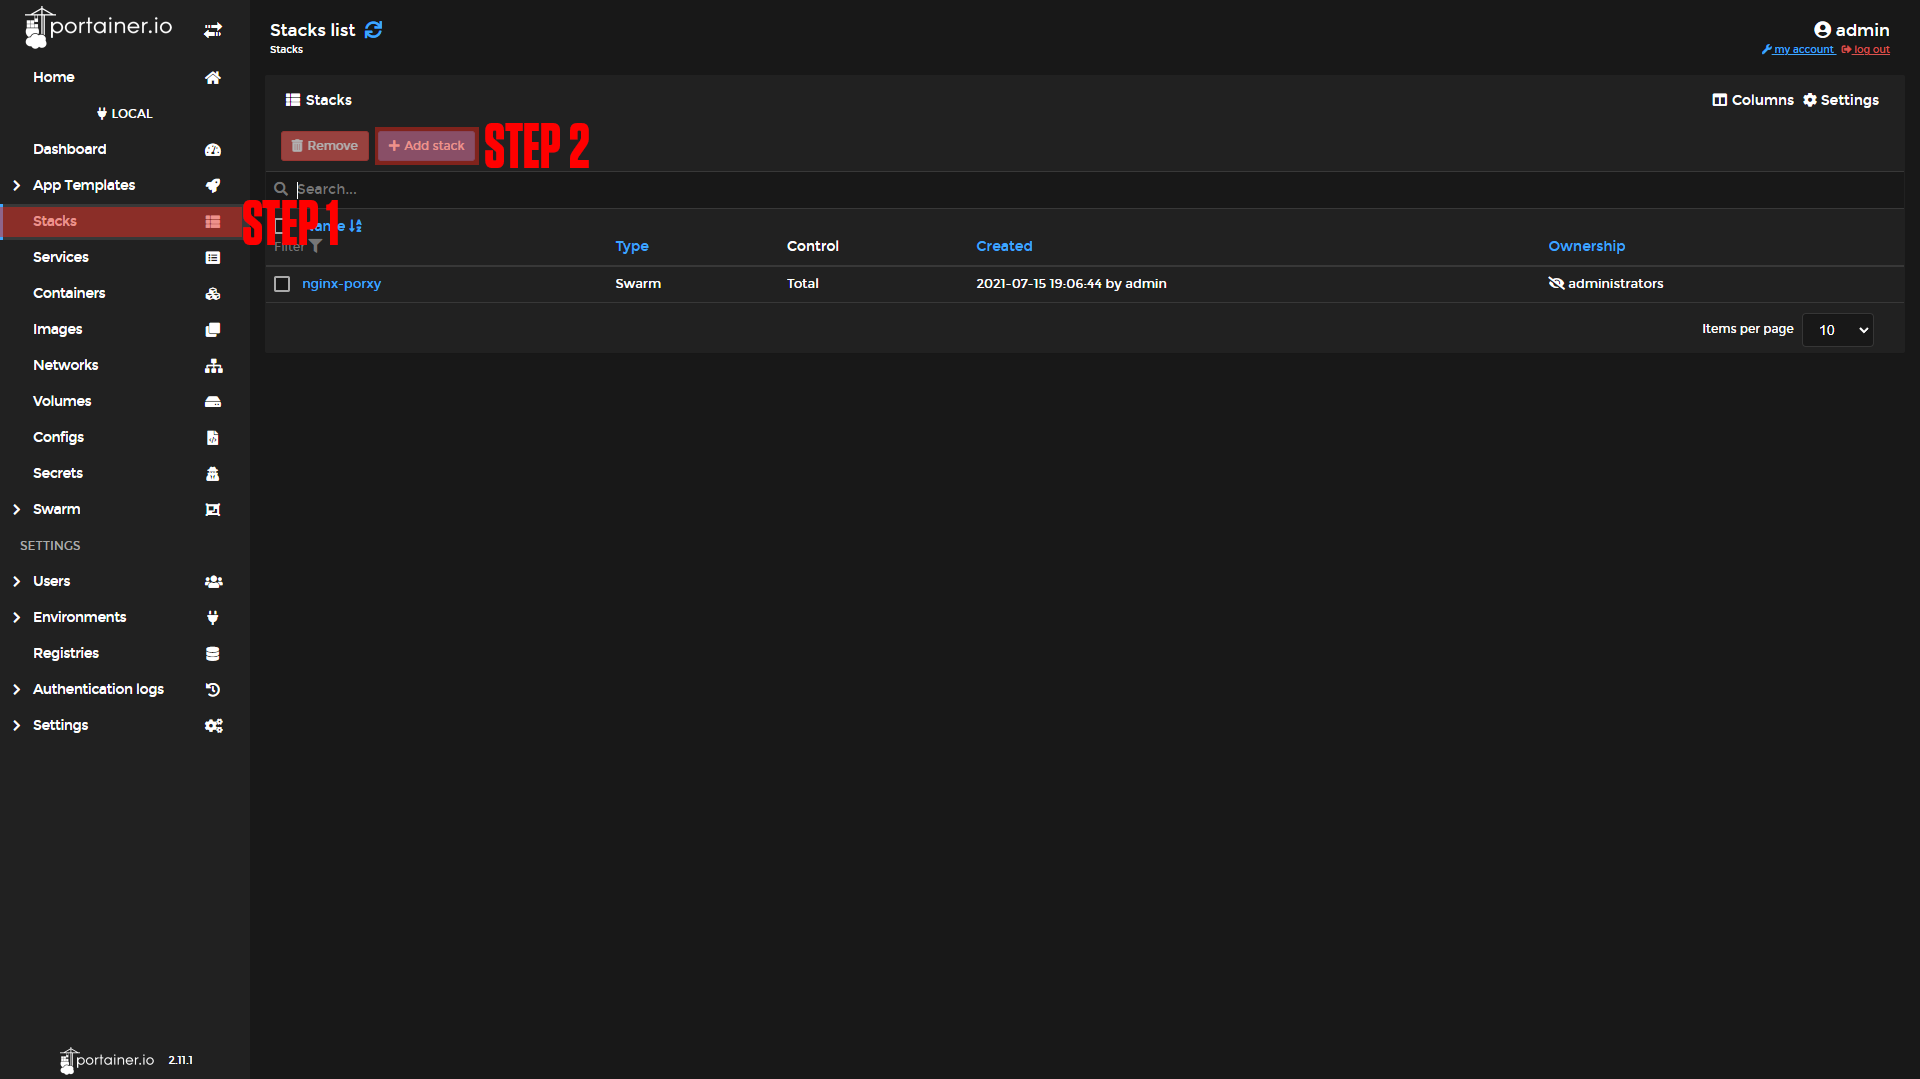
Step 1: Go to Stacks.
Step 2: Click Add Stack.
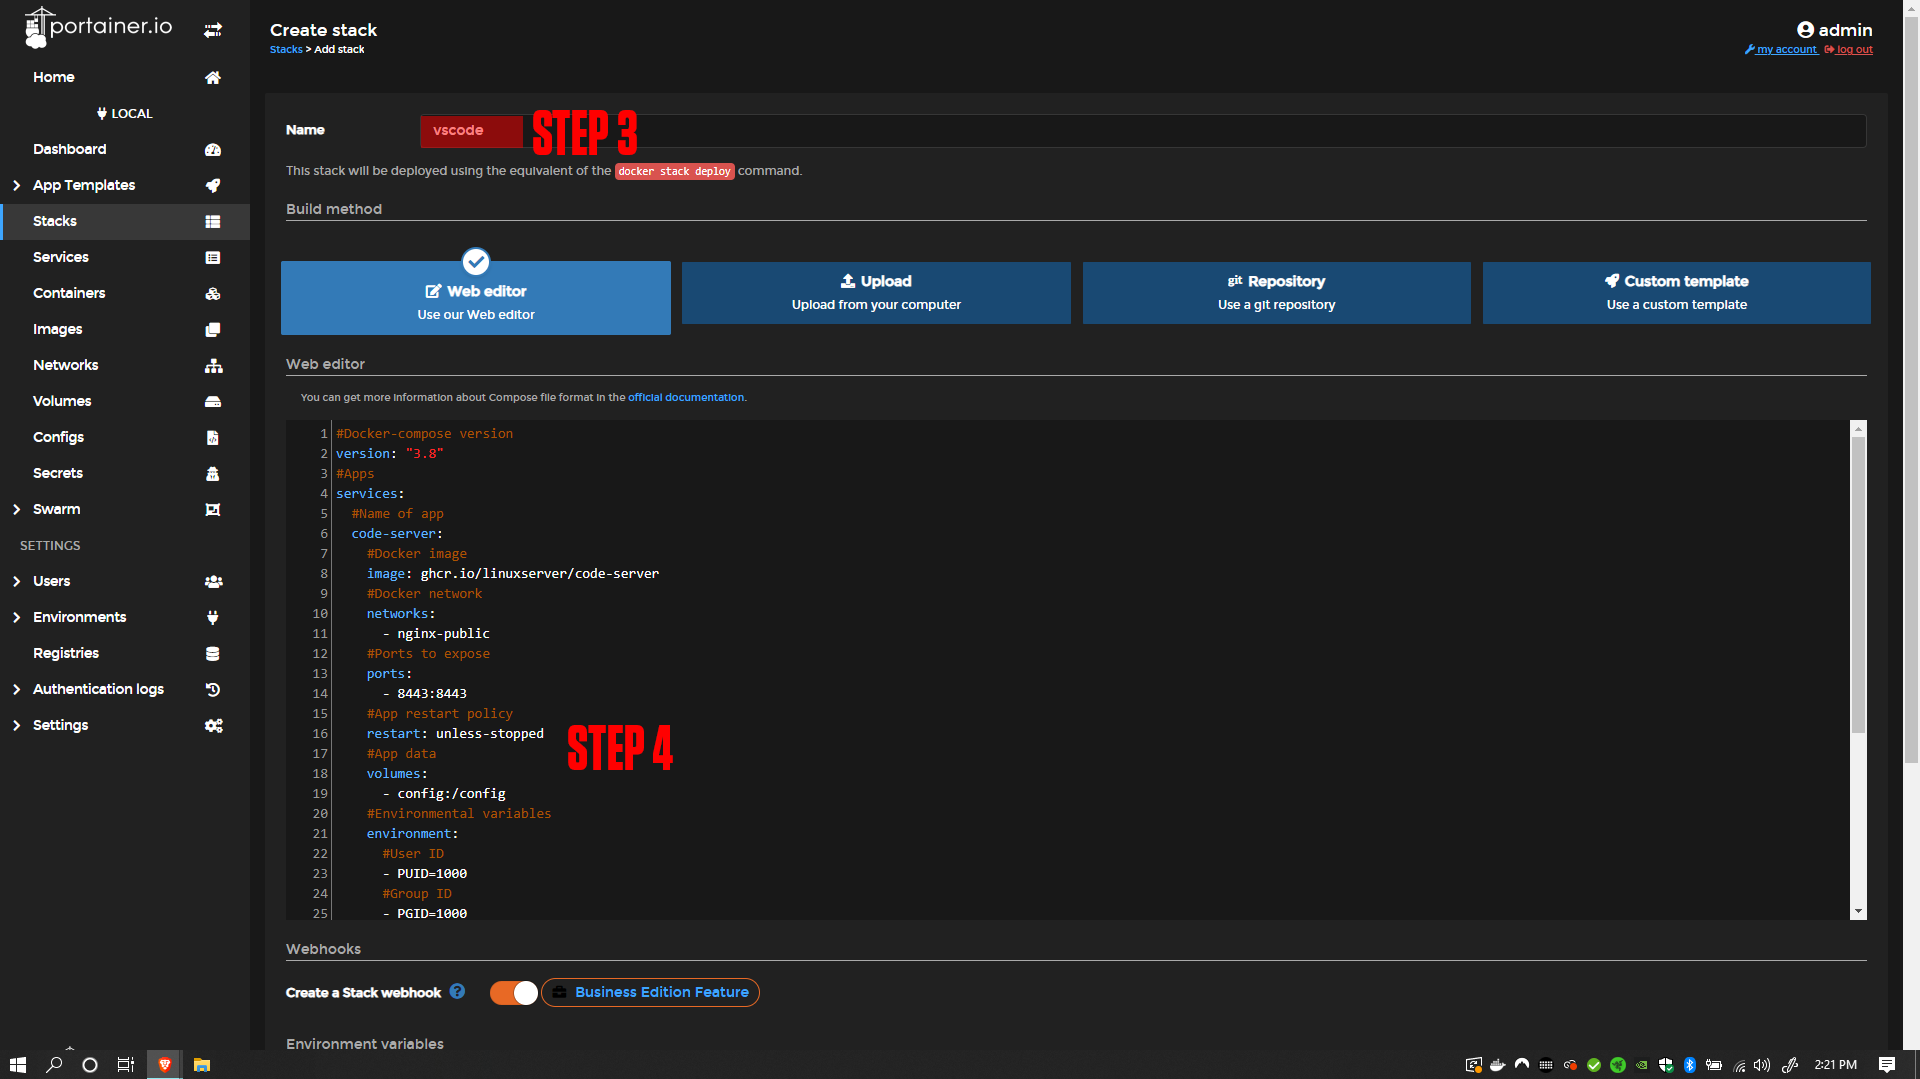
Step 3: Name your stack (Ex. vscode).
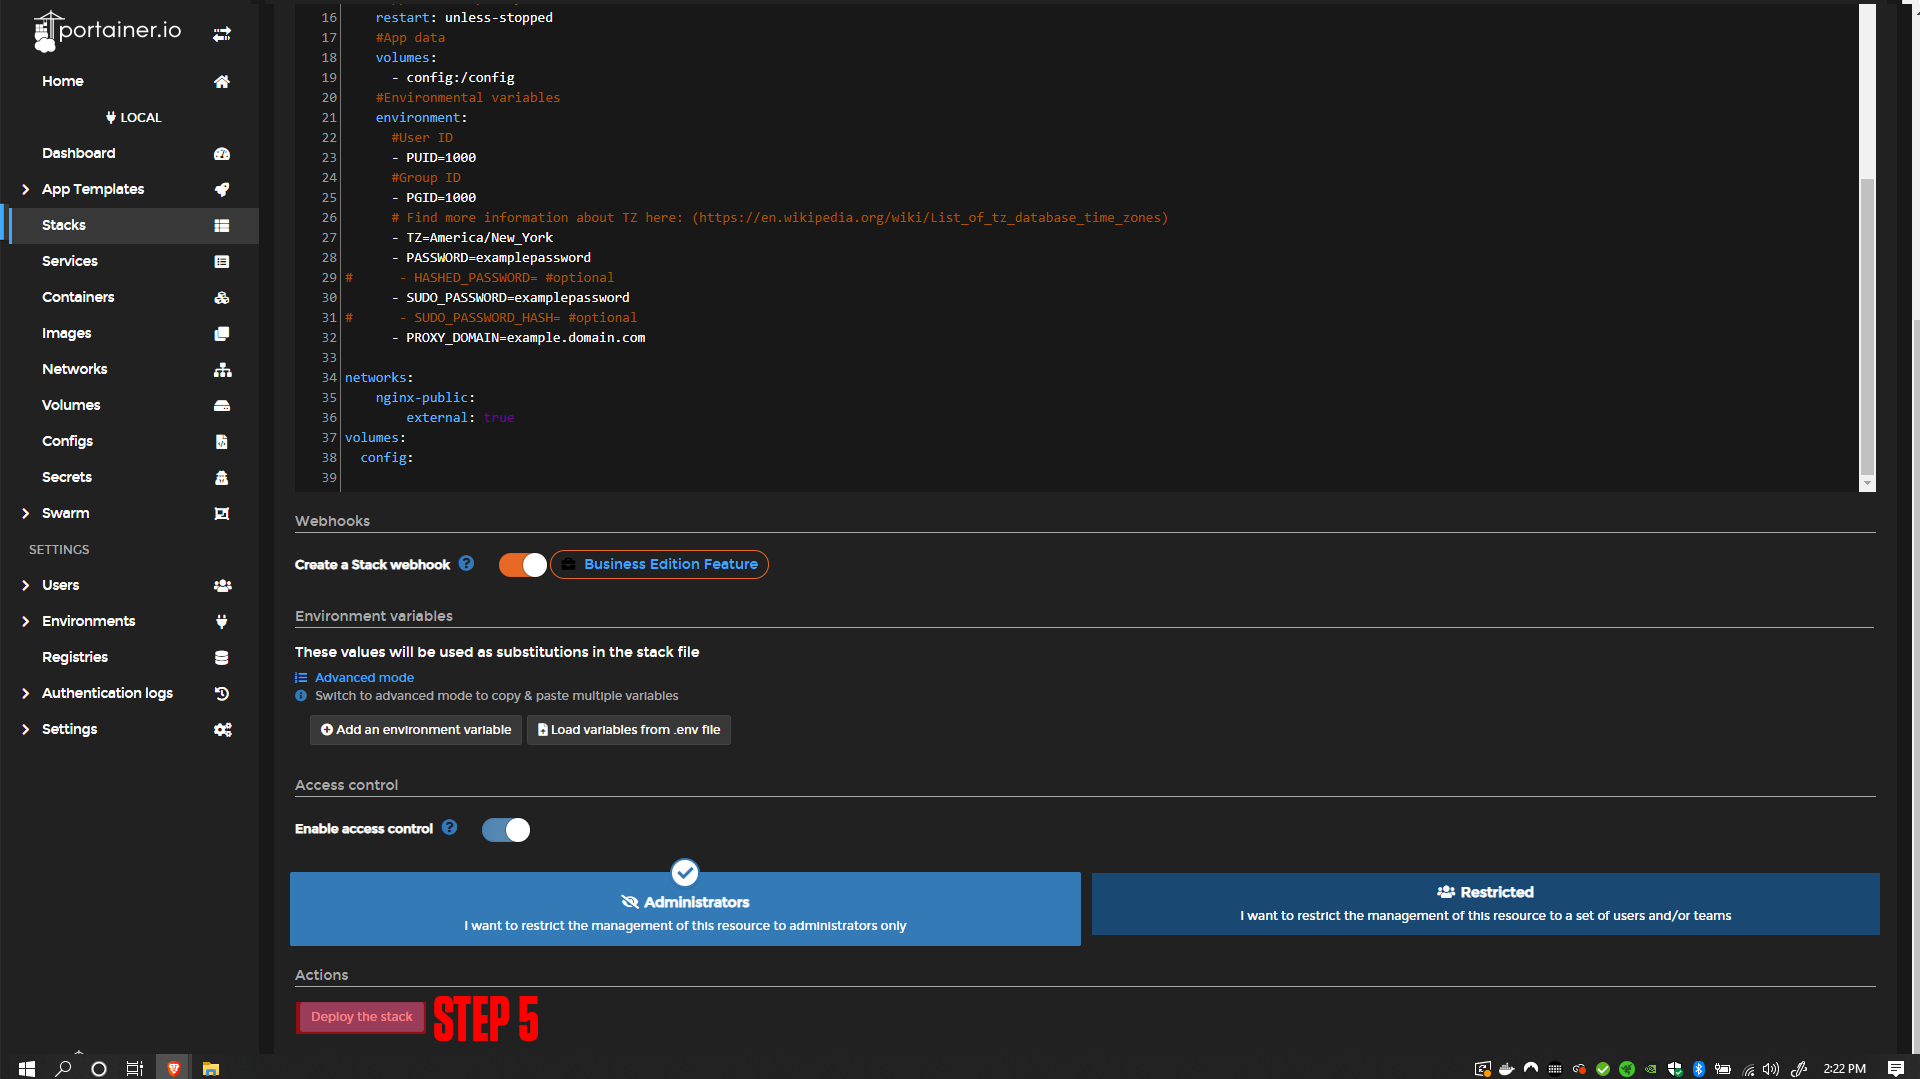
Step 4: Paste in the contents below:
Step 5: Press Deploy the Stack.
|
|
|
#Docker-compose version
version: "3.8"
#Apps
services:
  #Name of app
  code-server:
    #Docker image
    image: ghcr.io/linuxserver/code-server
    #Docker network
    networks:
      - nginx-public
    #Ports to expose
    ports:
      - 8443:8443
    #App restart policy
    restart: unless-stopped
    #App data
    volumes:
      - config:/config
    #Environmental variables
    environment:
      #User ID
      - PUID=1000
      #Group ID
      - PGID=1000
      # Find more information about TZ here: (https://en.wikipedia.org/wiki/List_of_tz_database_time_zones)
      - TZ=America/New_York
      - PASSWORD=examplepassword
#      - HASHED_PASSWORD= #optional
      - SUDO_PASSWORD=examplepassword
#      - SUDO_PASSWORD_HASH= #optional
      - PROXY_DOMAIN=example.domain.com

networks:
    nginx-public:
        external: true
volumes:
config:¶ Nginx-Proxy-Manager
Before we configure our apps, we will set up our domains using Nginx-Proxy-Manager. If you followed our Nginx-Proxy-Manager stack setup you should be able to copy everything we do step by step.
¶ Visual Studio Code Domain Setup
Step 1: Copy the Heimdall service name.
This should be vscode_code-server if you did not change the names of apps.
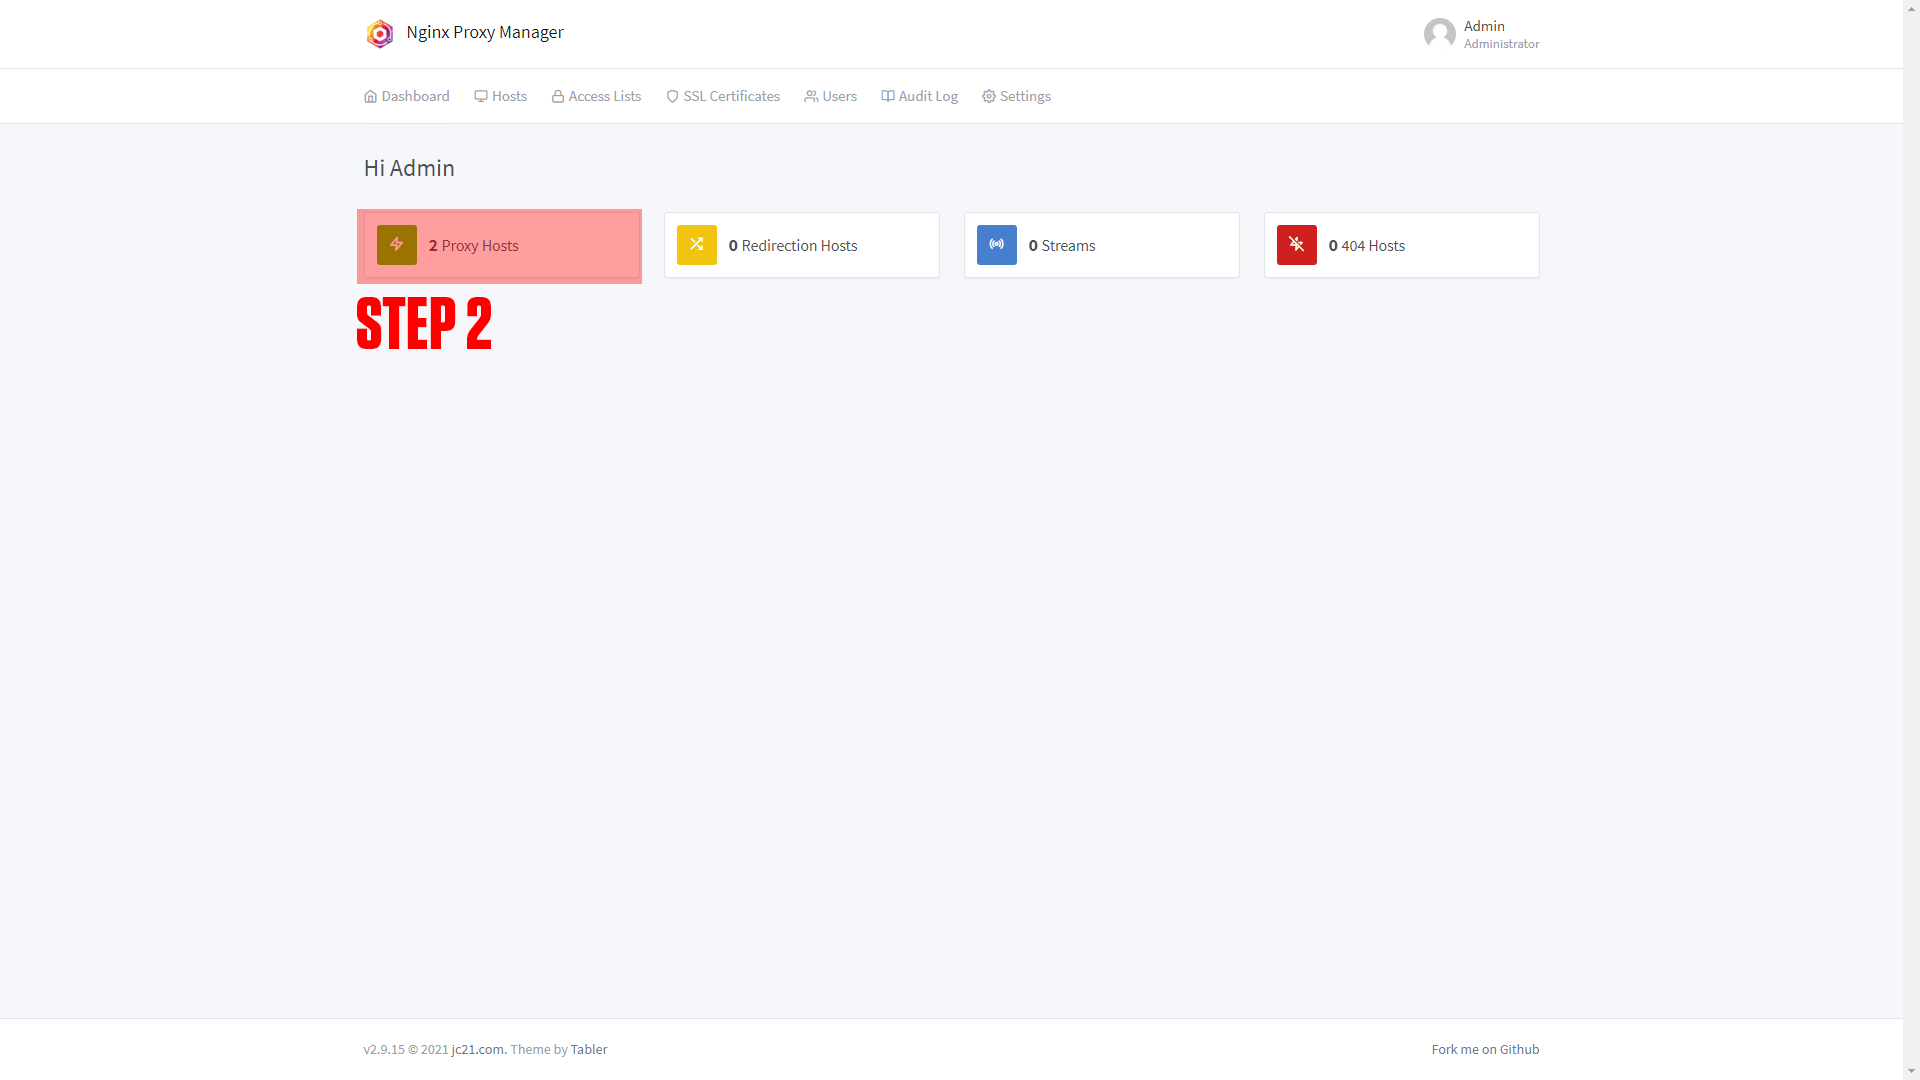
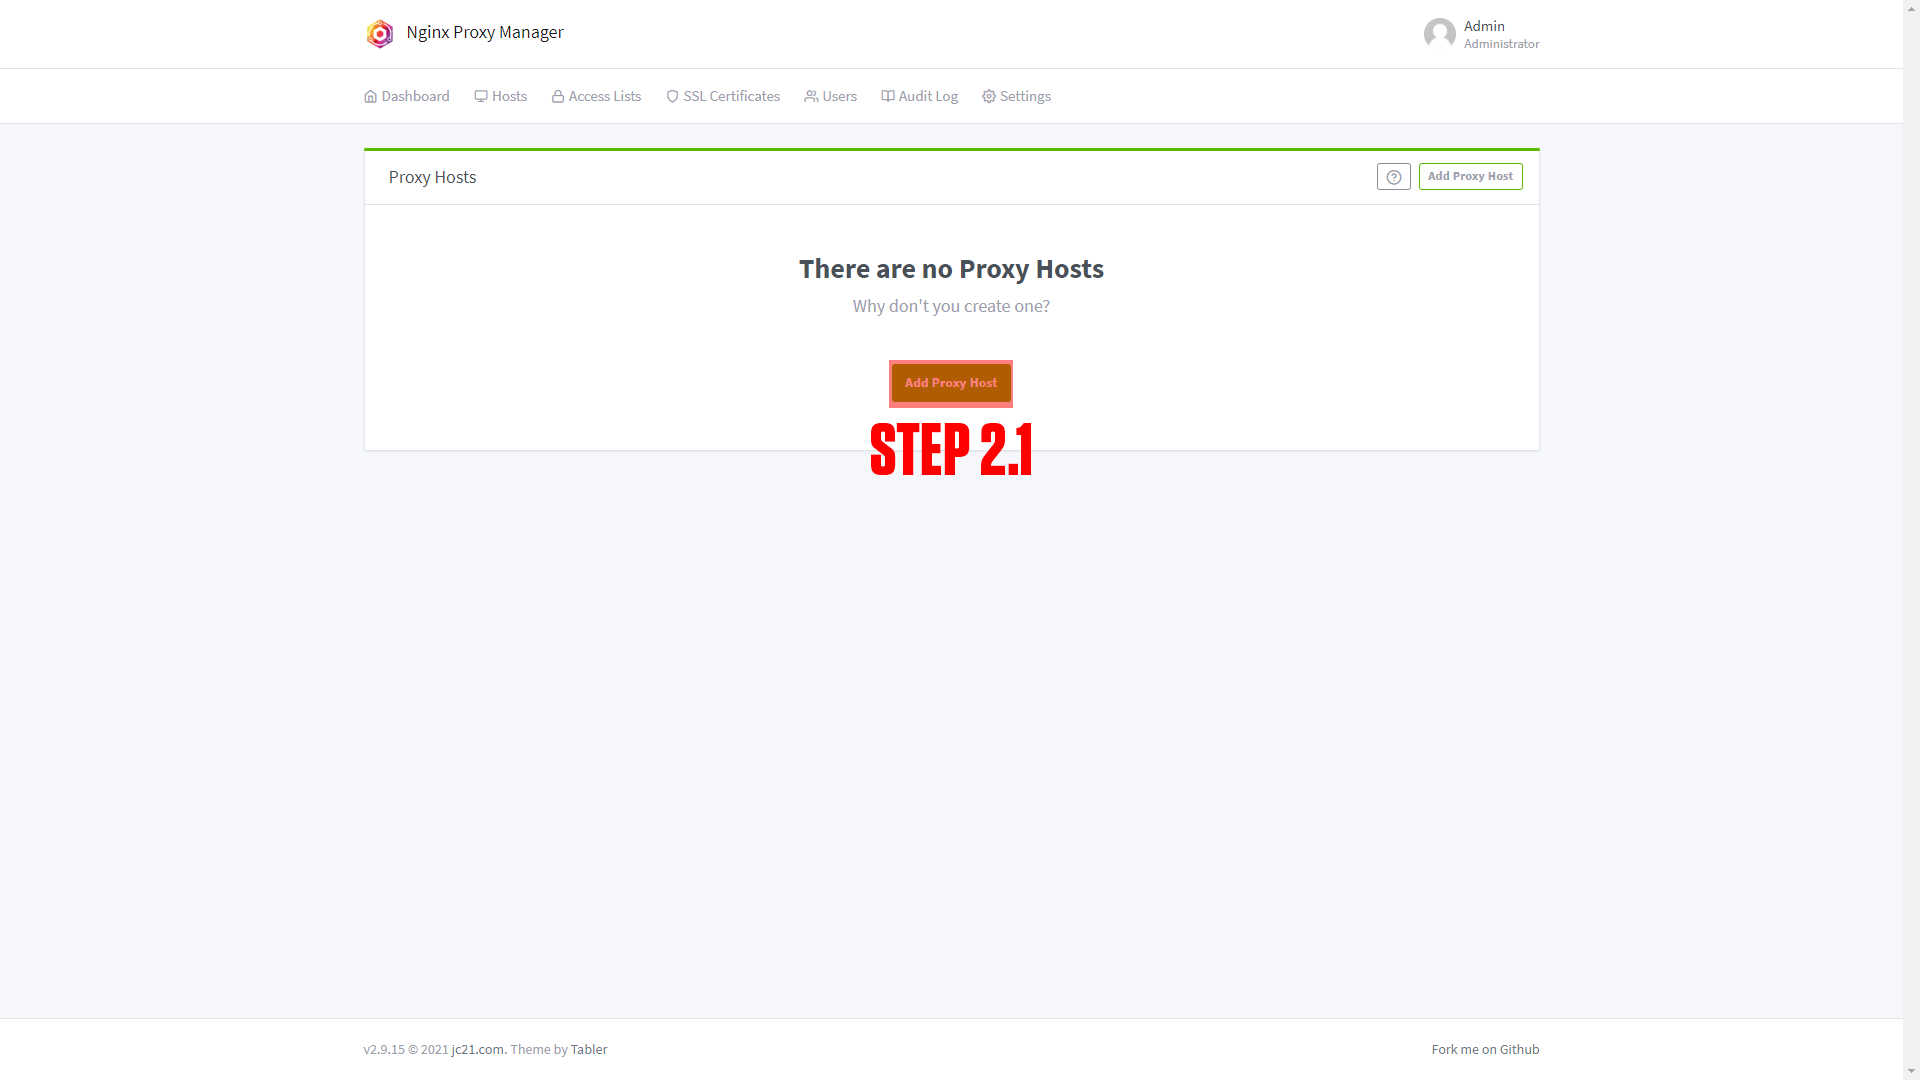
Step 2: Log in to Nginx-Proxy-Manager and create a new proxy host.
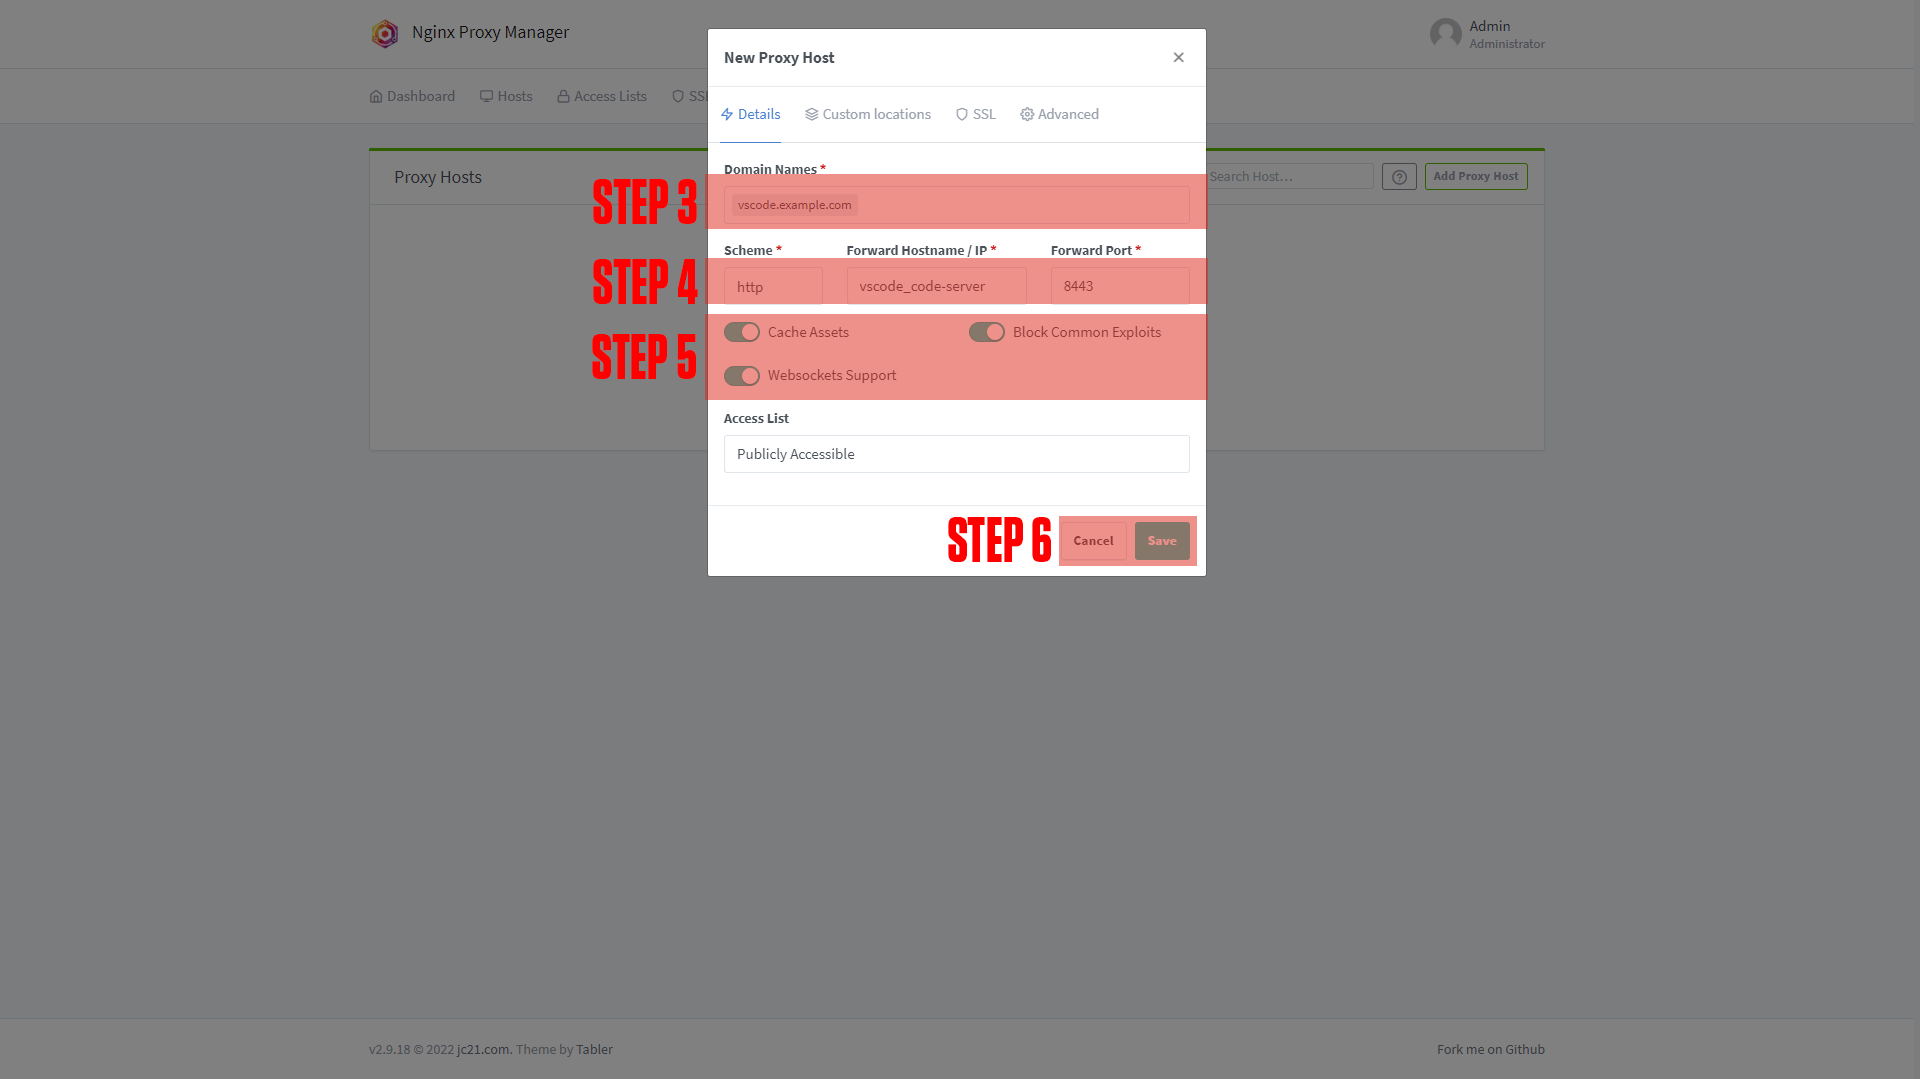
Step 3: Enter your Domain name (Ex. vscode.example.com)
Step 4: Add the service name to the Forward Hostname / IP at port 8443.
Step 5: Enable Cache Assets, Block Common Exploits, and Websockets Support.
Step 6: Click Save.
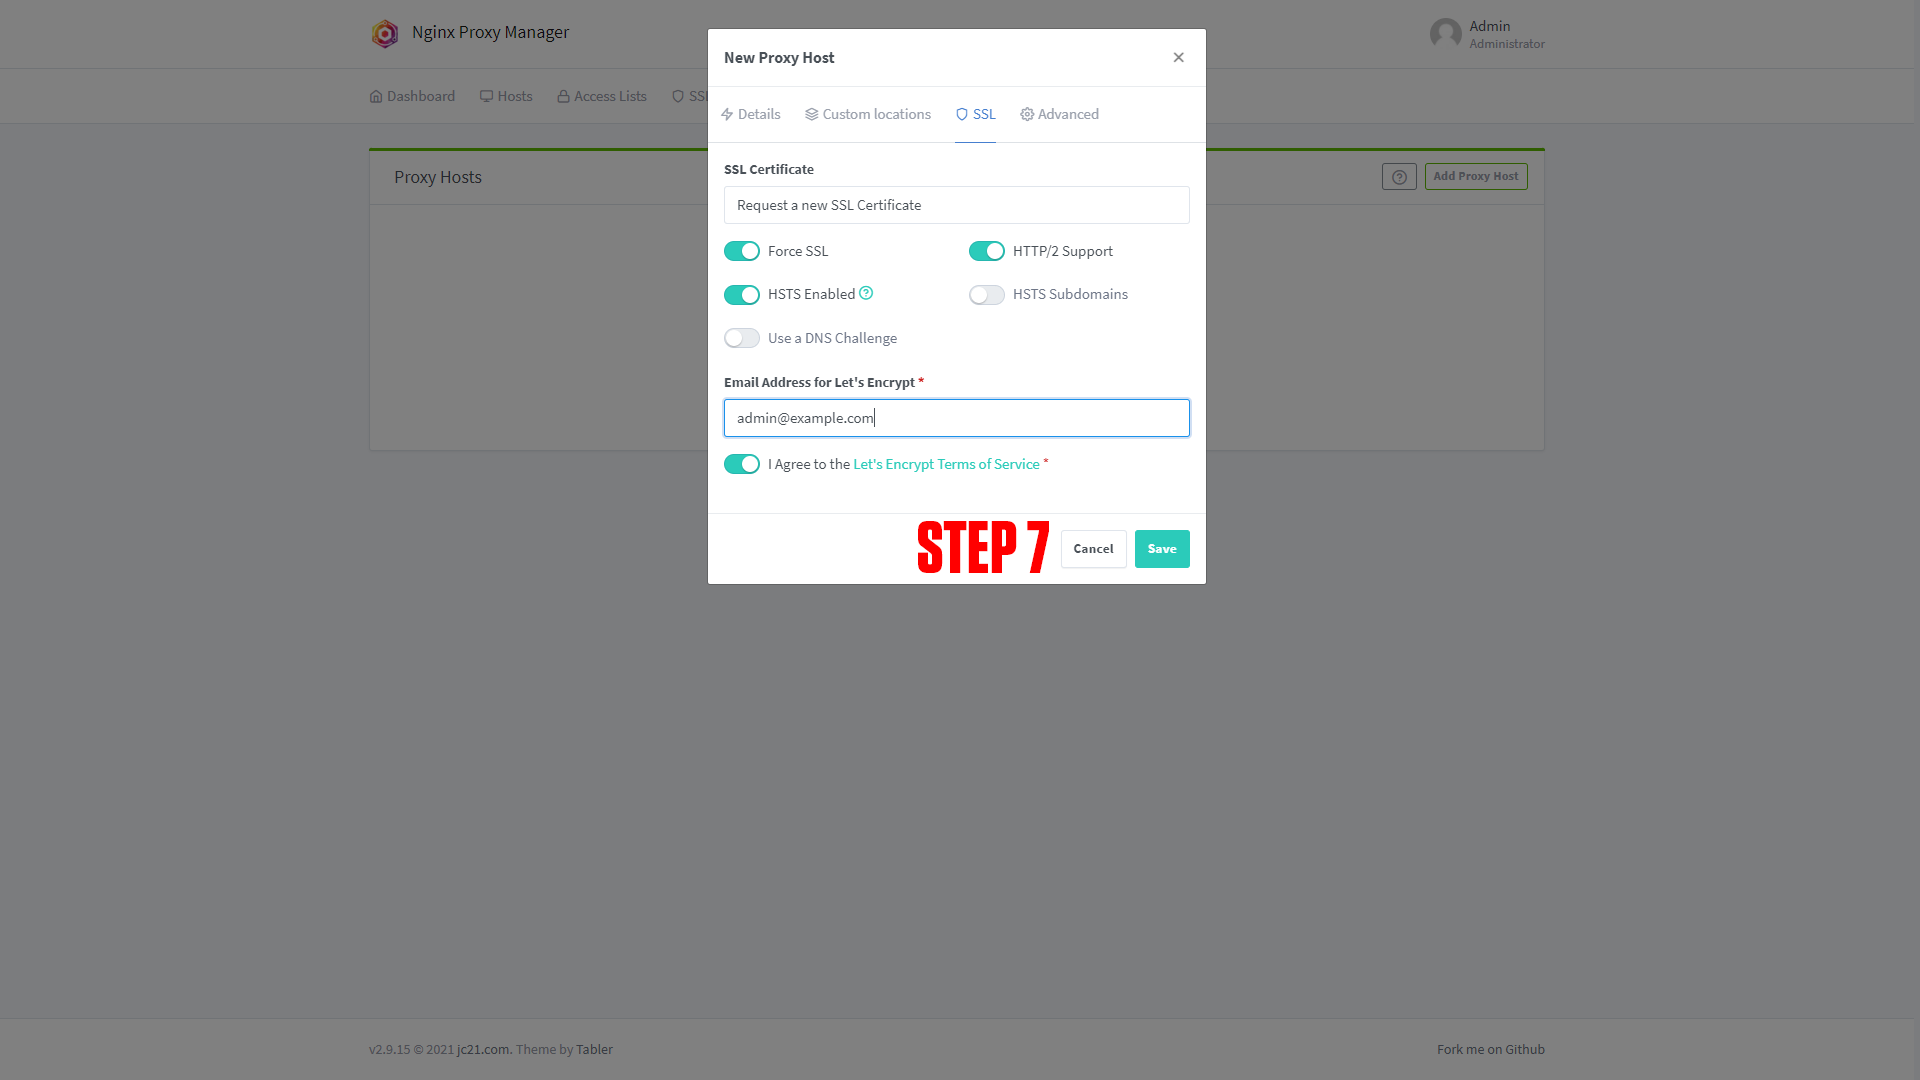
Step 7 (Optional): Enable SSL (we say this is optional, but you should always have an SSL cert if possible).
|
|
|
|
¶ Configuring Visual Studio Code
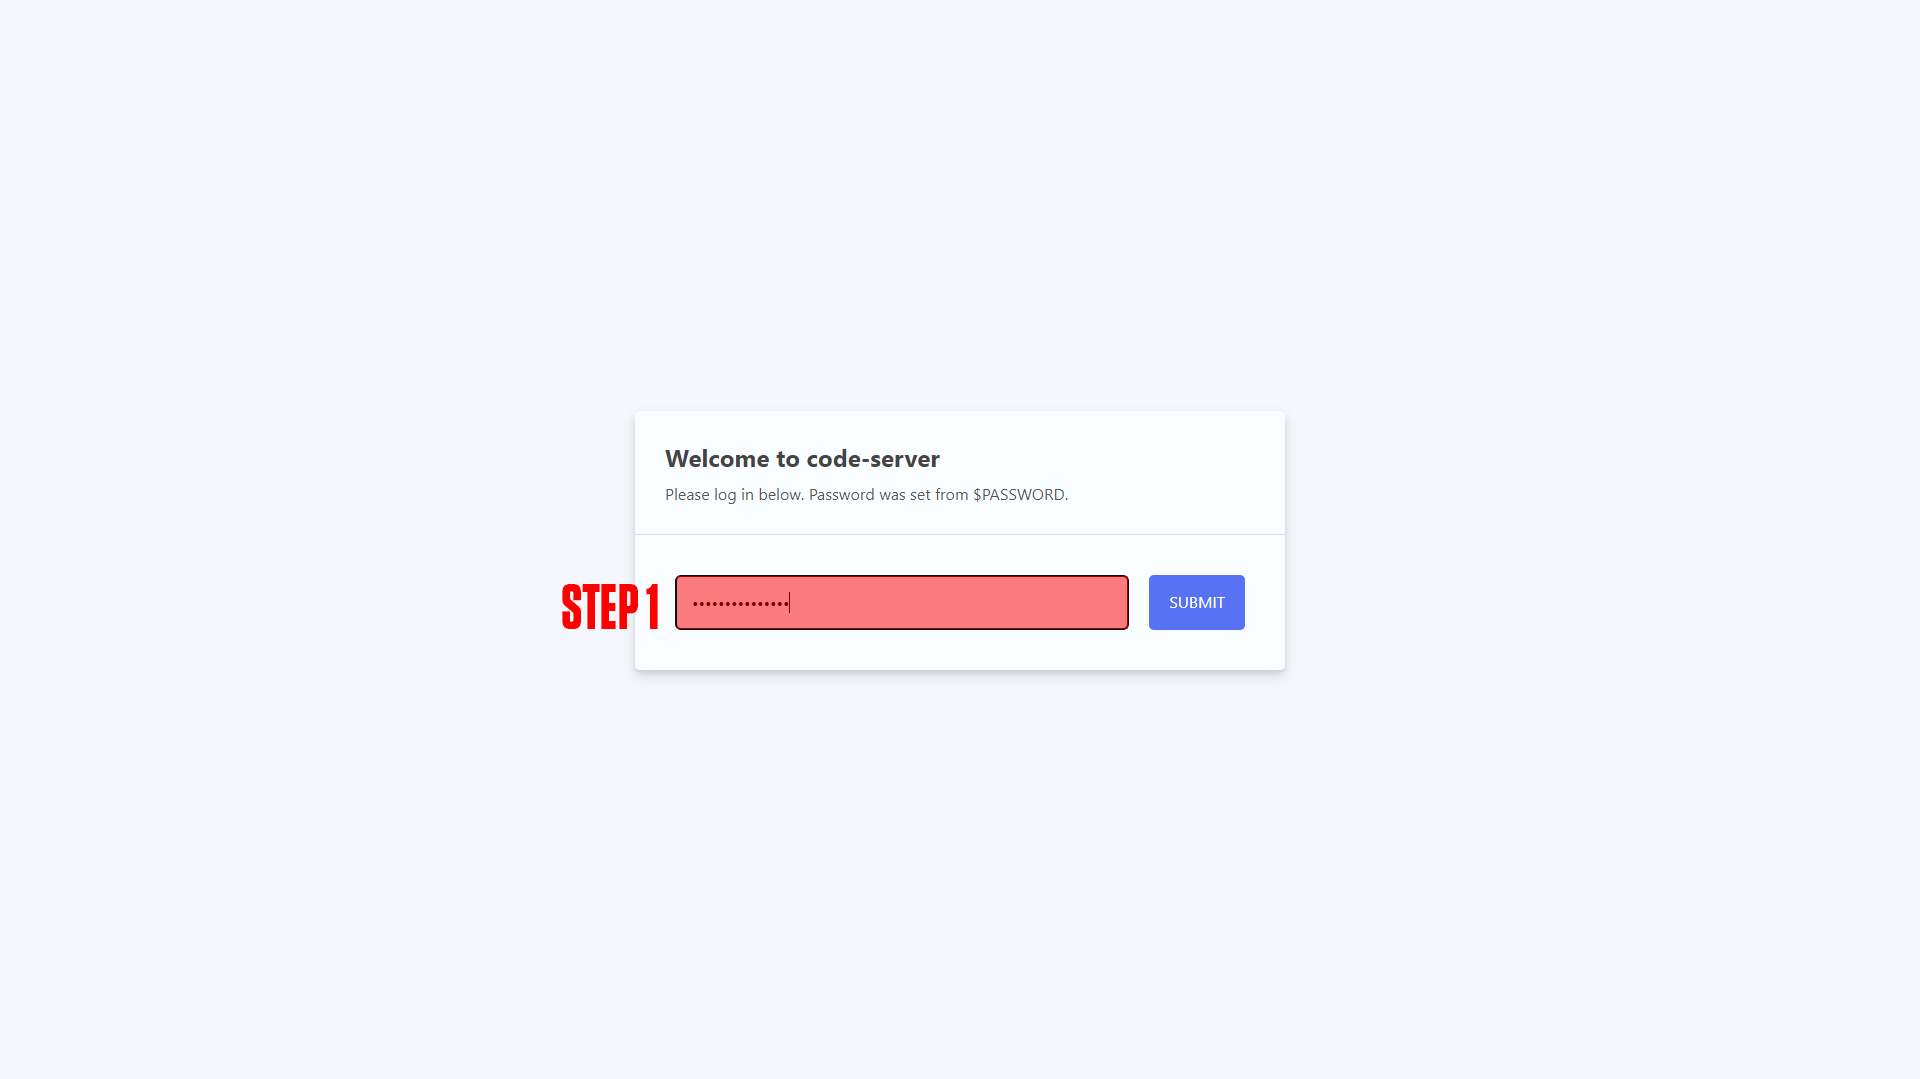
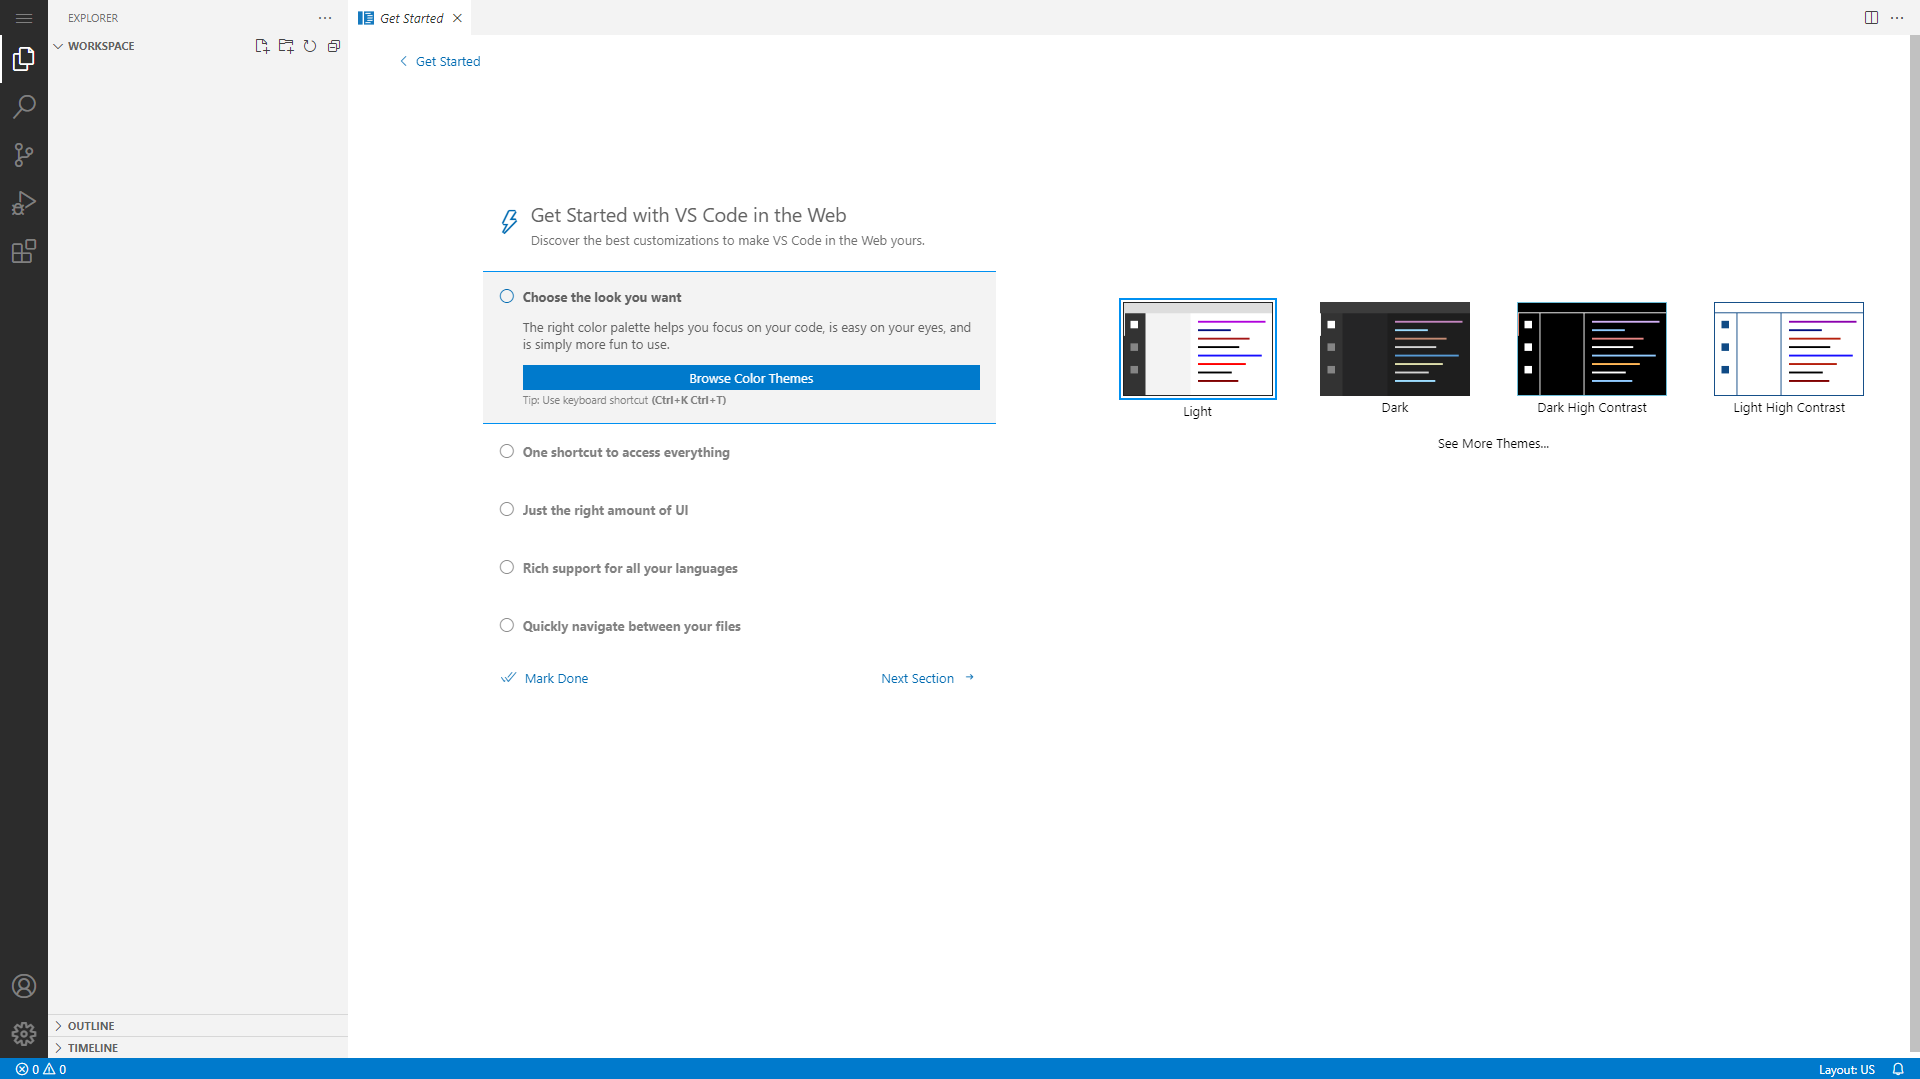
After setting up your domain name it's time to finish configuring the app. Go to the URL you chose for your application. You should arrive at a screen like this!
|
|
(If you do not arrive at a screen like this, something is wrong! Our premium members can open a support ticket Here!)
Step 1: Enter the password set in the Docker-Compose.
After logining in you will arrive at the dashboard shown above.
¶ Conclusion
Congrats! This is the basic setup for VS Code, as mentioned at the beginning we have a more in-depth course available at TrueFreedomTech.com.